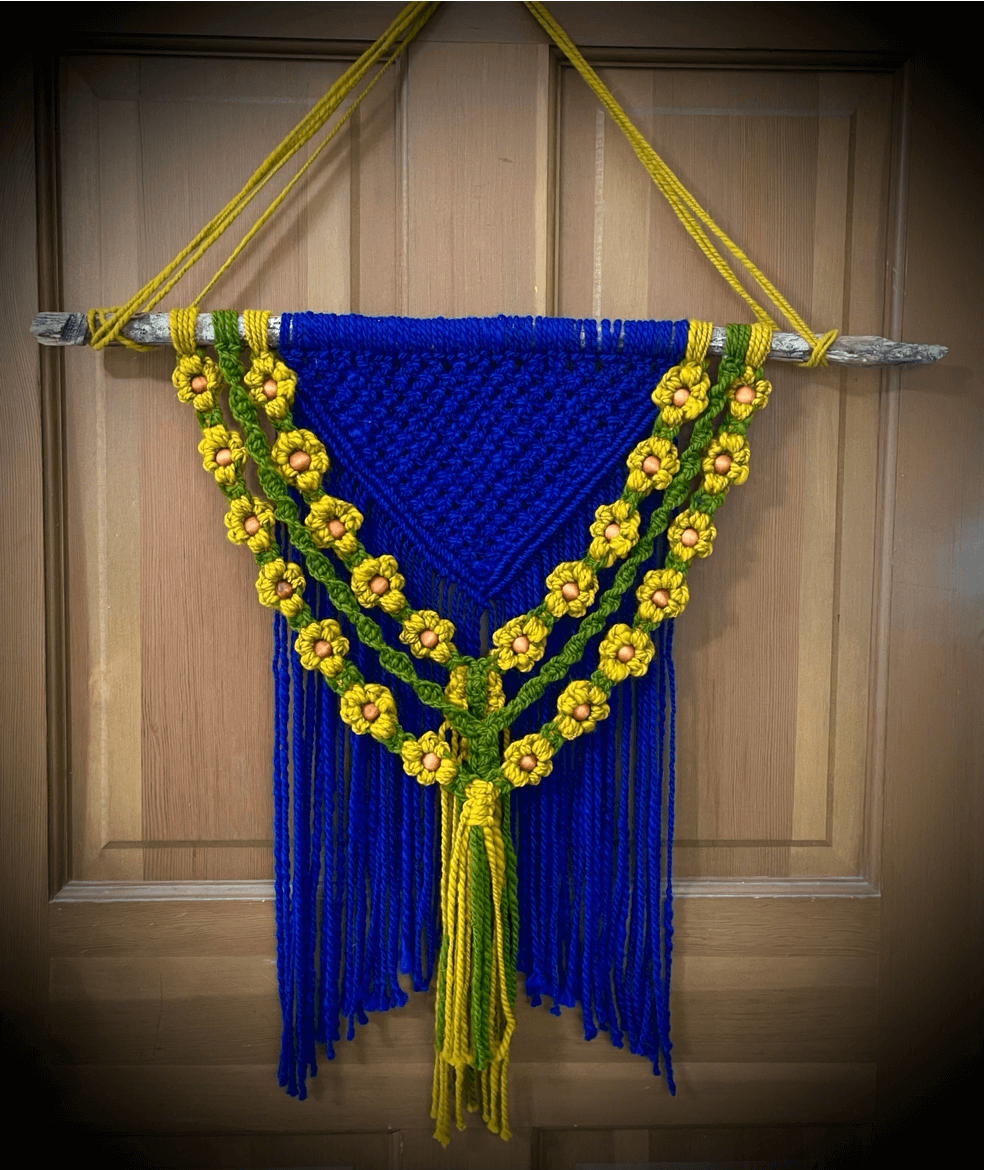
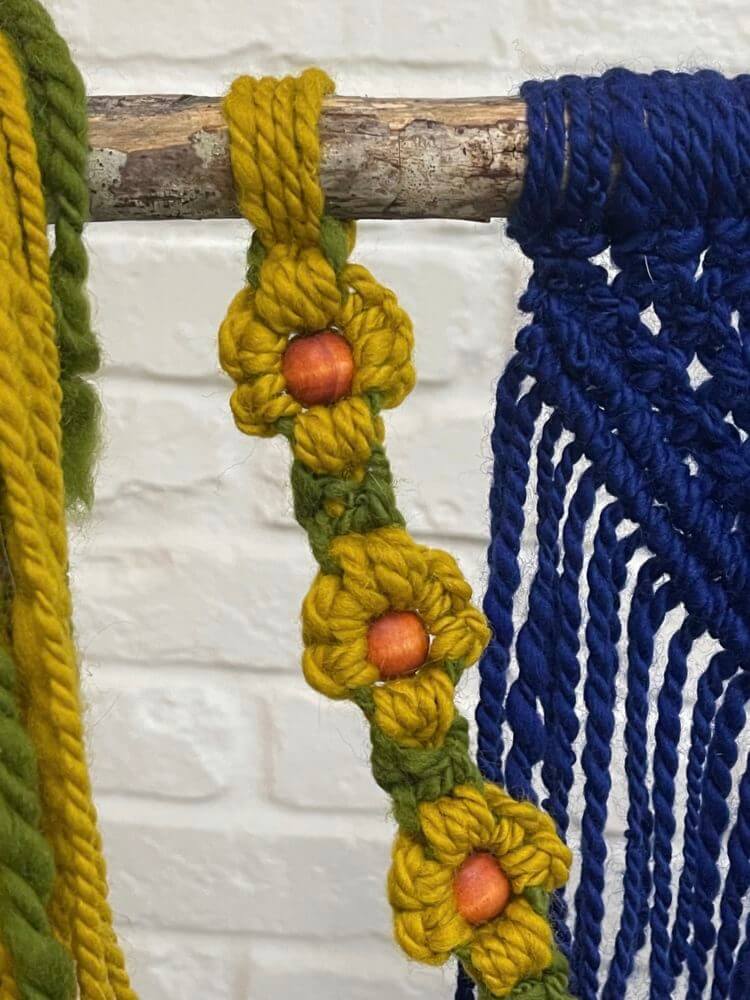
Hand Spun Macrame Wall Hanging – Sunflowers Under a Clear Blue Sky
Macrame is making a comeback. It’s an enjoyable and adaptable craft that involves a collection of knots arranged to produce plant hangers, key chains, suspended beds, and various other items. The material most frequently utilized is cotton rope.
But that substance is not what we will be employing!
In this post we will be making a Macrame Wall Hanging with hand spun Polish Merino Wool.

Our creation for today is meant to symbolize the Ukrainian Sunflowers set against a vibrant blue sky.
Our aspiration for tranquility.
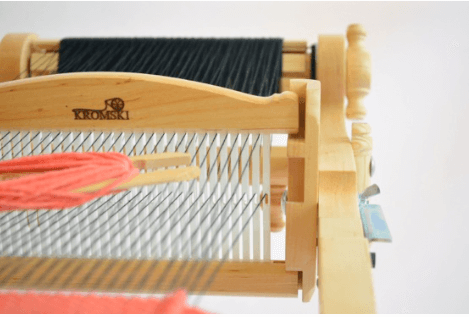
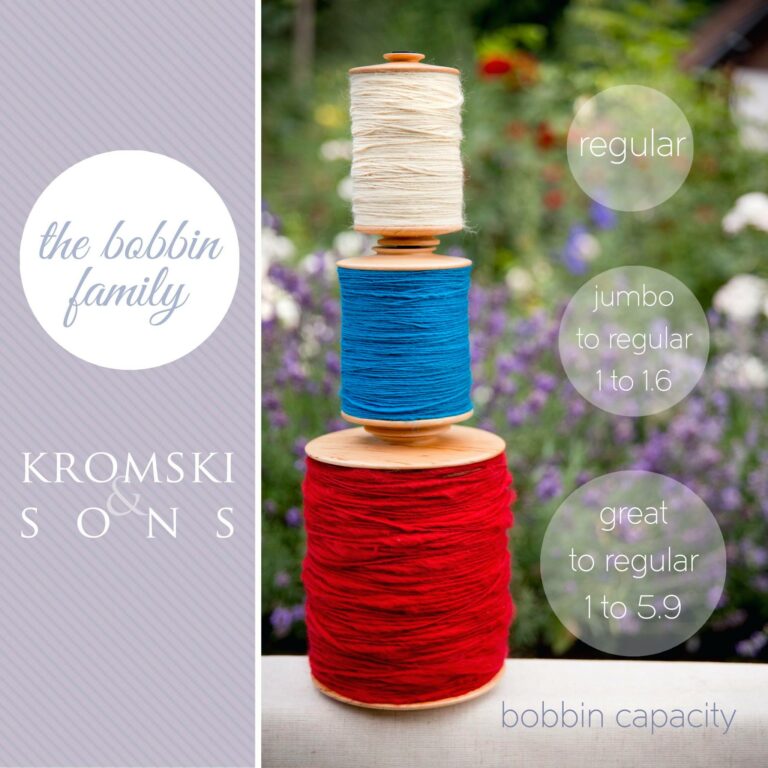
The yarn was spun on a Kromski Sonata equipped with a Magnetic Flyer Head and Jumbo Flyer Set.
Most spinners aim to produce slender, fine singles to use in either knitting, crochet, or weaving. For application in Macrame, the yarn ought to be of a thick weight and, perhaps more critically, firmly twisted.
The objective is not to create a pleasant, light, soft, and airy yarn. The intention is to craft yarn that resembles and functions more like cord (rope), yet still maintains ample pliability.
To assist in achieving this, the drive band is positioned on the smaller whorl, thereby introducing more twist to the singles and the final ply.
This can be challenging for those of us who have dedicated years to honing our skill at manufacturing fingering and lace weight yarn. Keep in mind that an appropriate yarn does not require flawlessness.
Once the yarn is removed from the wheel, I advocate for wet finishing under strain. A completely filled spray bottle suspended from the bottom of the skein is optimal. Typically, this is not the way I would complete my yarn, but as stated previously, we are seeking a durable and dense yarn with minimal bulk (low loft). The added mass (weight) will hinder the yarn from fulling and becoming overly airy for knot tying.

For this wall hanging you will require approximately the following yardage. Note that the actual total length will fluctuate depending on the thickness of the yarn and the tightness of your knots. I strongly recommend that you spin extra yardage and cut your lengths generously. These measurements worked for our example, but you may tie tighterand your yarn will most certainly differ due to the nature of hand spinning.
Blue: 64 yards. (Polish Merino #24 Sapphire)
Yellow: 42 yards. (Polish Merino #3 Gold)
Green: 44 yards. (Polish Merino #32 Lime)
Also needed:
24 wooden beads with large holes, approximately 15mm in diameter (you may require a few more or less depending on the yarn thickness).
A wooden dowel or stick measuring about 24 Inches in length.
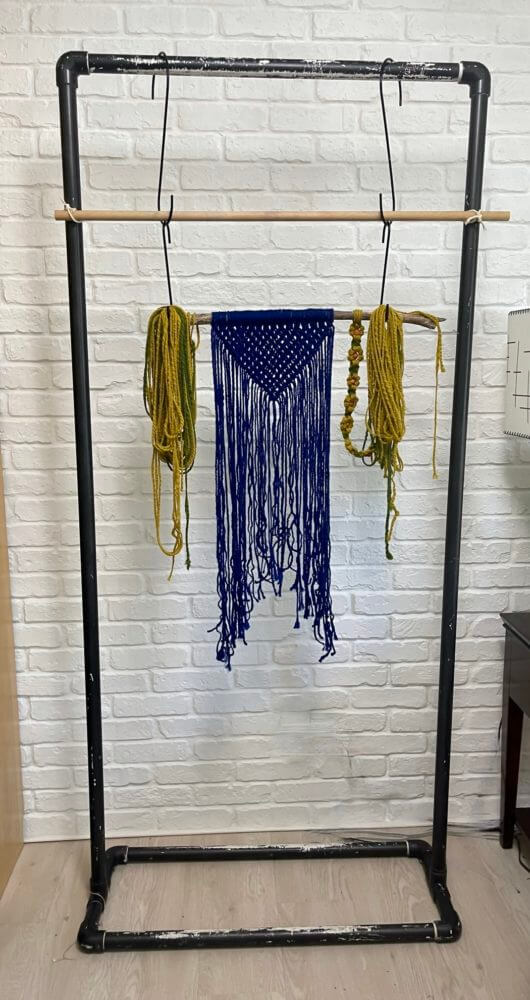
You will need to identify a suitable work station. The simplest way to work on macramé is to allow it to hang as you knot.
A portable coat rack is a perfect selection for a macrame station. They are relatively inexpensive and readily available.
A self-constructed PVC rack (such as the one shown here) also functions very well and is highly economical.
If you lack access to something like this, there are still many methods to suspend your project. Try an over-the-door rack or a rod placed between a door frame (jam). It is not advised that it be secured to a wall; you would need to be extremely careful as you work on the knots so that it did not pull free from the hook.
Begin by cutting the blue yarn into 2 yard lengths. You will need 32 pieces to make this hanging. If you want the blue section to be longer, shorter, or wider simply adjust the number and length of the pieces.
Create 32 Larks Head Knots in the center of the stick. This will give you 64 strands to work with.
If you are familiar with macrame, you can move ahead to the next section.
If not, here is a simple explanation of the Larks Head Knot.
Fold each 2 yard length of yarn in half.

Bring the fold over the top of the stick.
Continue down until you can see the loop below the stick.
Pull the loose ends of the yarn through the loop and pull snug (tightly).
The blue section is composed of a series of Square Knots using 4 strands at a time. See below for a numbered diagramof the steps.
For the initial segment (half) of the knot:
Pass rope #4 across in front of ropes 1, 2, and 3.
Next, bring #1 in front of #4.
Then guide #1 behind 2 and 3. Bring it out and over 4 through the space (hole) formed between 3 and 4.
Push the knot upwards as you tighten it (snug it up), but do not pull excessively.
For the second portion (half) of the knot:
Pass rope #1 across in front of 2, 3, and 4.
Next, bring #4 in front of #1.
Then guide #4 behind 2 and 3. Bring it out and over 1 through the space (hole) formed between 1 and 2.
Push the knot upwards as you tighten it (snug it up).

Once you have finished the entire row, shift your position so that you hold groups of four yarn strands that comprise two from each previous knot group.
Leave strands 1 and 2 on the left and collect 3 and 4 from the first knot and 1 and 2 from the second knot.
Repeat the Square Knot. Then use 3 and 4 from the second knot and 1 and 2 from the next.
Continue in this manner across the row.
At the far end (the end) there will be two strands (3 and 4) remaining (left hanging).
Follow this sequence (pattern) until all the available strands (knots) have been used and the design takes the shape of a triangle.

To provide the triangle with a pleasing (nice) final appearance, we will subsequently use a Double Half Hitch knot.
Select the outermost yarn strand from either side. Hold it across the front of the triangle so that it maintains the downward slope (angle). We will designate this the ‘inside yarn’. It will stay fixed as the central guide while the other yarns loop around it as detailed below.
Take the strand adjacent to the inside yarn. Bring that yarn over the inside yarn and back through the gap (hole) created between them. Maintain your grip on the inside yarn and pull the other upwards so that the knot sits tightly against (snugs up against) the triangle.
Keeping the inside yarn straight, proceed with the same length of yarn to form the second part of the knot. Pass that one behind the inside yarn, around and back to the front, pulling it through the opening (hole) that was created. Again, pull upwards to tighten the knot (snug up the knot).
Pick up the next yarn at the apex (top) of the triangle and repeat the process.
This is also illustrated in the photos located further down in this post.

Continue until the midpoint (center) is attained. Execute the same procedure on the opposite side. To establish a clean point, duplicate the knot one more time using the main yarn from the other side as the knotting strand.
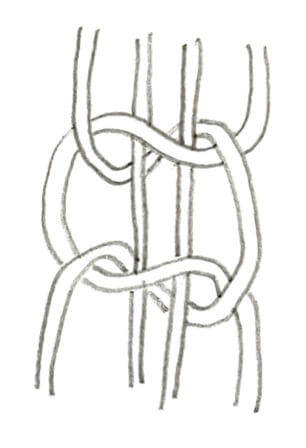
Next, we will create a knot referred to as the Daisy Knot. We have utilized it here to symbolize our sunflowers. There are several versions using either yarn or beads to form the center. On this project, we will incorporate beads to help construct our flowers.
The beads employed are 15mm, but of course yours may be different depending on your yarn density (thickness). Our yarn is 6 WPI.
Cut 4 lengths of yellow yarn 4.5 yards long for the first set of flowers.
Begin by making 2 yellow Larks Head knots on either side of the blue triangle. Before pulling them tight, pull a 4 yard length of green through the gap under the stick. Pull it until it is centered and then tighten (snug up) the yellow yarn.
- Make a Square Knot using the green yarn.
- Next, cross both of the green in front of the yellow. Ensure the green forms an opening (hole) on either side. Pinch everything together in the center with one hand to hold it in place.
- Use the other hand to bring 2 yellow strands forward and up so that they pass through the opening made by the green.
- Repeat this on the other side.
- Hold the green yarns to the front and pull to the left and right simultaneously. The yellow should curl aroundthe green and form the first two petals of our sunflower. 6-7-8. To make the side petals, use the outside yellow yarn and make 2 Double Half Hitch knots around the green. 9-10. Repeat this on the other side.
- Slide the bead onto the 2 center yellow yarns.
- Repeat steps 2-5.
For each sunflower, repeat steps 1-12 and finish with a Square Knot made with green.

Create enough flowers to sit just below the edge of the triangle and discontinue at the midpoint (center).
Form a second flower chain on the opposite side. Our design required 5 sunflowers on each side.
To join them together, make 4 Square Knots with the green yarn. Divide the yellow yarn into two groups of four. Execute 4 Square Knots with each group. Allow the green to hang behind the yellow. Use the four center yellow strands to make 4 additional Square Knots

Next, we will create some additional “leaves” for the flowers.
Cut four 6 yard lengths of green yarn. Make 2 Larks Head Knots on either side of the flowers.
This spiral effect is achieved by repeating one step of the Square Knot continuously until the desired length is reached.
It’s important that it lies flat when the two sides are connected (joined together). To ensure this, be certain to use step 1of the Square Knot on one side and step 2 on the other. This will cause them to twist in opposite directions, and the center will remain flat when attached.
This time when you reach the center, there will be a total of 8 strands of yarn. Make 4 Square Knots, holding two strands together as one while you execute the knot.
Cut four 6 yard lengths of yellow and two 6 yard lengths of green. Create another row of Sunflowers that will rest just below the leaves.
To connect this set together, use 2 strands from each side and make a Square Knot with the green as the center.
Take the outermost strands and make another Square Knot. This time wrap it around all of the other cords.
Trim the ends for a neat, finished look appearance.
Hang and enjoy!
Once you learn the basic macrame knots, it’s easy and fun to design your own wall hanging. With all the colors of Kromski Polish Merino there are endless possibilities!
If you make this one or one from your own imagination please share it with us on our Face Book Group – Kromski Fun. We’d love to see it!
*****************************************************************************************************************