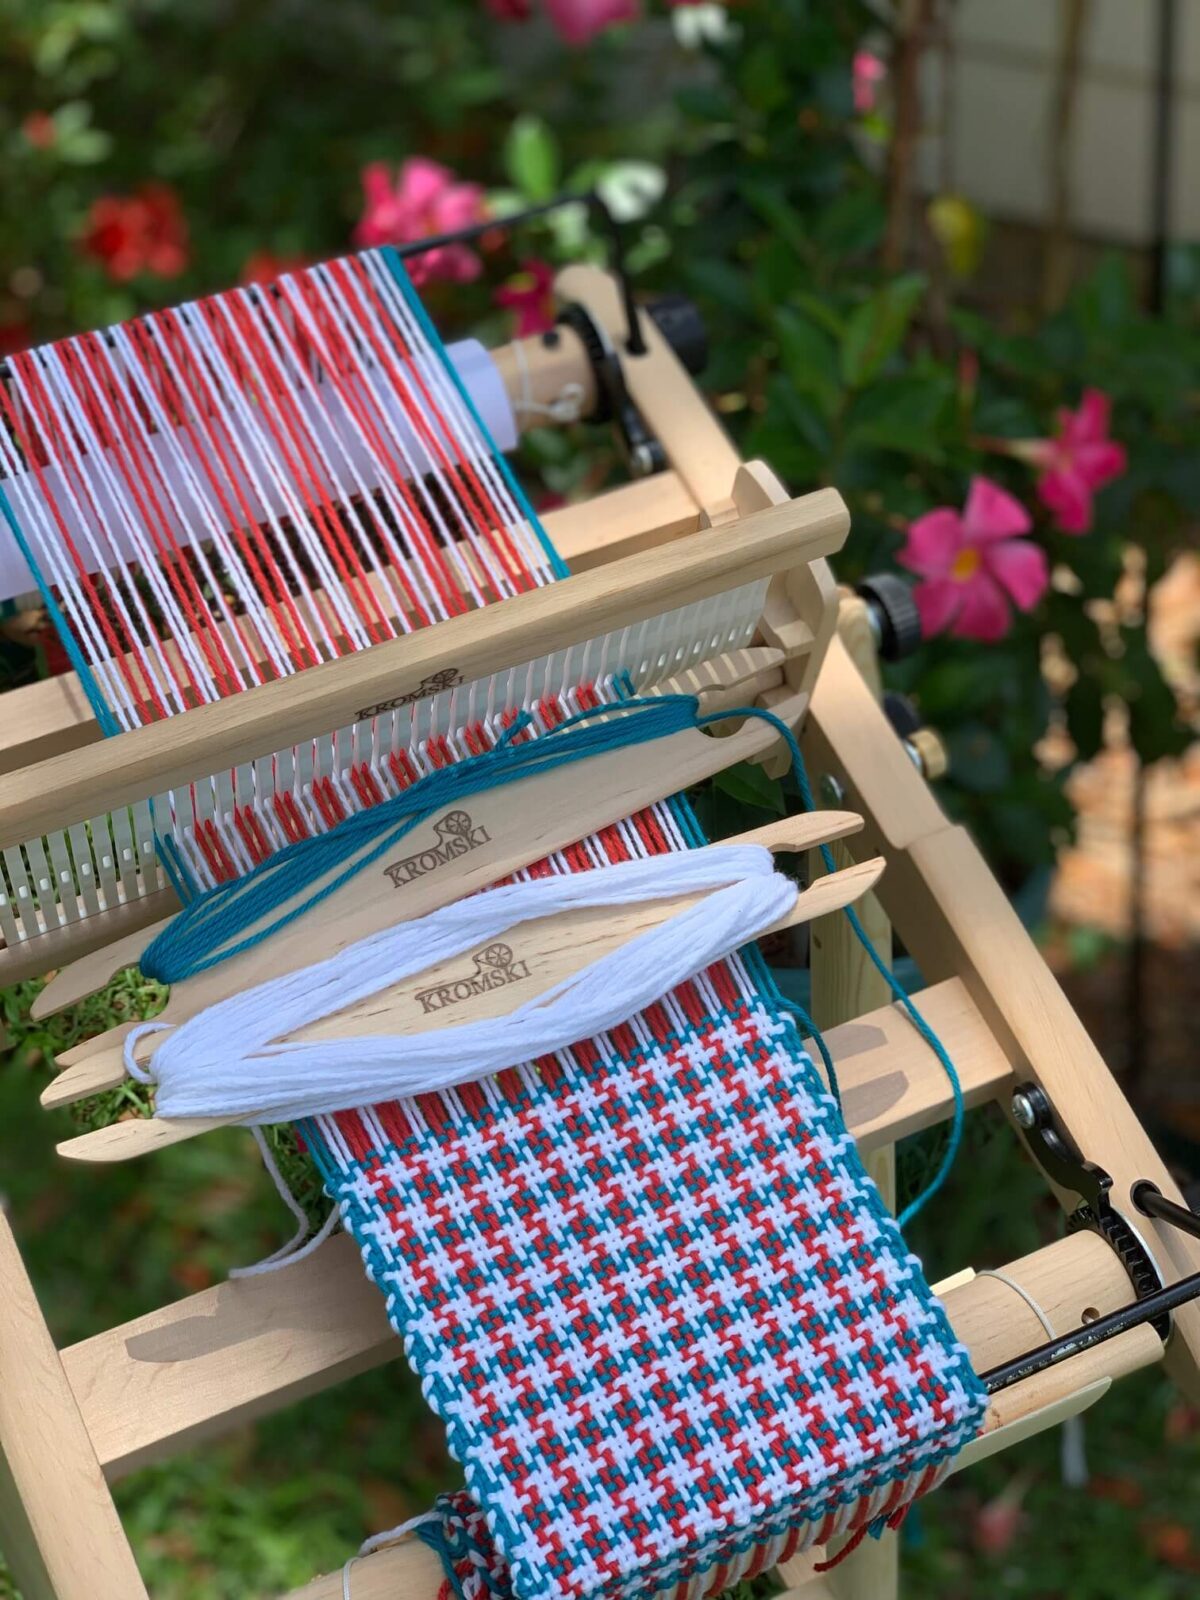
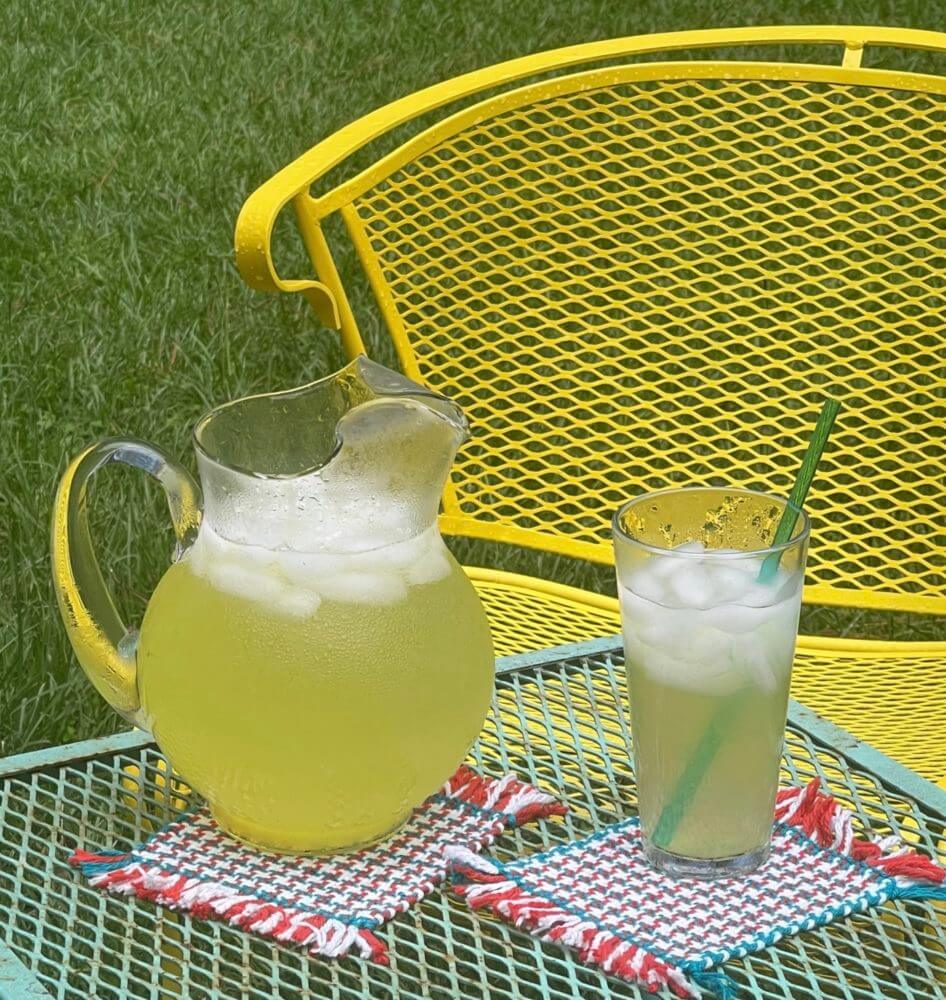
July Mug Rug
Time to weave a Star Spangle Mug Rug!
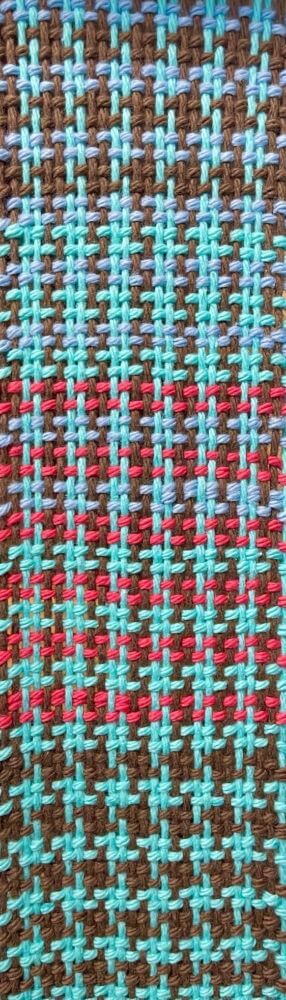
Celebrate the 4th of July with this fun and easy twist on Houndstooth Weave!
Supplies Needed:
- Rigid Heddle Loom, at least 8” wide
- Two shuttles
- Cotton dishcloth yarn in blue, red, and white: approx. 85 yards each of white and red, and about 40 yards of blue
The weave is essentially plain weave. The pattern comes from the yarn colors, not the structure, making this a quick project with plenty of room for creativity. Simply swapping colors can create endless variations!
Warp the loom as follows:
Warping Sequence for the Star Spangle Mug Rug:
Start with 2 ends of blue (one loop through the heddle if using the direct warp method).
Next, alternate 2 ends each of red and white eleven times (22 loops total).
Warp 2 ends of white.
Finish with 2 ends of blue.
At the end, you should have 50 ends in total.
To weave:
Weaving Instructions (Star Spangle Mug Rug):
Wrap 2 shuttles of yarn, one with white and one with blue.
Begin weaving on the right side. Make 2 passes of blue, leaving a long tail for hem stitching.
~ If you are unfamiliar with hem stitching, refer to our blog post for guidance.
http://kromskina.com/hem-stitch-for-weaving/. For this project however, you will stitch around 2 strands of yarn rather than the 3 as shown on the blog.
Next, starting from the left, weave 2 passes of white, weaving in the ends as you go.
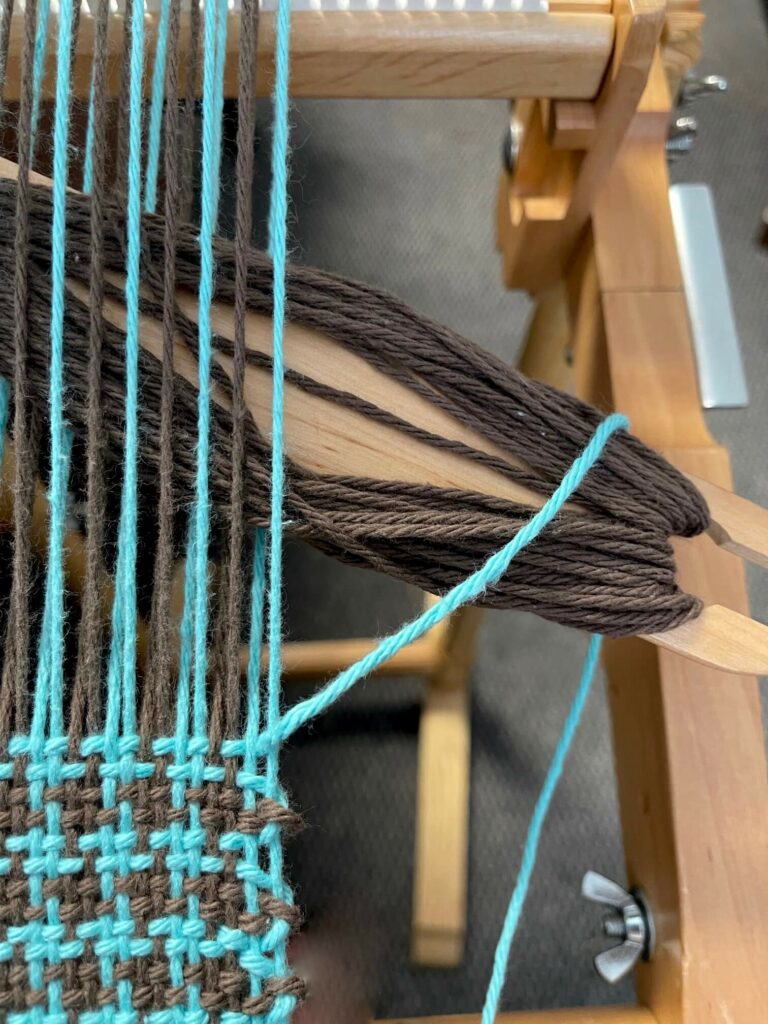
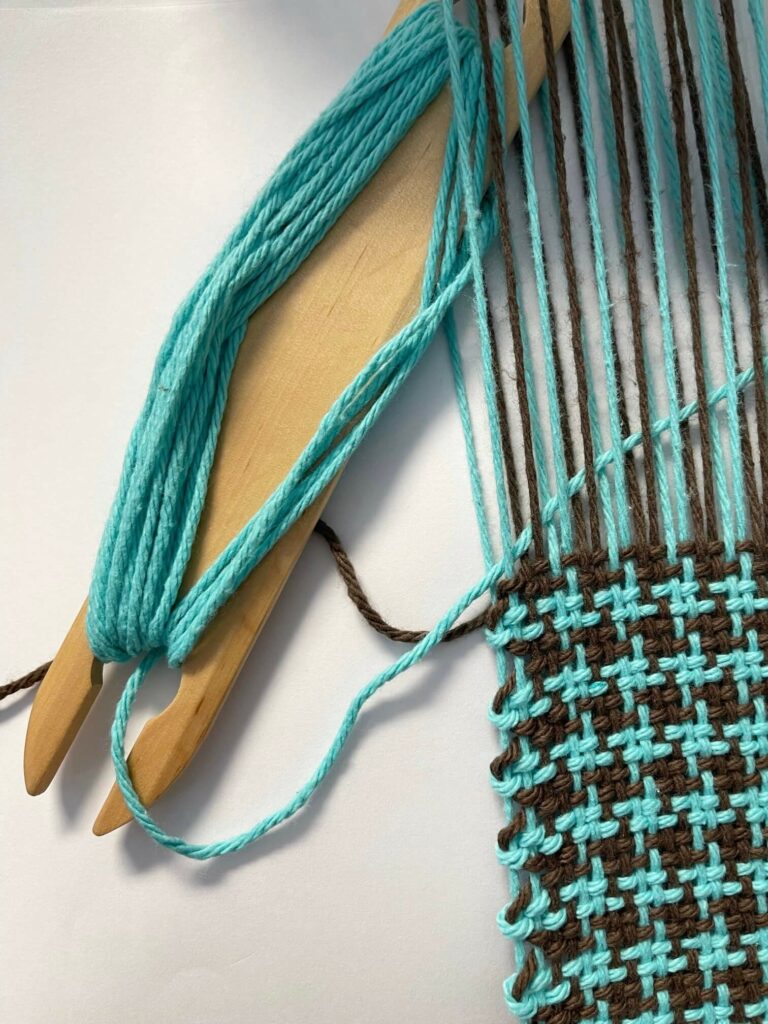
Since there are only 2 rows between color changes, it’s best not to cut the yarn each time. Instead, carry the weft up the edges.
How you carry the weft depends on whether your selvage edge runs through a hole or a slot. In this example, the right-side selvage is in a hole and the left-side ends in a slot. Yours may be opposite.
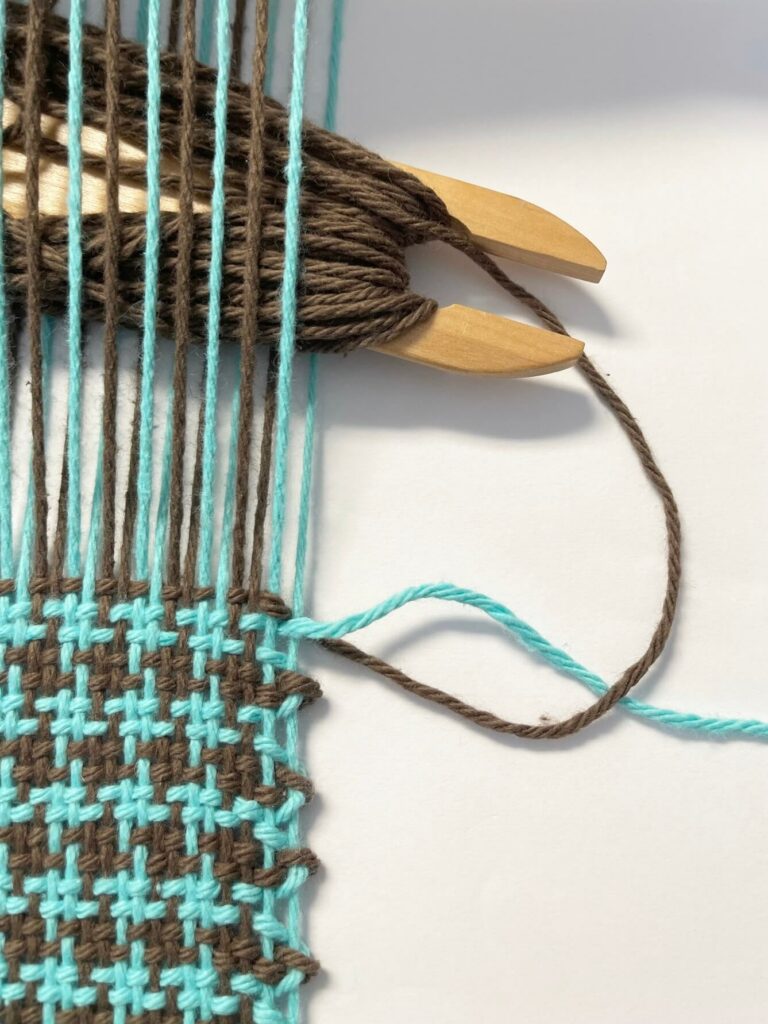
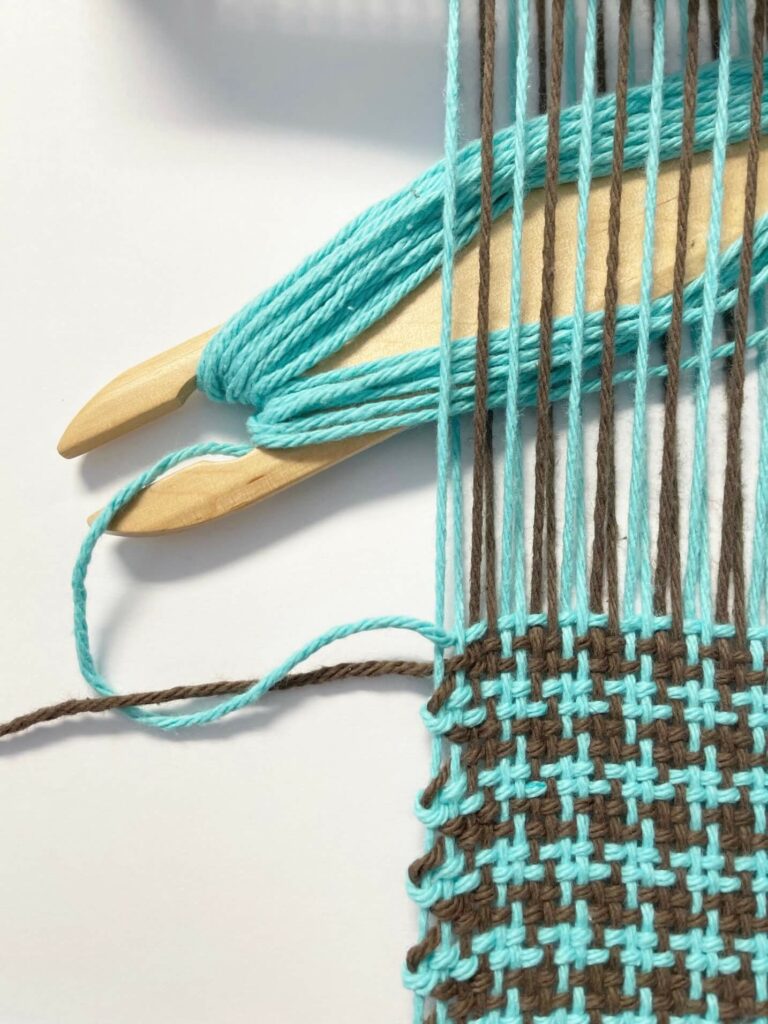
Notice in the photos that the working color (here brown) goes under the second, resting color before returning to the shed. This locks the edge loop down and gives a neat, smooth edge.
If the working color were to go over the resting color instead, it would create a lumpy, uneven edge.
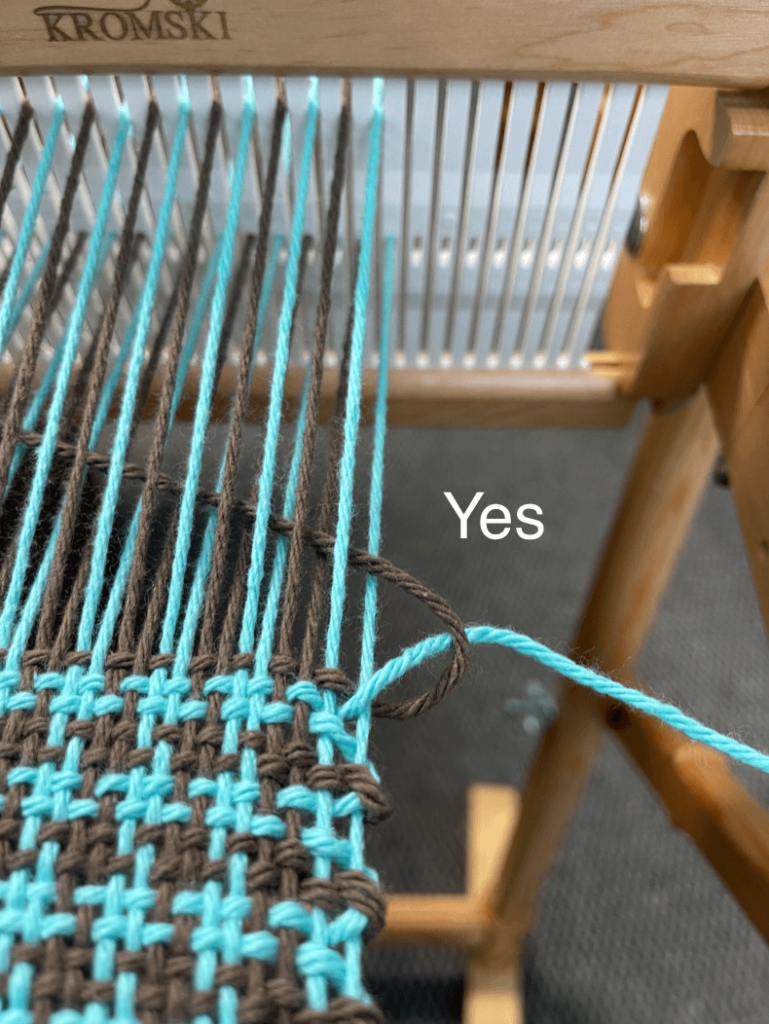
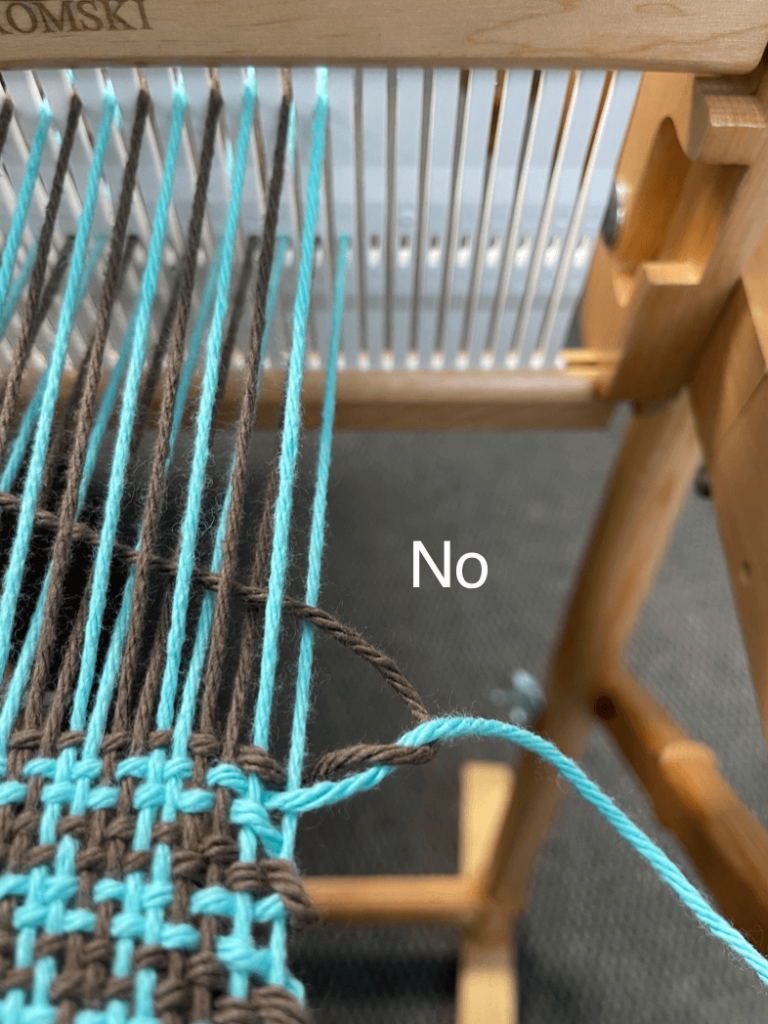
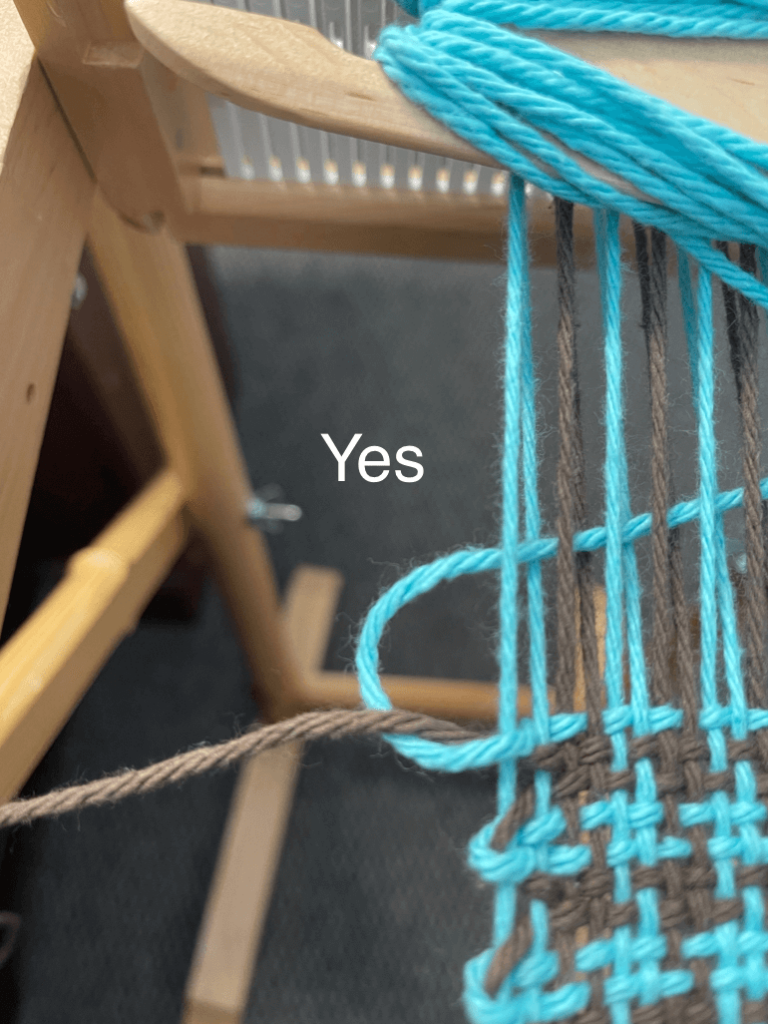
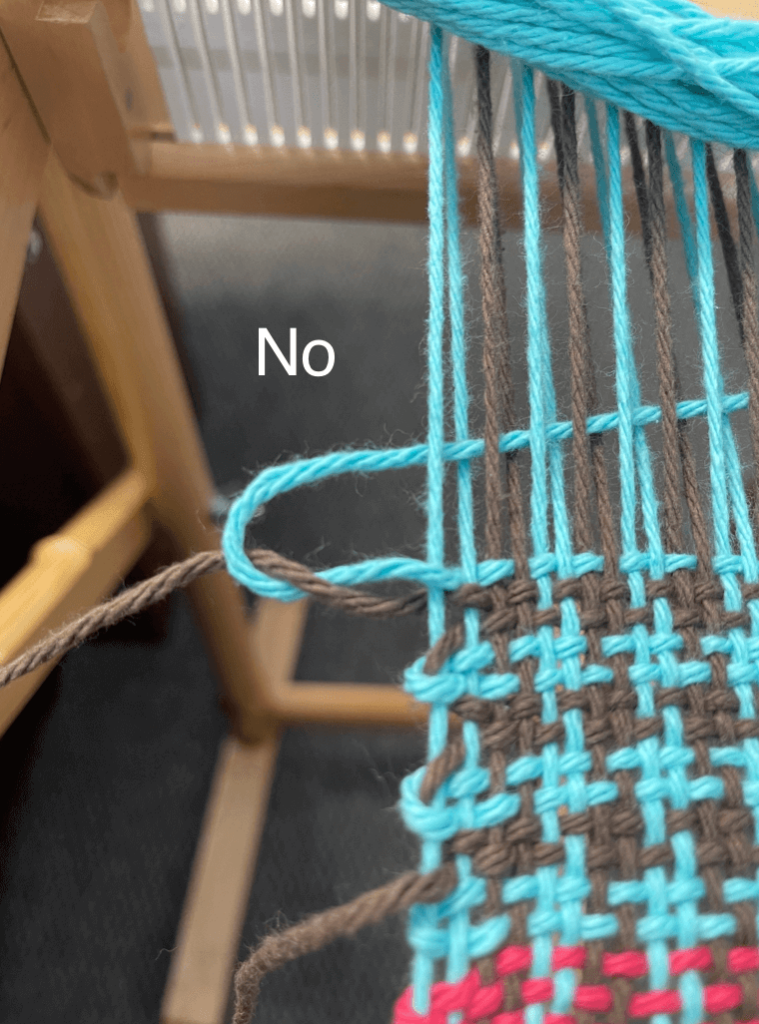
On the other side of the loom, the opposite is true. The working yarn (aqua) must go over the the resting yarn before wrapping and then travel back into the shed. It should look like the 3rd photo, not like the last one.
Continue weaving by making 2 passes of each color, alternating the shuttles of blue and white. Stop after completing 11 repeats (44 rows).
Next, weave 2 more rows of blue. Cut the yarn, leaving enough to stitch the hem with blue.
To mark the fringe, place 2 pieces of folded paper into the warp: raise the heddle and insert the first piece into the shed, then lower the heddle and insert the second piece into the same shed. The paper is now “woven” in place and will remain throughout the weaving.
Repeat this process to make a total of 4 Mug Rugs.
Remove the finished Mug Rugs from the loom and cut the yarn between the folded paper—a rotary cutter works well for creating an even fringe. Trim the first and last rugs to match.
Machine wash and dry. If they appear excessively wrinkled, wet them lightly and let them dry flat.
Once dry, trim the fringe again if necessary for a neat finish.
This is a fun one to play around with.
Simple weft color changes can give the weaving a whole new look.
Changing out the warp colors adds yet another field of play!