Weaving Your 1st Scarf
“My First Woven Scarf”
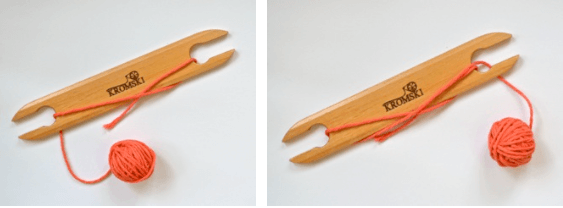
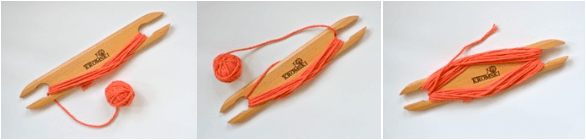
See part 1 – “How to Warp the Kromski Harp Forte” to get started.
Supplies:
Kromski Harp Forte Loom at least 8” wide
155 yards size 3 Crochet Thread or 8/2 Weaving Yarn
185 yards worsted weight (size 5) yarn.
Small amount of waste yarn
Scissors
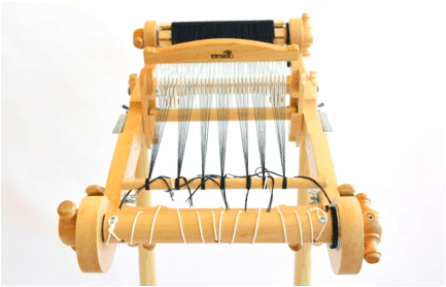
For this tutorial, I will be using the 8” Kromski Harp Forte with Stand.
The warp yarn is the yarn that travels from the back to the front of the loom. I will be making a simple scarf. I want my finished scarf to be 70″ long and I will be using the full 8″ width of the loom.
All looms have a certain amount of what is called “loom waste”. This is the yarn that is tied to the front and back beams. There is only about 10” of waste on the Harp Forte. I plan to use some of it as my fringe, so I don’t need to add the fringe into my calculations.
I need to add 10% to my overall length for what is called “take up”. What is “take up”? Picture the yarn as it travels over and under the warp threads. More will be used for this than would be used for a straight line. Typically there is about 10% added by these curves in the yarn. Depending on the yarn type, there could be less, but it’s better to have extra warp than not enough.
Therefore I need the length of my warp to be 70” (the scarf) plus 7” (for take up), which equals 77”. Then I add in 20” for the waste. My total length will need to be 97” (2.69 yards). Lets just call it 2.75 yards for simplicity. If I were using all cotton that I plan to machine wash, I would need to add another 10% for shrinkage. But in this case, I recommend hand washing in cool water, so it is not necessary.
Planned length of the scarf + take up + waste (use as fringe) + shrinkage = total length of the warp
To calculate the yardage needed to create my warp, I take this number, 97” and multiply it by the number of ends per inch.
The Kromski Harp Forte comes with an 8 Dent Heddle. This means that there will be 8 ends per inch. I’m not using the end spaces, so I have 62 ends. 97 x 62 equals 6,014” (167 yards).
Total length of the wrap x number of ends per inch = yardage needed to create warp
Weaving the Scarf
The Weft Yarn is the yarn that travels from left to right across the warp.
For this sample I am using an inexpensive acrylic yarn found at the local hobby store.
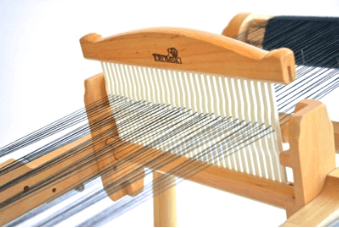
We begin by weaving a set up area using some waste yarn. This area will close the gaps in the warp threads caused by the tied bundles.
First you will need to load your shuttle with the waste yarn to act as the weft for the set up. In this case, I’m just using some cotton.
Wrap the yarn in a figure 8 motion around one side of the shuttle. Switch from side to side as each side fills, in order to maintain an even fill.
You won’t need a whole lot to weave the set up section.
When you load the shuttle with the project yarn, you’ll want to fill it as full as you can without making it too big to fit through the shed.
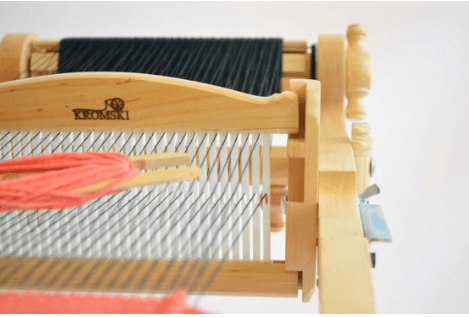
Shed? What’s a shed?
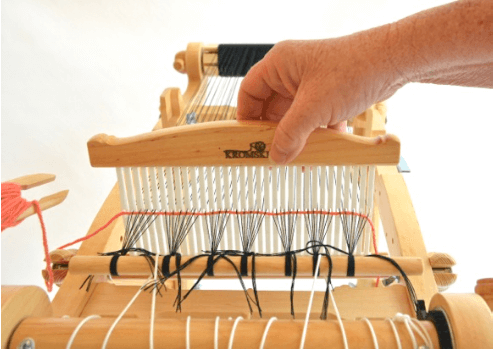
The shed is the name for the opening made in the warp when the heddle is either raised or lowered.
After warping the loom, notice the heddle is in the neutral (center) position.
Raise the heddle to the upper position. This means that the bottom of the heddle is resting on the upper notch of the heddle block.

Now can you see the shed?
Begin weaving from the right side (this isn’t mandatory, but it’s how we have started in this tutorial). Check to see that the shed is free of any loose threads that could catch on the shuttle as it passes through. If not, you may need to tighten up the warp. Do this by placing the heddle back to the neutral position, and turn the knobs on the front of the loom to tighten. You’ll need a nice taunt warp to achieve a clean shed. It is very important that you do not make the warp too tight. Rigid Heddle looms are not designed to be over tensioned. Doing so may cause damage to then beam. Damage caused by over tensioning is not covered under the warranty.

Once you have assured that your warp is tight enough, return the heddle to the upper position. Insert the filled shuttle into the shed moving from right to left, leaving a short tail hanging out of the right side.
Now take hold of the heddle and gently push the weft down towards the front of the loom.
Place the heddle into the lower position.
Leaving a loop of yarn hanging off the edge, pass the heddle through, from left to right. Push the weft down again with the heddle. Place the heddle back up to the upper position and pass the shuttle again from right to left. And again press the weft forward with the heddle. This is called “beating”.

Notice how the warp threads begin to spread out. Can you see that the gap between the bundles is beginning to close?
Continue weaving a few more times until there is no longer a gap and all the threads line up evenly. Leave a loop of yarn at each side as you weave. This will allow the warp to spread as the gaps close. Finish after a pass to the right. Cut the yarn and prepare the shuttle with the project yarn.
Now let’s weave a scarf!
As mentioned earlier, we are using an inexpensive acrylic yarn. Of course any yarn will do, but a worsted or bulky weight will weave up quicker, making it a good choice for your 1st project. This particular yarn is a lofty, loosely spun yarn with lots of texture. Wrap the shuttle as we did with the cotton set up yarn. This time, fill the shuttle with as much yarn as you can, while still keeping in mind that it must able to fit through the shed.
Begin weaving in the same manor as the set up section by positioning the heddle in the lower position. Insert the shuttle from the right as before, leaving about a 4” tail hanging out of the edge. (This tail will need to be laid by hand into the shed of the following pass.) Press the heddle forward and beat.
Next, place the heddle into the upper position. Lay the tail into the shed by hand. This step locks the yarn in place. Keep the heddle in the upper position and continue.
As you weave the scarf, keep the following in mind:
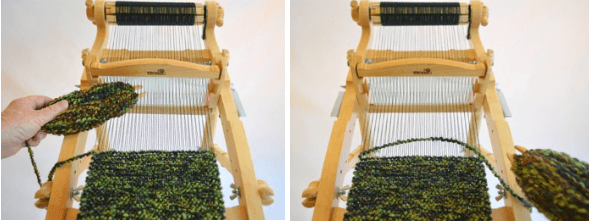
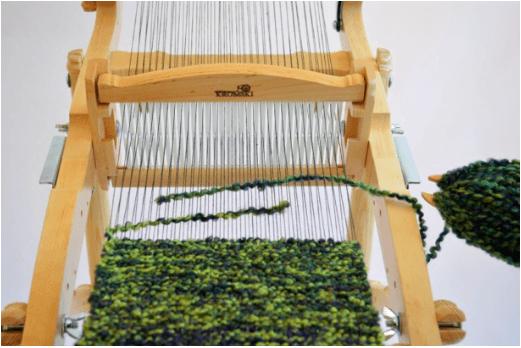
You no longer want to leave loops on the edges. Instead, proceed as follows.
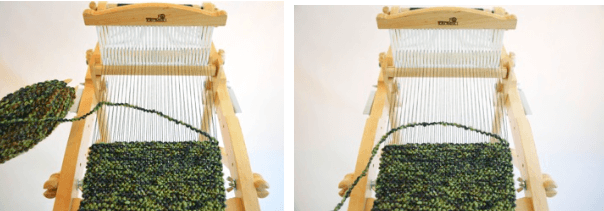
Don’t pull the shuttle strait across, but rather at an angle to the warp, creating an arch. Use your other hand to gently pinch the hold the fold in the yarn at the edge as you draw the shuttle through. This will prevent the sides from being drawn in too tightly, and ensure a nice edge to the finished scarf.

Press the yarn forward with the heddle as before. Press firmly, but not so tight that the fabric becomes stiff. You’ll want a scarf with a nice drape.
Next, lower the heddle into the bottom position.
Pass the heddle back through the shed, from right to left in an arch.
And beat.
As the woven fabric approaches the heddle, the shuttle will no longer have enough room to pass through. You will need to advance the warp. To do this, place the heddle in neutral. Release the ratchet and pawl on the back beam. Use the knobs on the front beam to wind the project forward. Stop about 2” from the front beam. Replace the pawl into the ratchet and tighten the warp again using both hands on the knobs.
Continue weaving as before.
When the shuttle runs out of yarn, lay the last bit into the shed as it would normally be. Fill the shuttle with more yarn and continue by overlapping the new yarn over the old by 3″-4” in the same shed. This will lock it in.
Continue to work back and forth until the scarf measures 70”. Finish your weaving by laying the tail end into the shed as above. Do not leave the cut end at the edge of the project or it will not be well hidden in the fringe. To check the length of the scarf, you can unroll it from the front beam, measure it and roll it back up.
Another way would be to roll a measuring tape up with the woven fabric as you go.
However, measuring is not really necessary, unless you want an exact length. When the warp nears the end, the scarf will be approximately 70” based on the warp calculations.
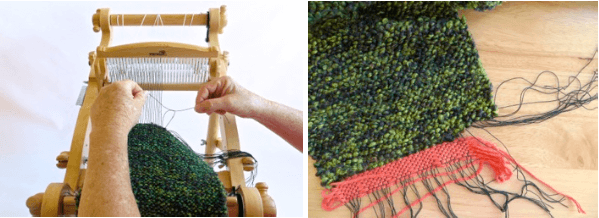
To finish the scarf, the ends must be secured. For this project the warp ends will be tied in a simple square knot. Begin on one side and carefully cut 2 strands of the warp, one strand from a hole and one from a slot, at least 5” beyond the end of the scarf.
Notice one lays above the fabric and one on the underside. Tie the upper strand to the lower strand. Work across the width of the scarf, 2 strands at a time. Unroll the scarf from the front beam, slide it off the dowel, and untie the knots in the warp. Gently pull the set up section (the cotton used at the start) apart from the finished project, but do not remove it entirely. Pull out 2 strands at a time and tie the ends together as with the other side. Once all of the warp ends have been tied, discard the waste yarn. Trim the fringe to your liking, keeping both sides even. Allow extra length if you plan to twist the fringe.
If you decide to finish your fringe by twisting it, hold 2 strands together and twist them in a clockwise direction. Without releasing them, twist the next 2 strands the same way. Next, hold the 2 twisted sections together and twist them in the opposite direction. Tie a knot in the end to keep them from unwinding. Work in this manor across both ends of the scarf. Due to the number of warp threads on this project, you will have 2 extra threads. These can be incorporated into the last 2 groups without being noticeable.
Because this is an acrylic yarn, there is no need to wet finish it.
It’s ready to wear!
If you have used a wool yarn, soak it in room temperature water for 10 minutes. Gently squeeze out the excess water and dry flat.
Cotton yarns need to be washed and dried. This will fluff up the fibers, giving you a lovely soft texture.
Washing cotton will also cause some shrinking, so keep that in mind as you plan your project.
Congratulations!
You just wove your 1st Scarf!

Here is a pdf version of this tutorial: 1st scarf