Tablet Weaving on the 8″ Harp Forte
Kromski has a new way to use the 8″ Harp Forte. Tablet Weaving!
Tablet weaving, sometimes referred to as card weaving, dates back to the 8th century BC. Typically found as trim and decorative bands throughout the ages. These bands were originally woven with no loom at all, but in modern times, it is perhaps most commonly seen on an Inkle loom… until now!
Tablet weaving is done with cards or tablets, that usually have 4 holes where the yarn is threaded through. As the cards are rotated, either forwards or backwards, depending on the pattern, the warp threads are raised and lowered to create a shed. This is essentially a 4 shaft loom that is easily held in your hand! This post will not give detailed instructions on how to Tablet Weave. There are many resources available where this knowledge can be found. Likewise, there are ample places where the cards can be purchased. There are also a number of tutorials on making your own cards using various materials.

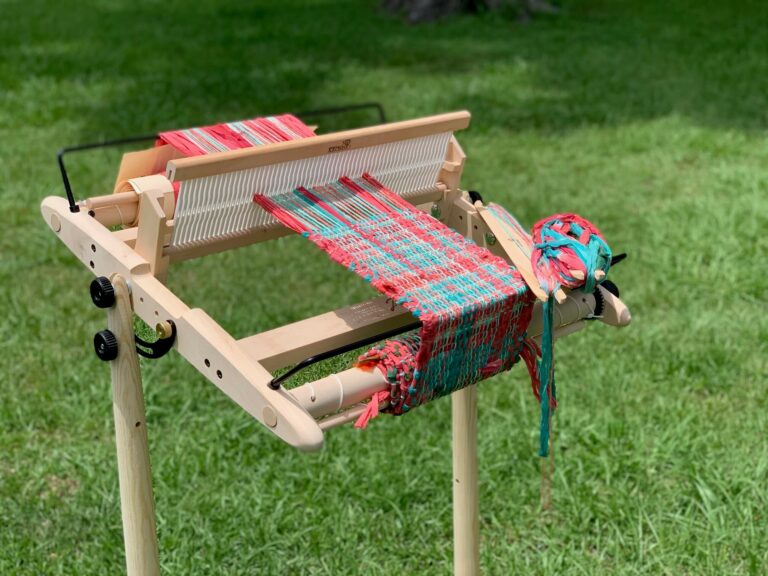
Given the fact that Tablet Weaving typically produces a very narrow band, the 8″ loom is a perfect size for this technique. The following will show you two ways to set up the 8″ Harp Forte and Stand so that you can sit comfortably at your loom while you weave. No more reaching over the awkward Inkle!

**************************************************************************************************
This 1st method requires you to thread each card individually.
In addition to the 8″ loom and stand, you will need a 16″ dowel (the dowel that comes with the 16″ Harp is perfect), or similar rod. The heddle and one of the dowel rods that came with your loom will not be used for this method.
Begin by removing the apron strings. Set them aside for now.
Place the 16″ dowel in the “V” formed by the arms on the stand. Following your pattern, begin warping your cards. Place the working yarn on the floor in front of the loom. Bring the yarn up over the front beam, through the designated hole on the card and around the back beam. Continue drawing the yarn under the cross support on the stand. Next bring it up behind the 16″ dowel and back around the front beam. Cut the yarn and tie the two ends together. Continue with the entire pattern, keeping the tension the same on each strand. Your warp should look like the image below.

Retrieve the dowel strings and one of the 8″ dowels. Tie one string though each of the outer holes on the front beam (leave the center hole empty) creating two loops.

Hold the dowel behind the warp and attach one string on either side of the warp. To help them to stay in place, wrap each around the dowel one time.
Rotate the front beam towards the front as you would when adjusting the warp in regular weaving until the dowel rests against the warp. Slide the 16″ dowel out and finish snugging up the tension. Your loom should now look like this. It is important to remember that you should never over tighten the warp.

Here is another angle.

Now you are ready to weave! As the project progresses, loosen the tension by releasing some of the string length and rotate the warp to weaving area.

This method will produce a band that is approximately 70″ long.
**************************************************************************************************
In order to weave a longer band, you will need a longer warp.
For this method the loom will be set up normally with the dowels and strings in the usual position.
Determine the length of the project and add 20% for take up. Cut the threads and warp each card, pulling the yarn all the way through and knotting the 4 strands together in front of each card. Secure the cards with a stitch holder or similar method until the warp is fully attached to the loom. Gather the ends. Insert the front dowel in such a way that it is between “A”/ “B” and “C”/”D” (this is how the holes on the cards are labeled for patterns). Wind the front beam until the warp ends are snug against the beam.
Before securing the warp onto the back beam, be certain that all of the tangles have been worked out. Run the warp behind the dowel as shown. I have loosened the warp for the photo. The yarn hanging down is the end. I am lifting the warp out of the way with my hand so that you can see.

Wrap the yarn around the beam as shown, alternating sides, until all of the warp is wound and the tension holds.


Weave according to your pattern. When the warp needs to be advanced, unwrap the back beam, advance and rewrap. The woven band will wrap nicely upon itself, or if you have a particularly long project, spread it out along the beam as you progress.

When you get near the end of the warp and there is not enough to wrap, knot the end and use the dowel to hold it in place.

The above is also a good method to use on a pattern that develops twist. Each time the warp is advanced, take a minute to untwist the yarns before rewrapping the beam.
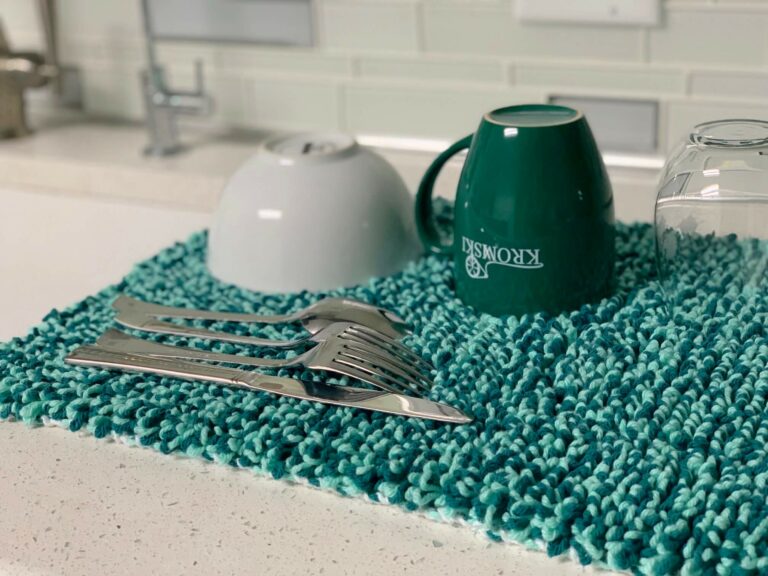
In these samples I have used 3/2 cotton. This is a great size for belts or straps. A thinner yarn, like a 10/2 will create a nice trim that can be used as an accent on clothing, lanyards or lightweight straps.
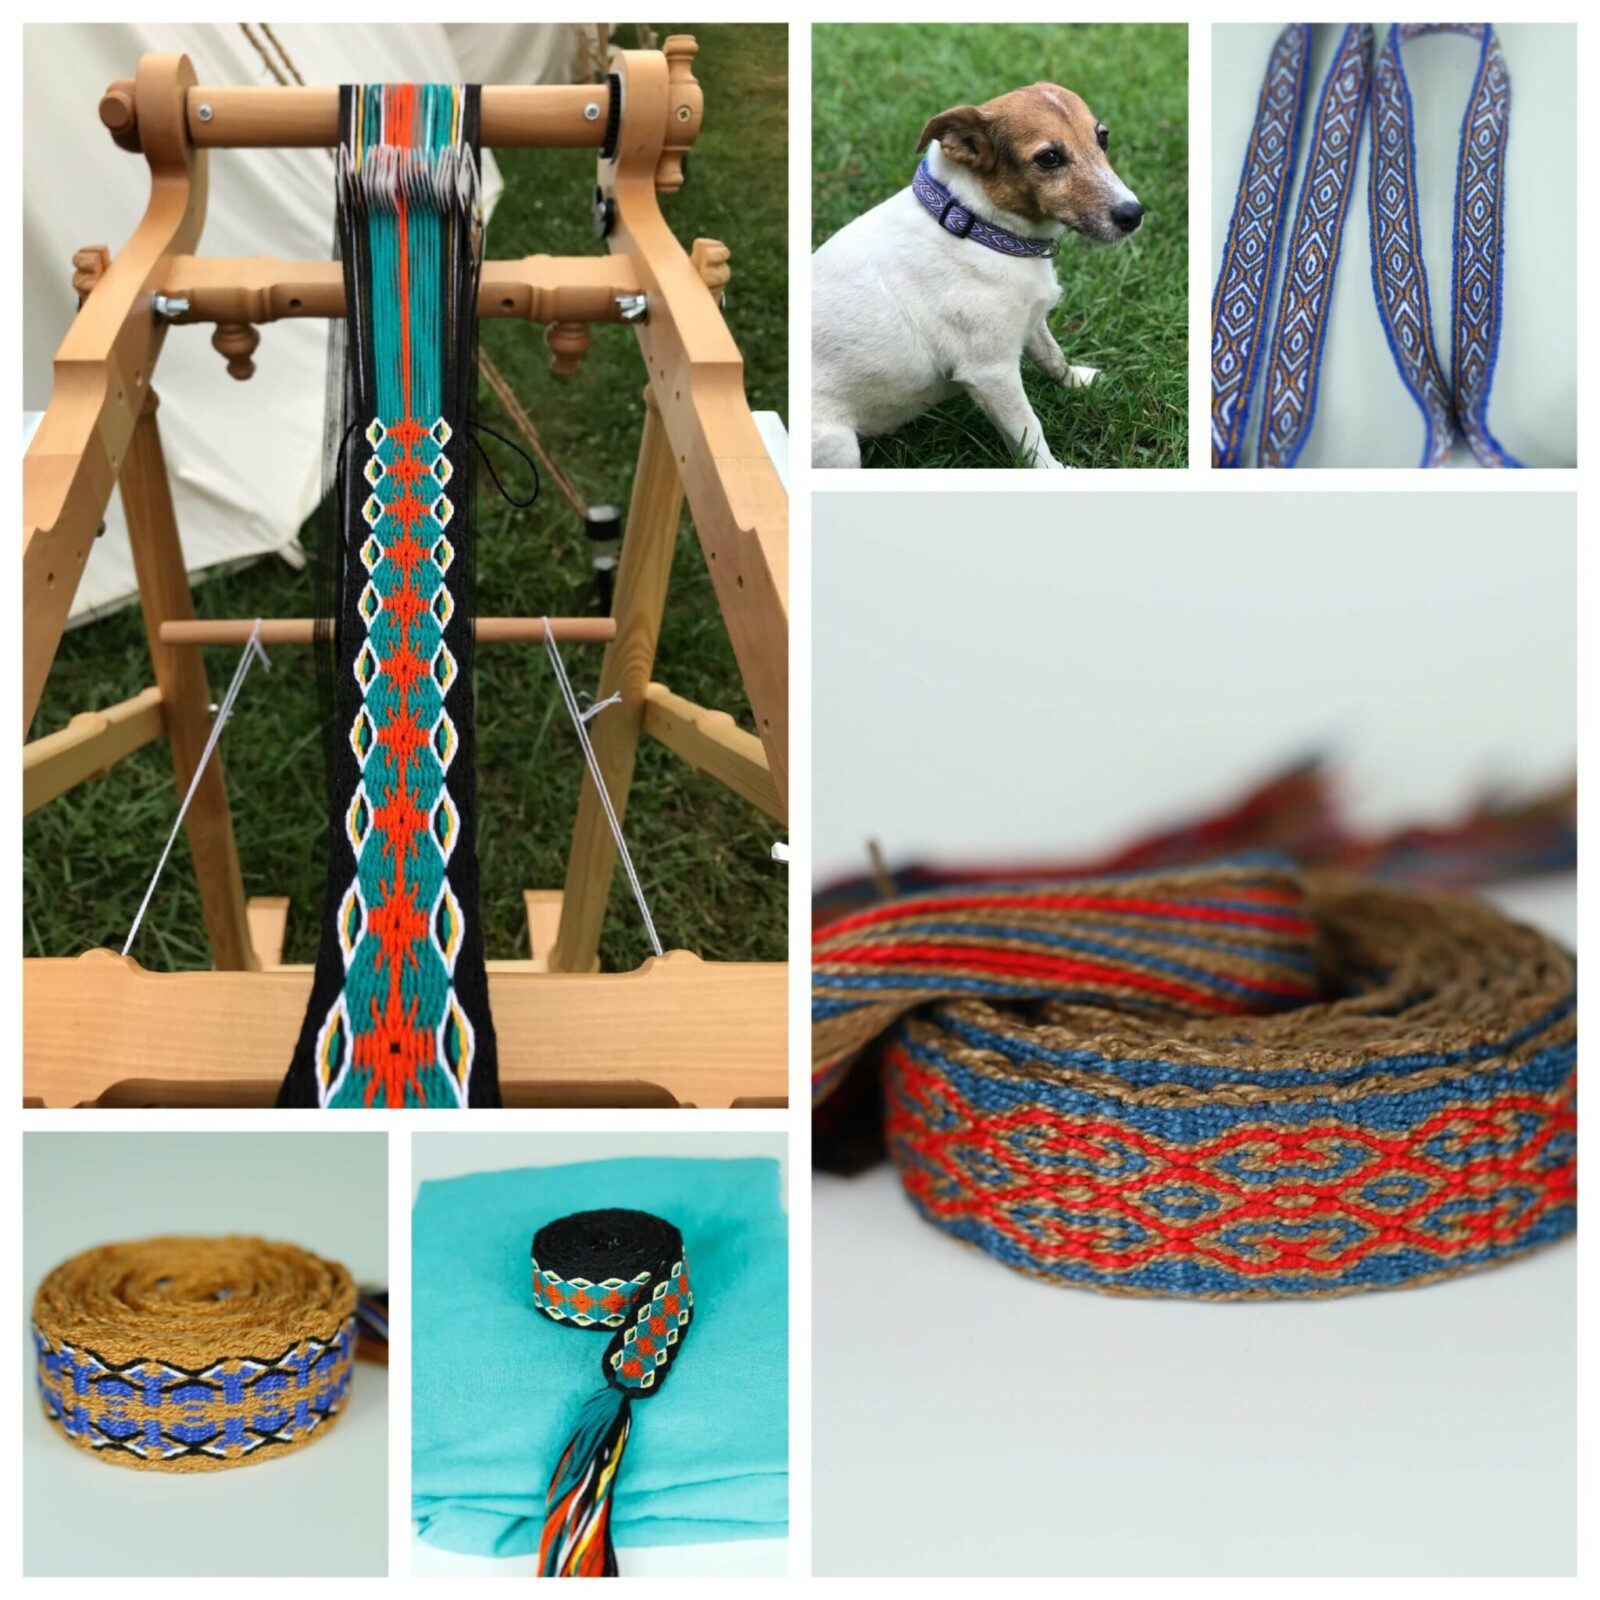
Here are some examples of what can be made with these fun and sturdy bands.
The 1st we made into a nice dog leash.

When sewing, fold under the raw end. Then, using the same yarn as the outer edge, sew the top and bottom side, forcing the raw end to hide between the layers.

I also made a collar for one of my dogs. So handsome!
![]()
This one will become the straps on a tote bag. The excess will be a key fob to match.

This is truly a fun way to weave. There are so many possibilities with both patterns and projects. I can hardly wait to warp up my 8″ Harp Forte again!
Don’t forget to share your projects on Kromski Fun!