


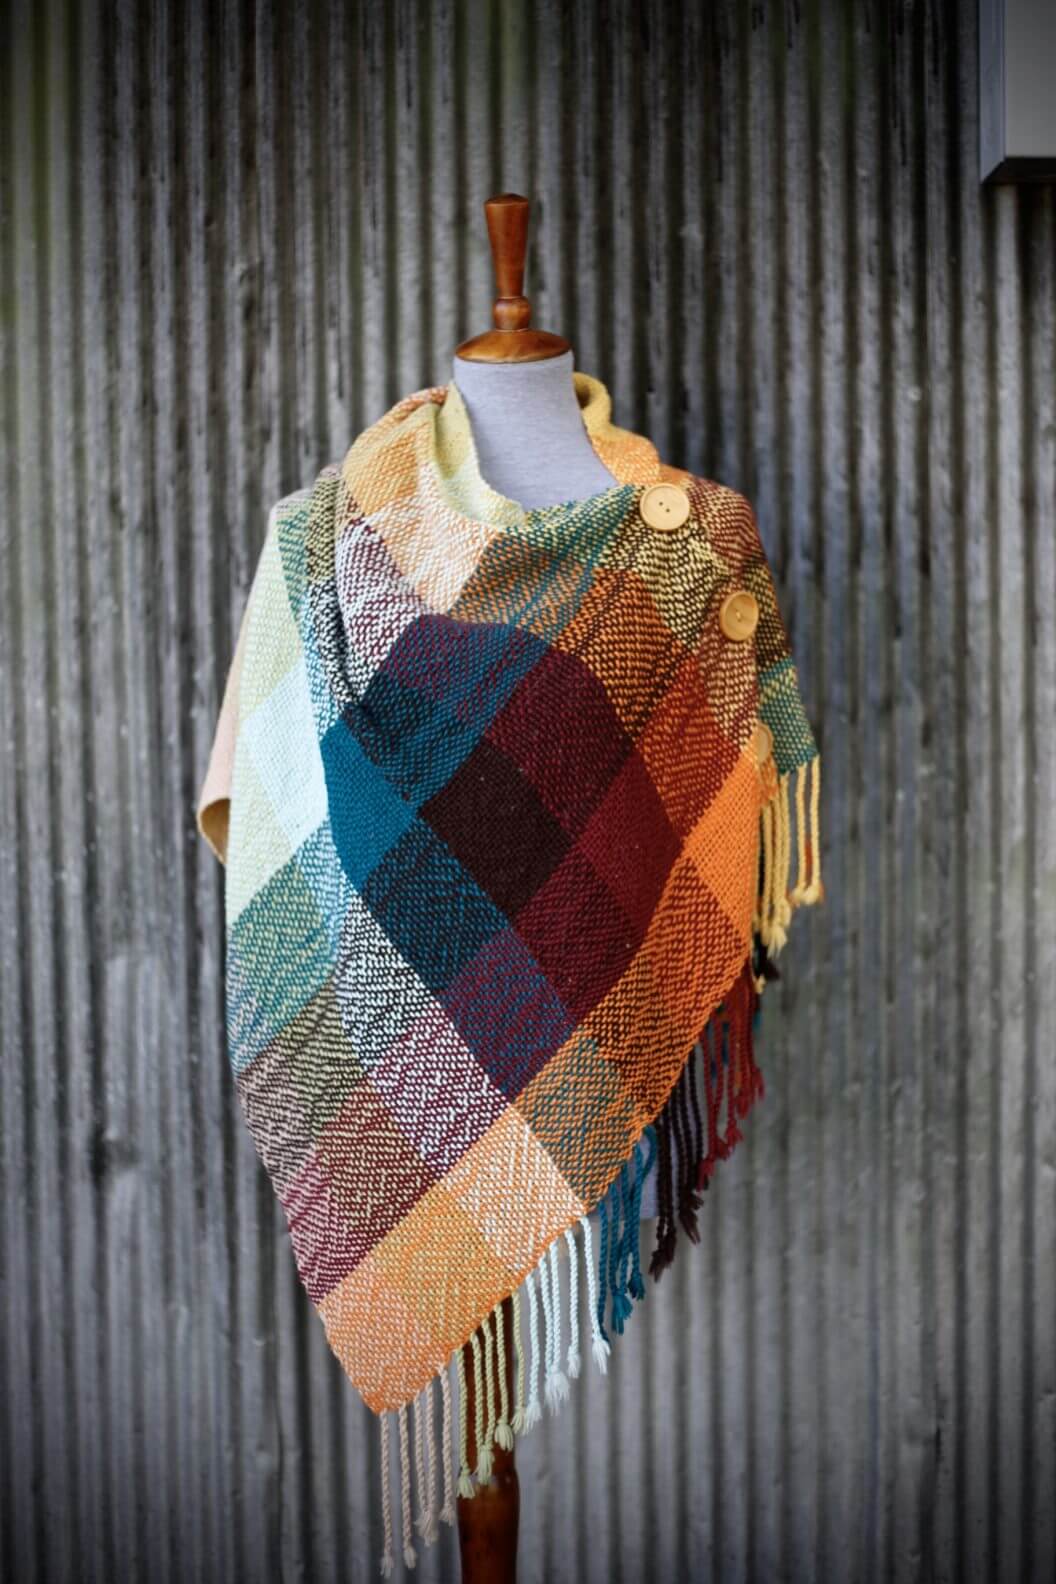
This easy Double Heddle project is just the thing to welcome Fall. With open sides and cotton yarn, it’s enough to ward of a light chill, yet not so heavy that it can’t be warn indoors. And it makes a great project for those wanting to try the double heddles for the first time!
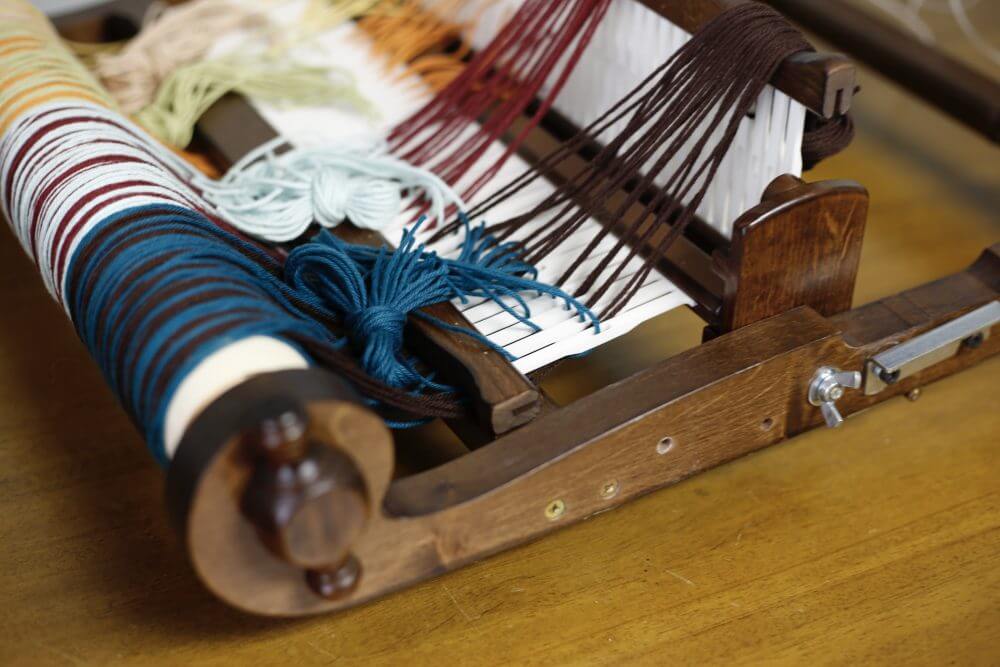
For this project you will need a 16″ rigid heddle loom, equipped with two 5 dent heddles.
We’re using the Kromski Harp Forte in Walnut finish with the new Double Heddle Blocks.
You will also need 8 balls of worsted weight cotton in different colors. We used just over half of a 100 gram ball for each color. Find 3 decorative buttons and a needle to sew them in place to complete the poncho.
Because we are using the new Double Heddle Block, we need to move the rear heddle out of the way after it is warped in order to comfortably reach the front heddle for warping. Tie off all of the ends for safety. Then simply remove the heddle from the block and lay the bottom of the heddle on the ledge of the ‘neutral position’ and the top along the cross bar of the loom.
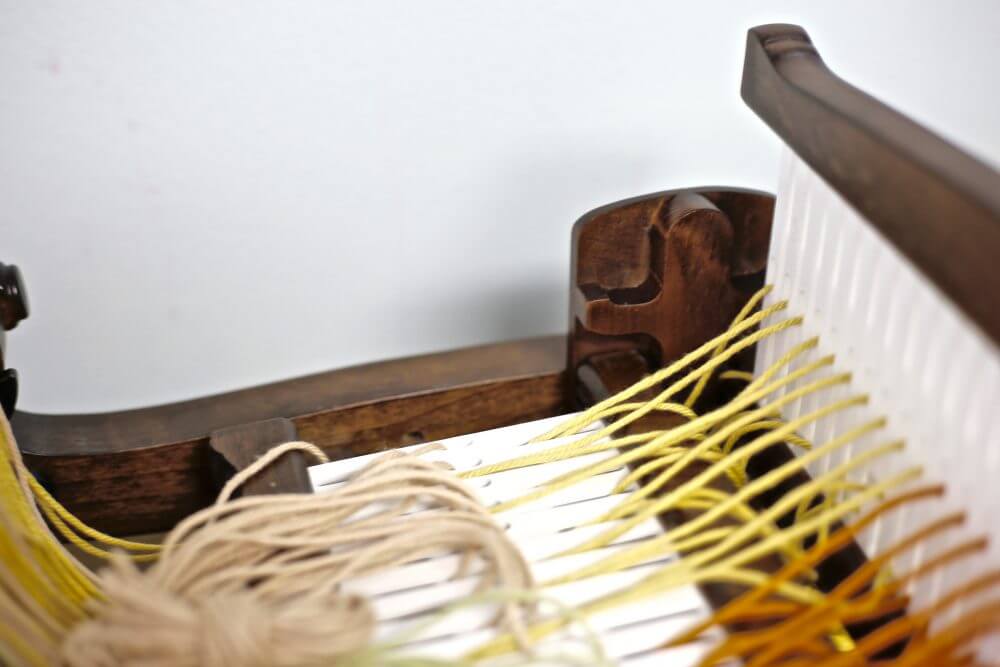
This will allow you to set the bottom threads aside while you draw the top layer through the front heddle.
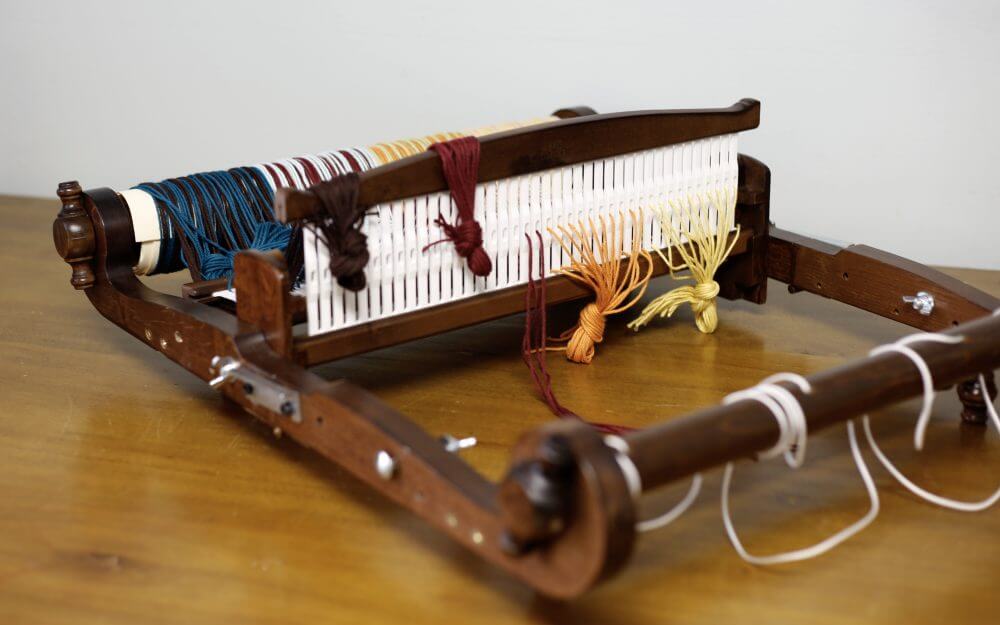
Once that is completed, untie the remaining yarn, one section at a time and finish warping as directed in the previous post.
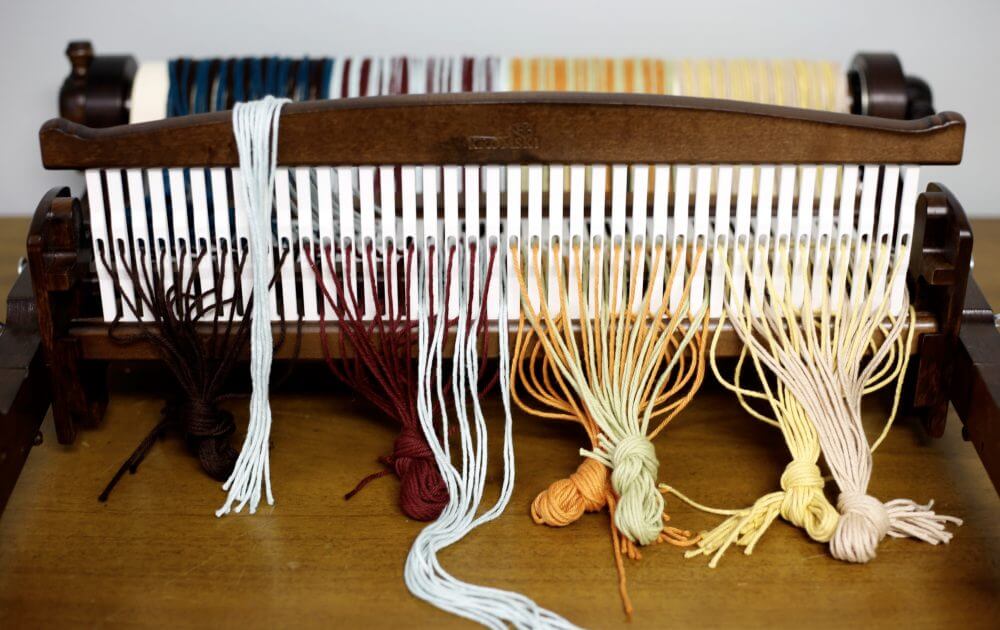
Weave 30 passes of each color to create the plaid effect. After 12 color changes, your fabric should be about 65″ long. Remove it from the loom and twist the fringe into groups of four. This will not only give the poncho a nice decorative edge, but will also prevent the fabric from unweaving.
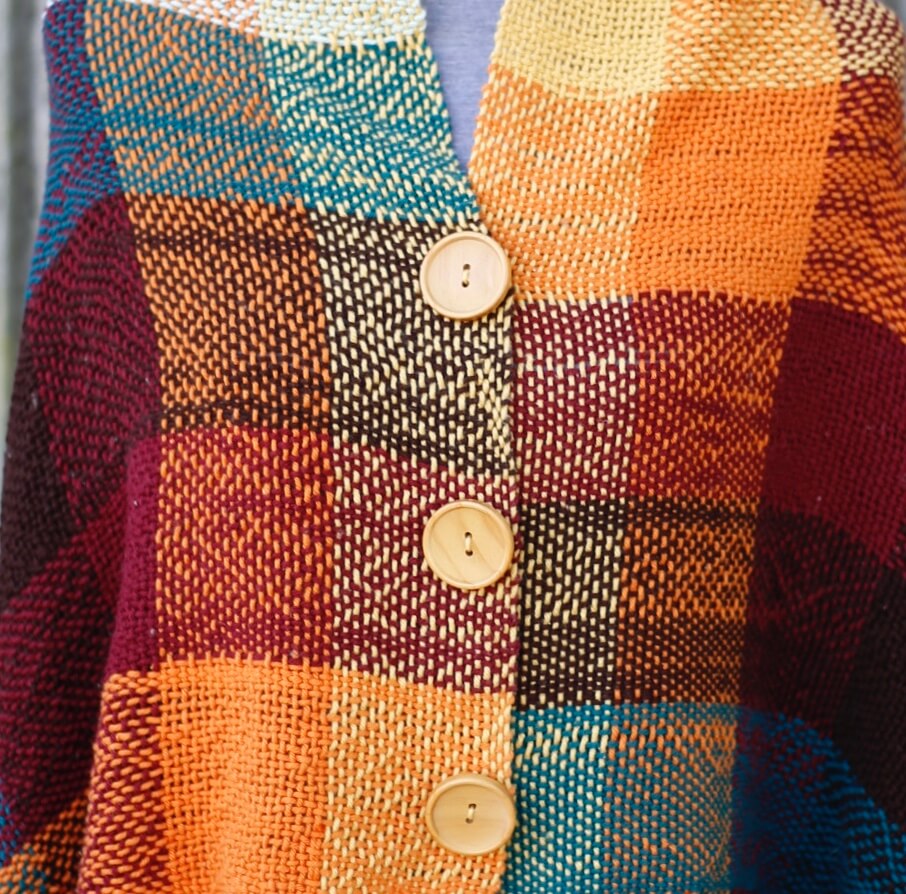
Machine wash in hot water and dry on the high setting of the dryer. This will cause the cotton fibers to shrink and fluff up making this a wonderful soft fabric. It finished at 48″ long and 27″ wide.
To create the poncho, fold the fabric in half length wise. Overlap the edges just enough to sew on the buttons. I’ve sewed these on with the first button 2″ from the end and set the others 4 1/2″ apart. This gives me plenty of room for my head, yet still keeps it snugly on my shoulders. You may want to adjust the placement to better suit yourself.
Now all that’s left is to decide how you want to wear it! Buttons on the front?

Or off to the sied

You can adjust the size buy choosing either the 24″ or 32″ loom. Then determine the length and plan for about 15% shrinkage.