Weekend Winter Hat
If you’re like most of us, you are now realizing just how quickly the holidays are approaching! Here is a super quick project that can easily be done in just one weekend.
Let’s start with the yarn. Our hats are made with a bulky spun Polish Merino wool. This was spun on the Kromski Sonata. The finished yarn is 2 ply, 6 WPI. The wonderfully thick yarn makes this a quick spin and a quick knit. A perfect project for the busy holiday season.
You will need:
- Contrast/Pom Pom Color: 30–35 yards
- Main Color: Approximately 120 yards (about 4 oz)
- Needles: US size 10, 16″ circular, and US size 10 double-pointed needles
- Notions: Stitch marker, pom pom maker (or cardboard to create 2 1/2″ pom poms)
- Gauge: 14 stitches × 20 rows = 4 inches

For my first hat, I used White Milled Rice #34 and Heather #15. The Heather yarn is slightly thicker, closer to 7 WPI, so the resulting hat turned out just a bit larger, even though I used the same needle size. For me, the 6 WPI yarn produced the perfect fit.

Special Stitches: K1B and P1B
To work the K1B (knit one below), locate the hole below the knit stitch to be worked as designated by the arrow in the photo below.

Insert the right needle into this hole. Be certain that the needle is below the bar from the previous stitch. Knit as usual.

The P1B (purl one below) stitch is work in much the same way. Locate the hole below the purl stitch.
Bring the needle through this hole and purl as usual. Again being certain that the needle is below the bar from the previous stitch.

THE PATTERN:
Cast on 64 sts with main color. Place marker and join in the round.
Work one row of *K1, P1*
Join the contrast color and work the 2 color rib as follows:
- Contrast yarn – *K1B, P1*
- Main color – *K1, P1B*
When changing colors, do not cut the yarn—simply carry it behind your work. Repeat these two rows three times (for a total of six rounds), or until the section measures about 1 1/2 inches.
End with the main color and work one round of K1, P1. Keep the contrast yarn uncut; carry it up the inside of the hat, occasionally wrapping it with the main color to secure it. Make sure the stitch isn’t too tight when picking up the new color.
Continue knitting in the main color for roughly 1 1/2 inches. The width of your stripes is flexible—here’s how the sample hats were done:
Switch to the stripe color and work 3–4 rows, then return to the main color.

After knitting about another inch (approximately 4 1/2 inches from the cast-on row), begin decreasing, adding any additional stripes as desired.
Decrease pattern:
- Row 1: Knit 11, K2tog around (K12 at end).
- Row 2 and all even rows: Knit.
- Row 3: Knit 10, K2tog
- Row 5: Knit 9, K2tog
- Row 7: Knit 8, K2tog
- Row 9: Knit 7, K2tog
- Row 11: Knit 6, K2tog
From Row 12 onward, decrease on every row:
Row 17: K2tog
Row 12: Knit 5, K2tog
Row 13: Knit 4, K2tog
Row 14: Knit 3, K2tog
Row 15: Knit 2, K2tog
Row 16: Knit 1, K2tog
Cut the yarn and draw it through the remaining stitches and pull snug. Burry the yarn inside the hat. Cut the stripe yarn and burry that end as well.
Make a Pom Pom to attach to the top of your hat and that’s it – your finished!

I found these to be quite addictive…
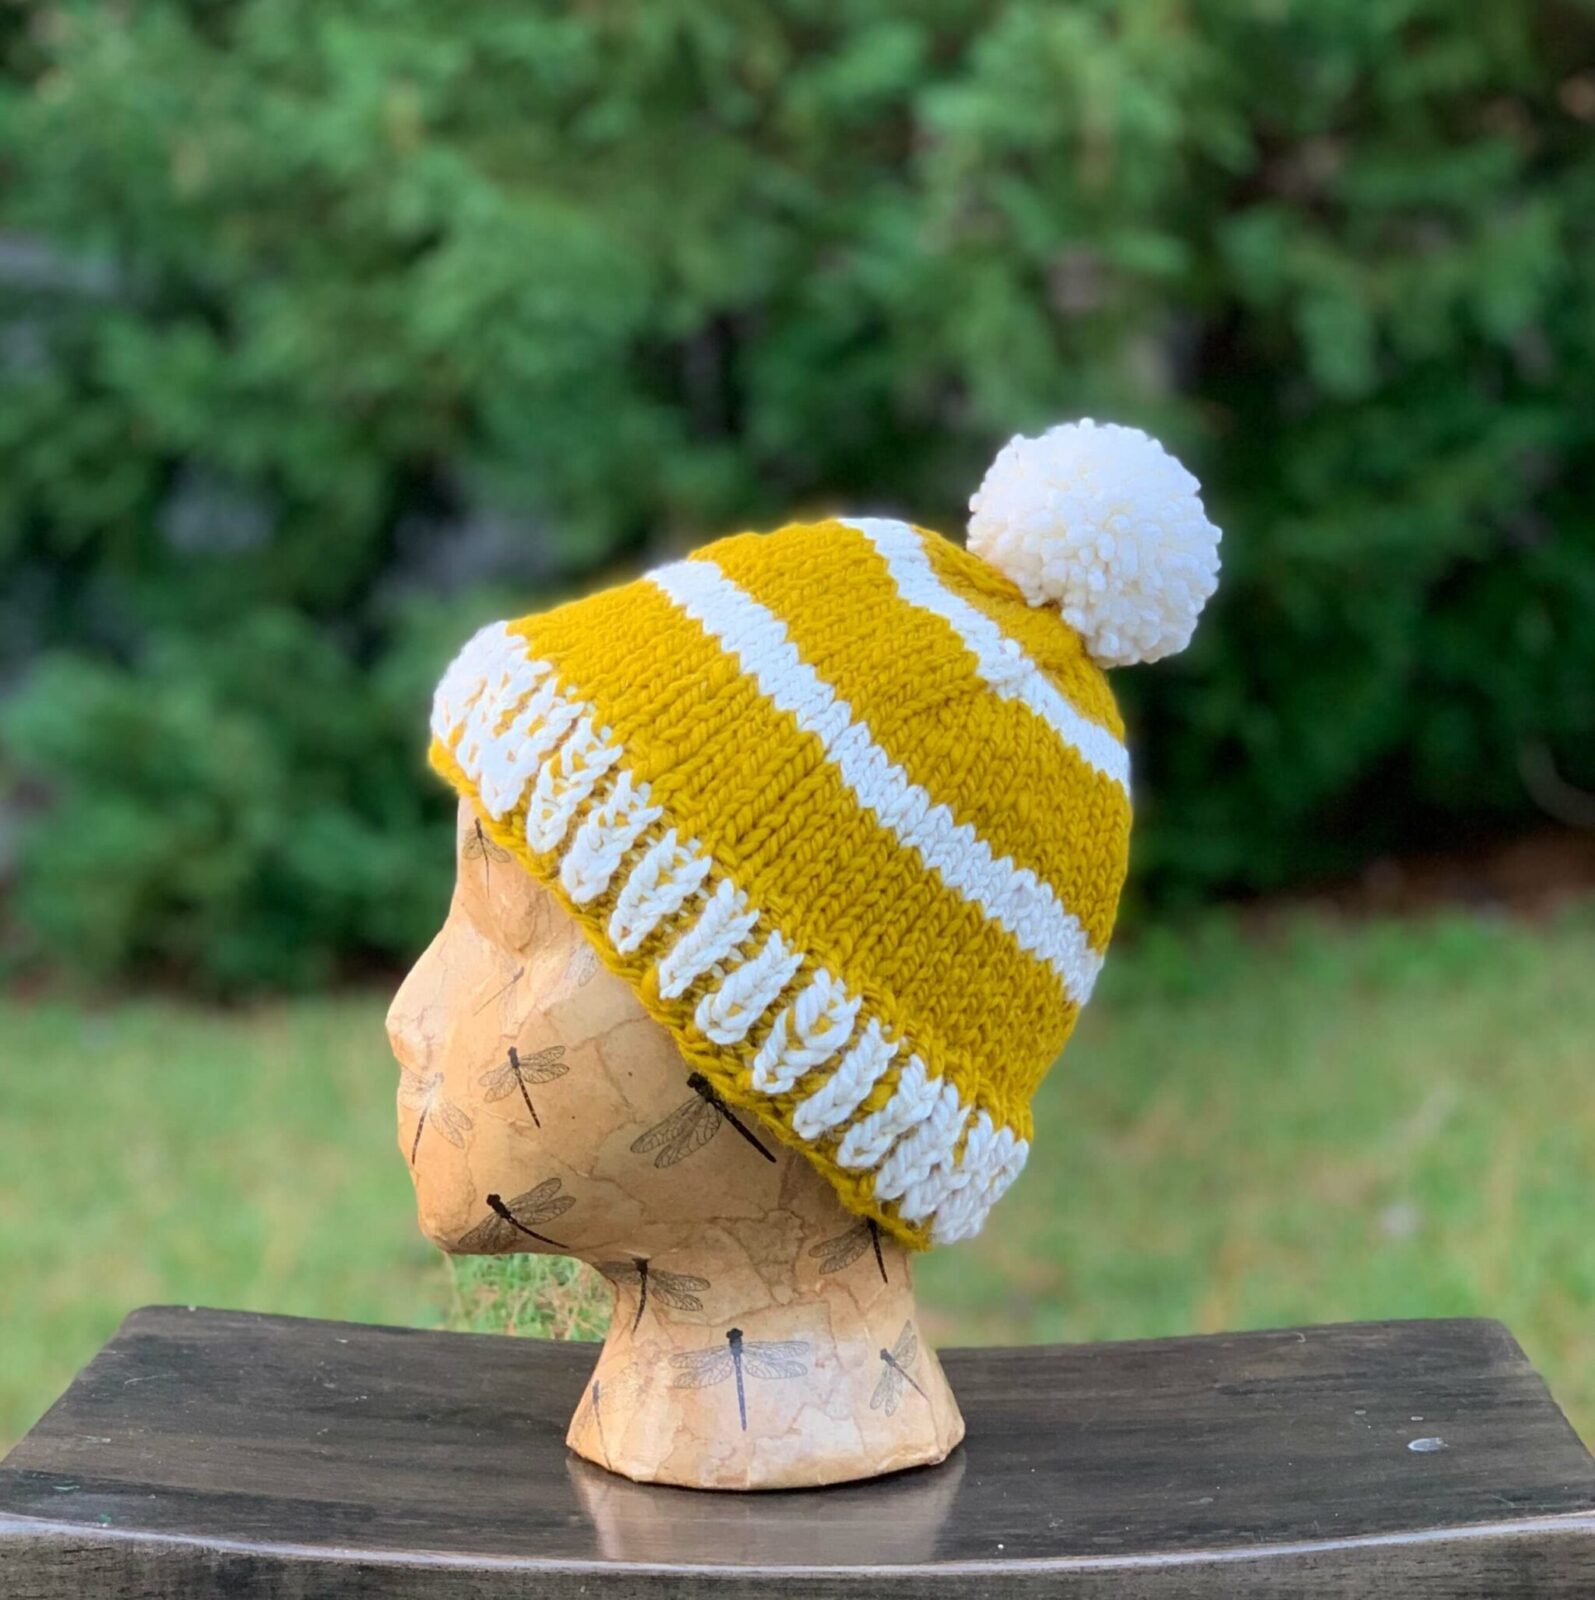
After completing the Heather and White hat, I had a bit of white yarn leftover. I paired it with Gold #3 to knit a White and Gold hat. Once that was finished, there was some gold remaining, so I spun up Lime #32 wool and created a Gold and Green hat.
Now I have a bit of the green left over… I may need to spin some more white!! Maybe I’ll use the Polonaise wheel this time!