Double Weave Part 1 – How to Warp a Second Heddle
There has been a lot of talk lately about weaving with a second heddle. In this post we will explain how to set up to weave a Double Weave project. We will be making a small blanket on a 24″ Harp Forte. Our finished blanket will measure 38″x 40″ after washing . This means it will be about 45″ x 50″ before shrinking, while still on the loom. How is this possible on a loom that’s only 24″ wide?? The process is called Double Weave. It’s not as difficult as you might imagine. The cloth will be woven with a folded edge so that once the blanket it removed, we can unfold it and it will be twice the width of the warped area.
It should be noted that this may not be a good choice for the 1st time weaver. These instructions assume the reader understands and knows how to warp and weave on the rigid heddle loom. If you are looking for a good first project, take a look at these posts: How to Warp the Kromski Harp Forte and Weaving your 1st Scarf.
To create a double weave cloth, you will need a Second Heddle Block Set and a second Heddle the same size as the first one.
Our project today is a small cotton blanket, suitable for cool summer evenings or as a baby blanket. For this project you will need:
- 24″ Harp Forte Loom
- Two 5 dent heddles.
- 6 different colors of yarn and some white for part of the weft (120 yards each of a worsted weight cotton).
I highly recommend that you chose contrasting colors for the top and bottom layer of the warp. This will help you to differentiate between layers as you weave, thus reducing the risk of error. In this instance, we have 6 colors. They translate to 3 color blocks on the bottom layer and 3 on the top layer.
You are probably already wondering what I mean by ‘layers’. Lets 1st take a look at the color plan for our blanket.

I’ve made a very simple sketch of the lay out for my warp. Reading from right to left we have light pink, bright pink, light blue, 40 ends each (20 loops using a direct warp). These 120 threads will fill the width of the loom. Then you will notice a line marked ‘fold’. This fold line represents where the the left side of the loom will be. Imagine that the paper is folded in half along that line. The dark blue now rests above the light blue. The yellow is above the bright pink and the green is above the light pink, thus forming 2 layers of weaving.
Set the warping peg at a distance of 65″ from the rear apron rod. Begin warping the bottom layer (the right side of the plan drawing), just as you would do normally with any project. This heddle will be in the rear heddle block. Warp 40 ends (20 slots) of each color. The last slot on the left will be the outer edge of the heddle.

Leave the threads in the slots and around the warping peg. Next, add the top layer. Remember for this plan we want the green above the light pink, so we will begin with green and work across to the dark blue. This project assumes that you are using the direct warping method shown in How to Warp the Kromski Harp Forte blog post. Attach the top warp to the back dowel rod the same way that you attached the 1st one, bringing the new yarn over the dowel alongside each bottom layer thread. Bring each loop through the slots just as if the bottom layer was not there.

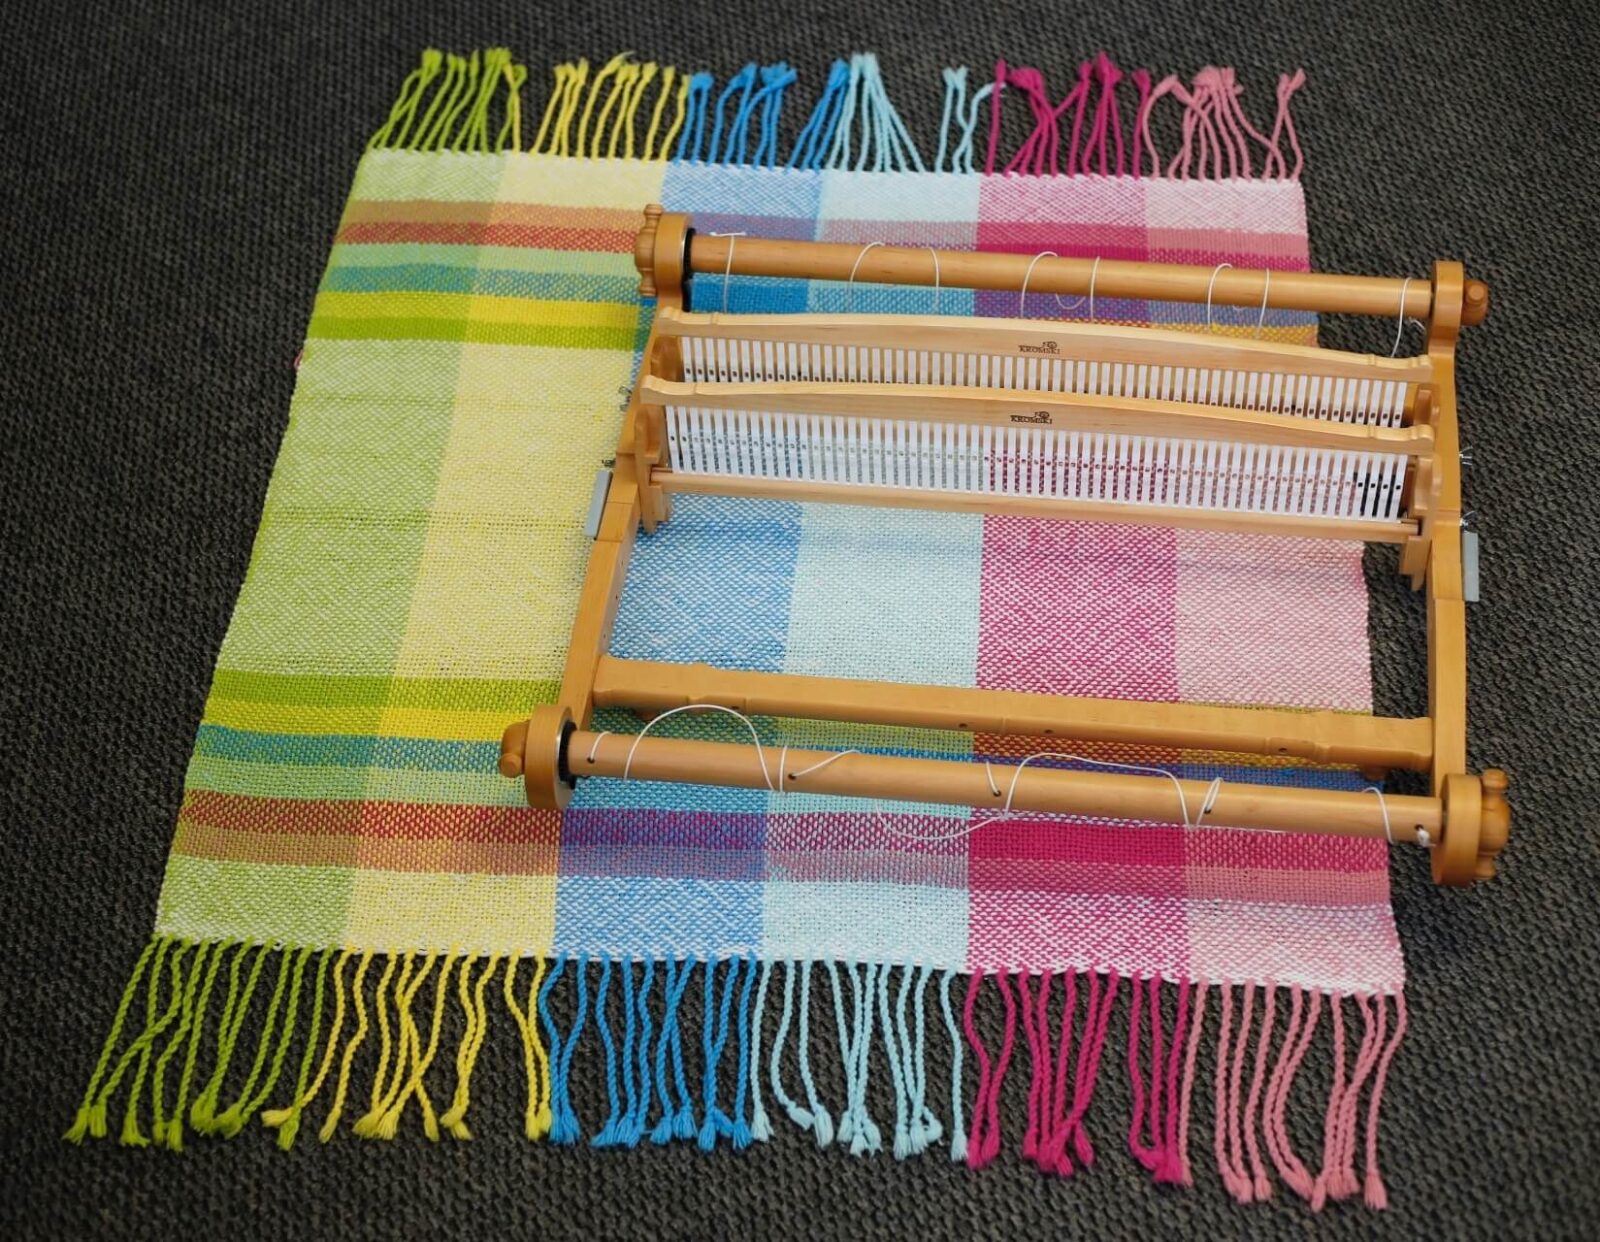
Once all of the slots are filled, wind the warp onto the back beam. Your warp should look like the photo below. Notice there are 4 threads in each slot, 2 of each color according to the plan. It isn’t necessary to tie them into bundles, but if you live with small children or pets, it may be advisable to tie them if you need to walk away for a bit before moving on.

Using the top layer of threads, bring one through the hole to the right of the slot and leave one in the slot. This is exactly how you would warp these threads if the bottom layer was not there.

In this first section there are now 2 pink(bottom) and one green(top) thread in the slot and one green(top) thread in the hole. Continue across the width of the loom.

Before starting on the front heddle, it’s helpful to bring the yarns still in the slots up and lay them over the back heddle to make them more accessible.


Now add the second heddle into the front heddle block. Bring the yarn from the holes in the back heddle through the slot to the right of the corresponding hole in the front heddle. Notice how the edge is again used as a slot.

Take the second top thread from the slot in the back heddle and place it into the same slot as the other top thread (this is the corresponding slot).

There are now 2 top threads in each slot in the front and 2 bottom threads in each slot in the back heddle.
Pick up the 2 threads from the back slots and place one in the hole to the right of the corresponding slot in the front and one in the slot to the left of that hole.


Notice there will be 2 threads on the the far right and one on the far left of the front heddle. Remember these spots count as a slot and in a warp that does not go all the way across the loom, would be resting in slots.

All that is left to do is tie the warp onto the front apron rod as done with any project and you are ready to weave! This may all seem rather daunting, but if you work along while following the steps, you should find it to be much easier than it first appears.
Read the next post, Double Weave Part 2 – Weaving the Blanket, to learn the next step and begin making the blanket.