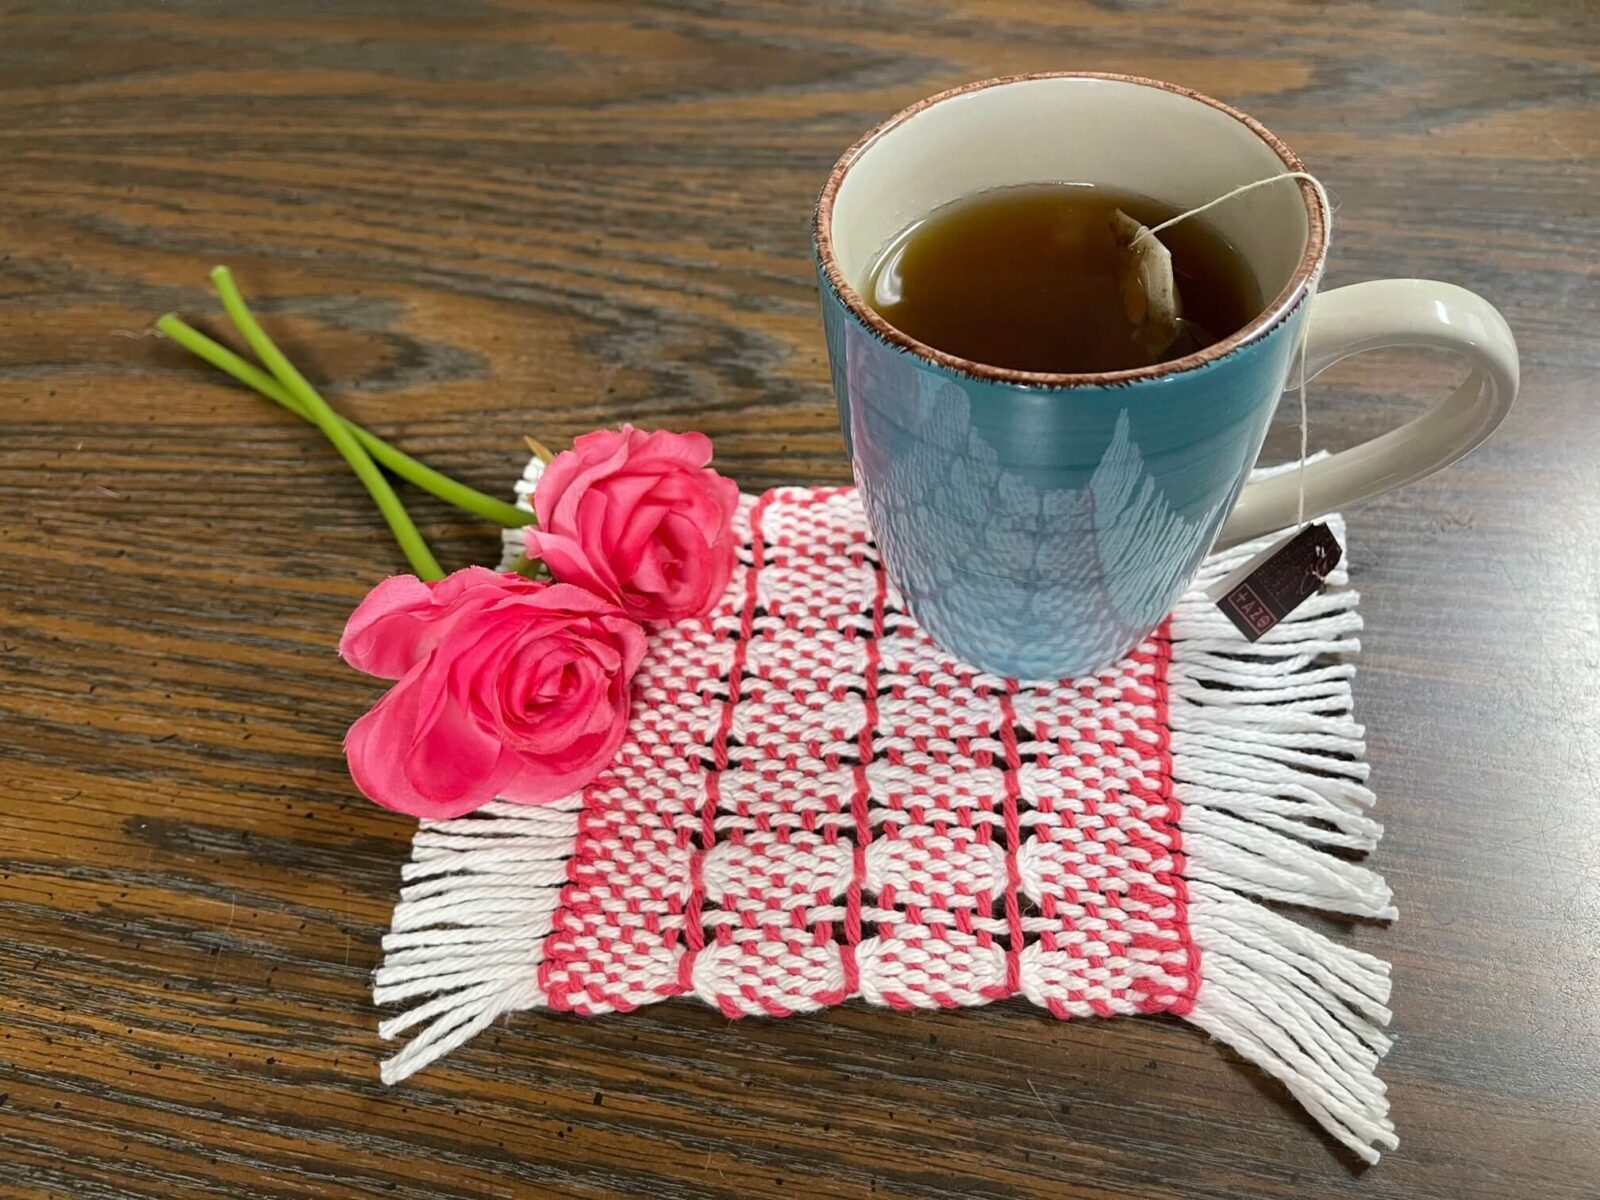
May Mug Rug
Step 1: Prepare the Weft
- Choose your first “flower” color for the weft.
- Wrap your shuttle and leave a long tail (about 24”) for the hem stitch at the beginning.
- Weave 6 passes of plain weave with this weft.
Step 2: Hem Stitch
- After the 6 passes, perform your first hem stitch along the starting edge:
- Pull the tail up through the first loop of the warp, over the edge, and back under the same warp thread.
- Repeat along the edge to secure the weft and keep the selvage neat.
Step 3: Begin the Brooks Bouquet Design
- Switch to your next color for the “flowers.”
- Use plain weave passes, but follow your chosen pattern to place colors where the blooms should appear.
- You can do 2–4 passes per color for small flowers, adjusting the number based on your desired flower size.
Step 4: Edges
- Carry the weft up the sides, wrapping it around the previous edge yarn to maintain a neat selvage.
- Avoid pulling tightly; you want the edges even without puckering.
Step 5: Repeat
Add a hem stitch at the end before cutting off the yarn.
Alternate colors as desired to create a bouquet effect across the rug.
If you need help, here is a hemstitch tutorial. http://kromskina.com/hem-stitch-for-weaving/
Raise the heddle to the Up position.
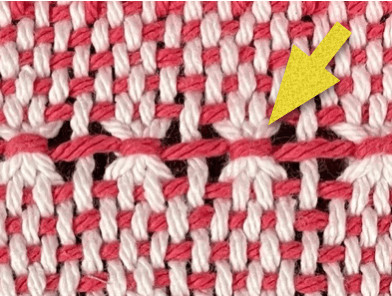
Wrap the shuttle around 4 warp threads as follows: insert the shuttle into the shed. Pass it under 4 top threads, then bring it out between the 4th and 5th thread to the top of the warp. Wrap these 4 threads with the shuttle and return it to the same shed.
Next, pass the shuttle under the previous 4 threads plus the next 4 threads (making 8 in total) and bring it out between the 8th and 9th threads to the top of the weaving. Notice how the first 4 threads cluster together when the weft is pulled tight. You have just created your first bouquet!
DO NOT CHANGE THE SHED!
Next, insert the shuttle into the shed just after the previous bouquet, before the second set of 4 threads—essentially, between threads 4 and 5. Make sure to stay within the shed and avoid going under the lower threads.
Move the shuttle to the left, passing under the 4 threads just wrapped and the next 3 top threads (7 threads total). Bring it back up. At this point, you have two bouquets of 4 threads each and one bouquet of 3 threads ready to be wrapped.
Continue this process by wrapping one group at a time as you prepare for the next, pulling each wrap snugly but don’t worry too much yet—we’ll adjust the tension once the entire row is complete.
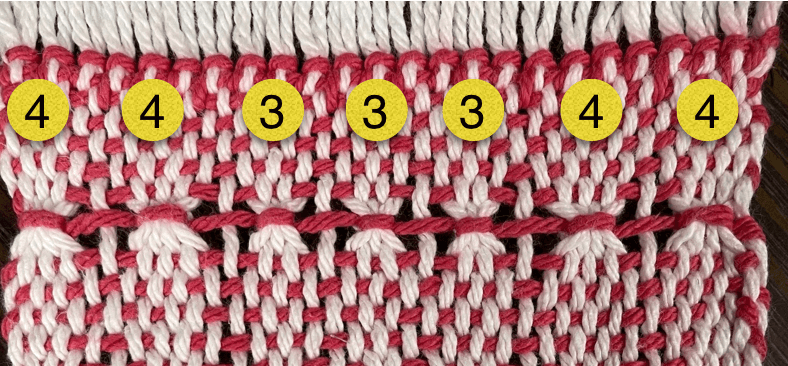
The sequence of groups will be 4, 4, 3, 3, 3, 4, 4.
Follow this pattern: wrap a group of 3 threads, then go under the next 3 and back up (6 threads total). Repeat once more. For the next bouquet, wrap 3 threads, then go under the next 4 threads (7 total) before bringing the shuttle back up. Repeat under the previously wrapped bouquet and the next 4 threads. Finally, wrap the last 4 threads and exit the shed.
Once the row is complete, make sure all the bouquets are wrapped snugly. Lower the heddle and weave 5 rows of plain weave.
Repeat this process two more times to create a total of 3 bouquet rows. Finish with 6 rows of plain weave and complete the hem stitching.
For video assistance please visit https://www.youtube.com/channel/UCr_0xa80mEpfaw8GmV8bptw