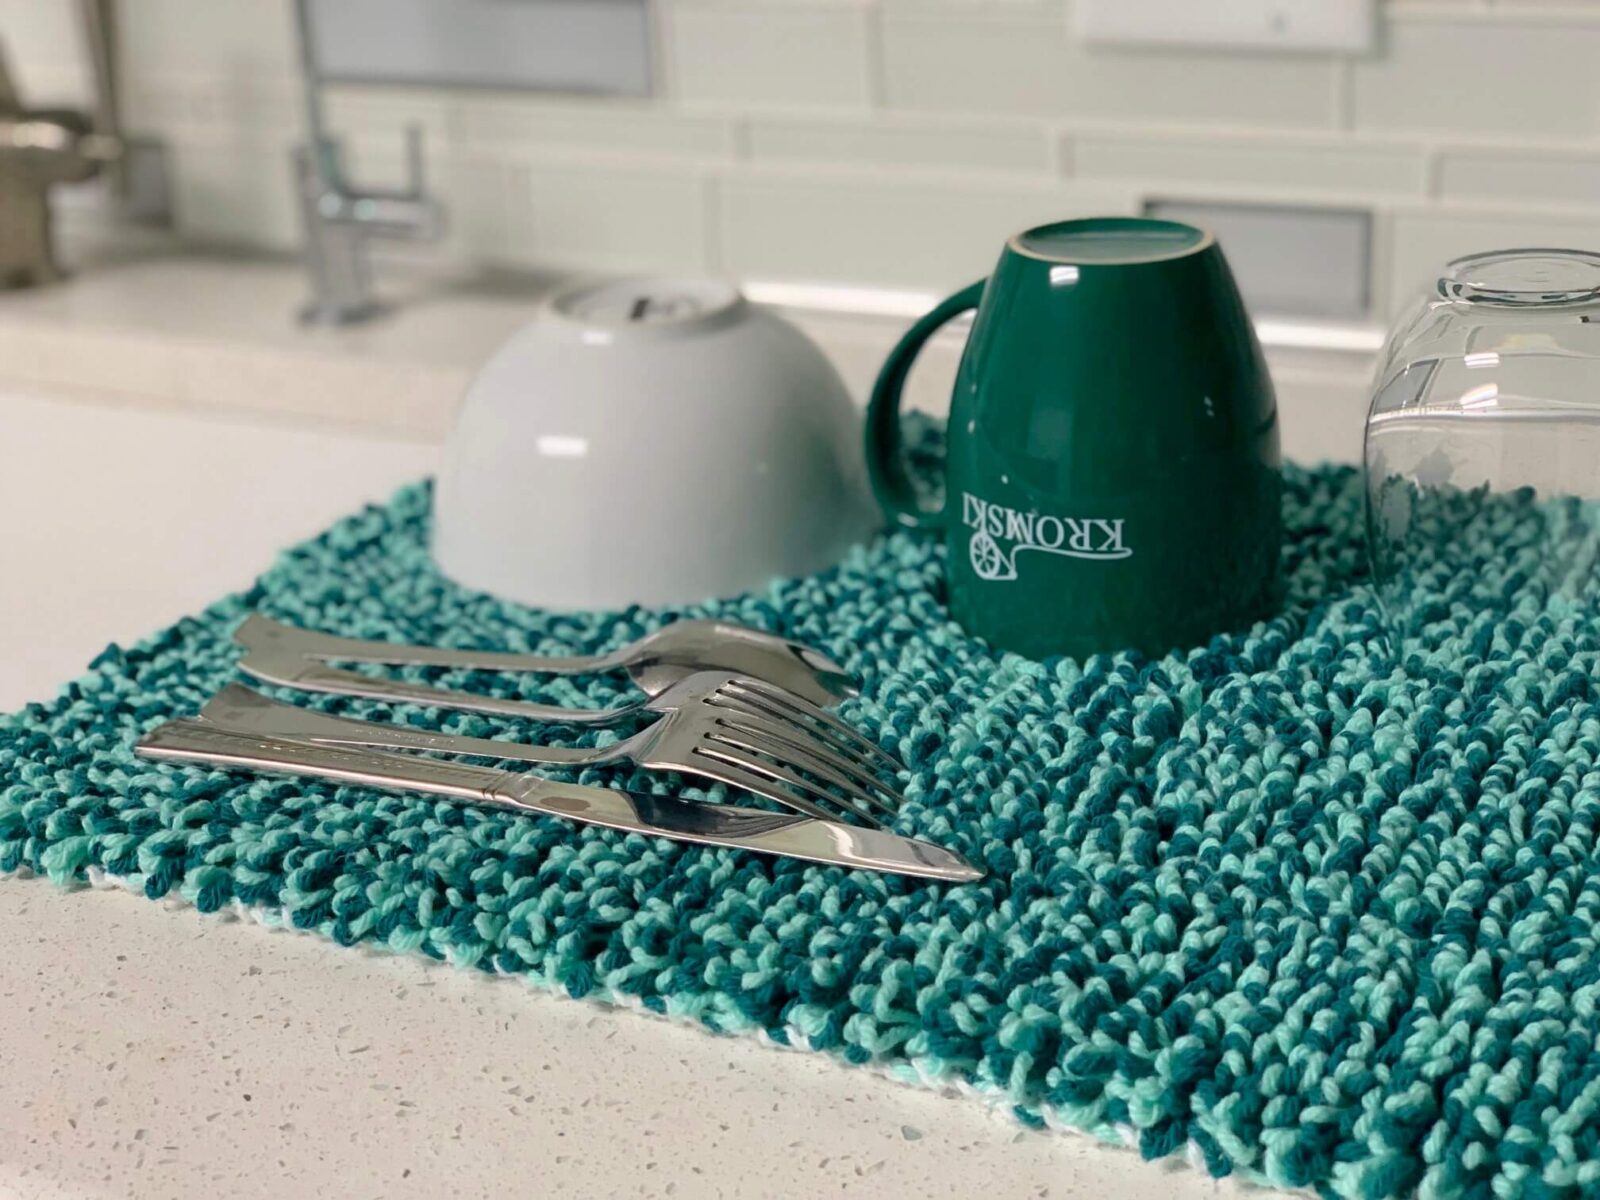
Loop Pile Towels
Weave a thick plush towel on your rigid heddle loom – it’s easier than you may think!
Take a look at this quick video to see the technique in action. https://youtu.be/MZtZLIoDBDA
For this project, we used the 16″ Presto loom with an 8-dent heddle and worsted weight cotton yarn. You’ll also need a dowel long enough to span the full width of the weaving area. The dowel included with your loom works perfectly, though here we used a 24″ dowel borrowed from a Harp Forte. You’ll also need two shuttles for this project.
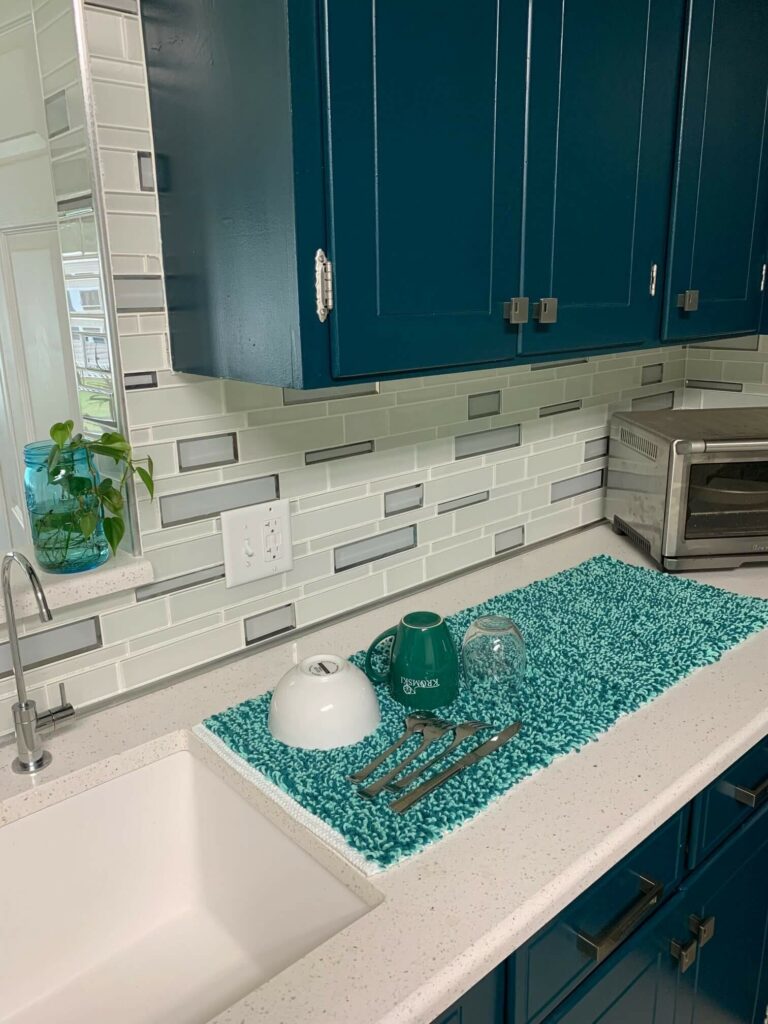
Our Aqua dish towel measured 40″ long, covering the full width of the heddle. After wet finishing, it finished at 14″ × 36″. We used white for the warp and background and held together light and dark Aqua yarns for the loops. A smaller, single-shuttle mat using the same color for both loops and background is also shown below.
Warping: Warp the loom with white worsted weight cotton dish cloth yarn to a length of 80″, using the full 16″ width of the heddle.
Shuttle setup:
- Fill one shuttle with the loop yarns, holding both Aqua colors together. For this towel, we used two balls of 200 yards each of the loop colors.
- Fill the second shuttle with white and weave 20 rows using a standard woven or paper header. This will form the hem edge.
Loop pile sequence:
Pass the main color shuttle through the shed. Adjust the edges but do not press the heddle forward; leave it in the “up” or “down” position. Place the dowel on top of the warp, and starting between the second space, pull up the weft and lay it over the dowel. Continue this across the width, stopping just before the last space to maintain an even edge.
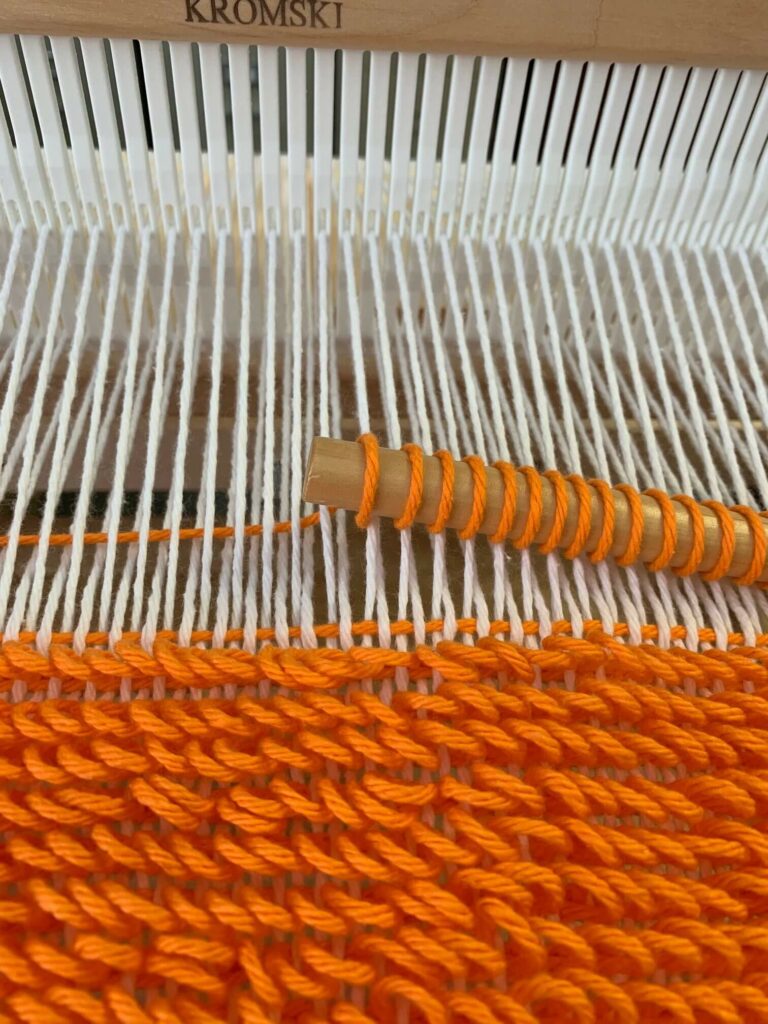
With the dowel still in place, press the heddle forward. Change the shed and pass the background color through. Press the heddle forward again, this time angled slightly, with the lower edge leaning toward the front.
Remove the dowel while keeping the heddle pressed forward. This angled position helps prevent the loops from pushing out the bottom of the weave. Once the dowel is removed, press the heddle forward again, change the shed, and lock the loops in place with another pass of the background color.
Continue weaving another row of loops. Your pattern should form a 3-row repeat: loops, plain weave, plain weave—then repeat.
Make certain to wrap the yarn as it is carried up the sides. This will keep the edges nice and neat.
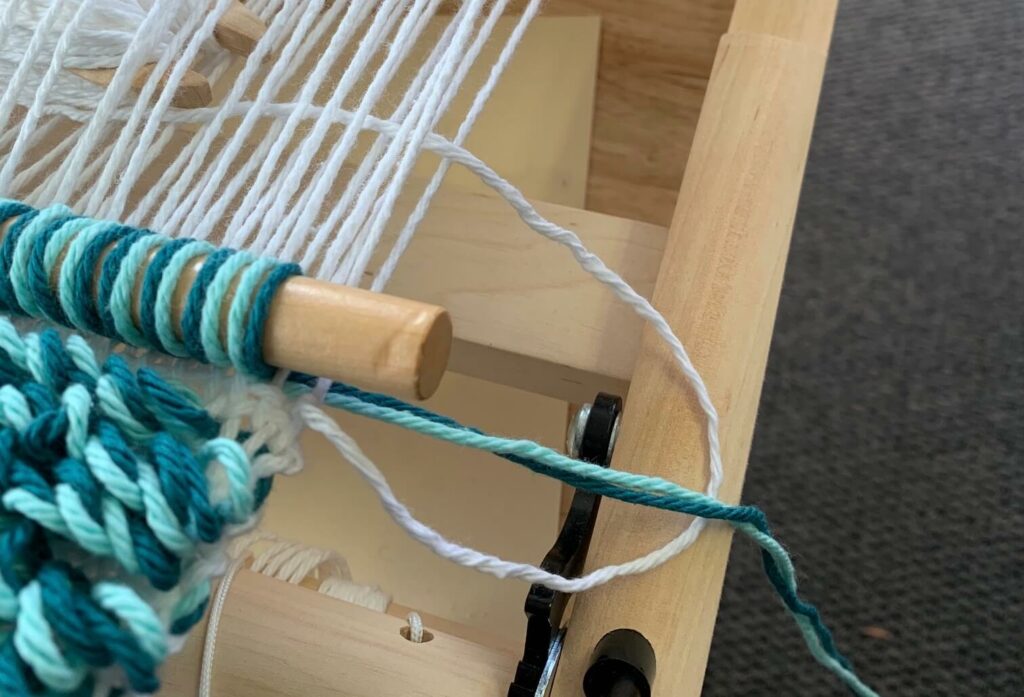
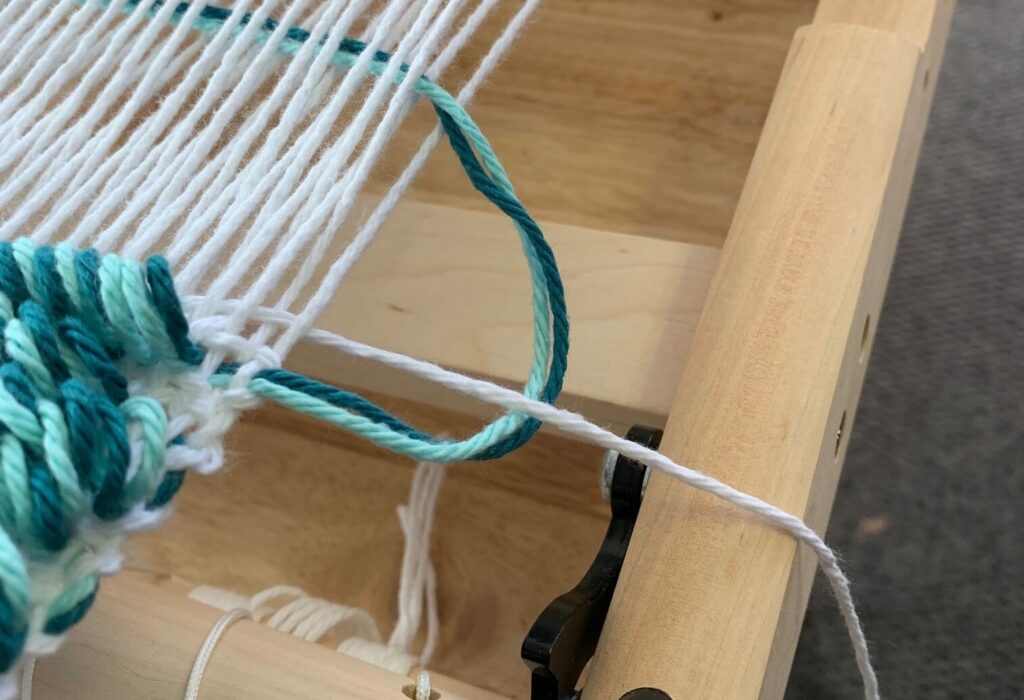
Continue weaving until all of the main color yarn is used. Finish with 20 rows of white for the hem, followed by some waste yarn.
Remove the piece from the loom and secure the ends of the waste yarn by sewing several rows of zigzag stitches on a sewing machine to prevent unraveling. Trim the excess yarn, leaving a small margin so you don’t cut too close to the stitching.
Wash in hot water and dry thoroughly on high heat. This will shrink the cotton and tighten the weave, ensuring that the loops stay securely in place.
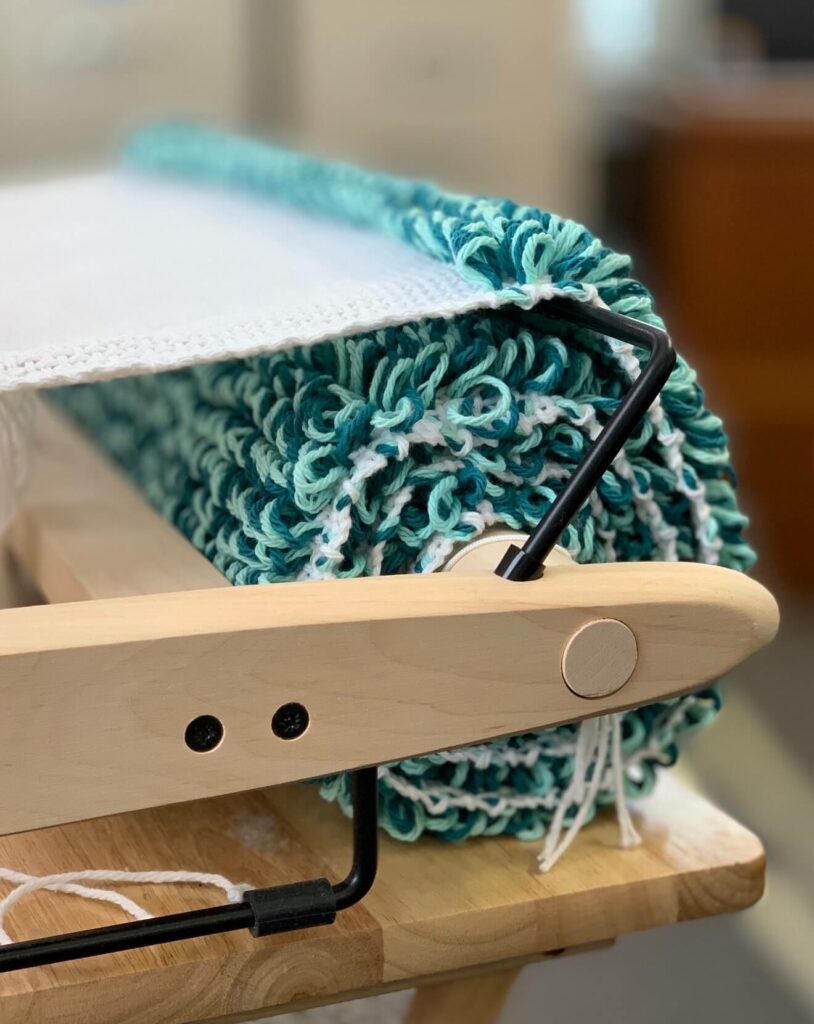
Trim the ends so that the white is 2″ wide. Fold over and hem, either by hand or machine. Because the weave is so full on the top, the hem lays better when folded towards the top rather than the underside as is usually done on a towel.
This makes a lovely absorbent dish drying mat.
My dog absolutely loves the small water mat I wove for him. I used the same loop pile method described above, but simplified it by using orange yarn on a single shuttle for both the main color and the background.
Since only one shuttle was used, the pile isn’t as thick as the larger towel, but it works perfectly as a durable little matfor daily use.