How to Warp the Kromski Harp Forte
Warping your Rigid Heddle Loom for the first time can be a daunting experience. But it doesn’t need to be. It’s actually quite easy.
Let us walk you through the process, step by step.
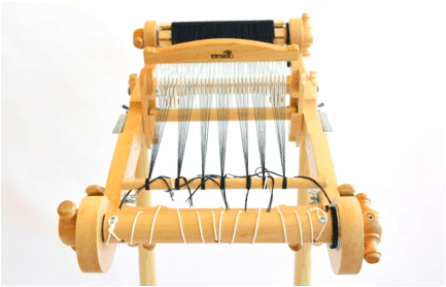
For this tutorial, we will be using an 8” Kromski Harpe Forte and stand.
The warp is the yarn that runs from the front beam to the back beam and is an essential part of all weaving.
The weft is the yarn that runs from left to right through the warp. See Part 2 “Weaving Your 1st Scarf” for more information on weft.
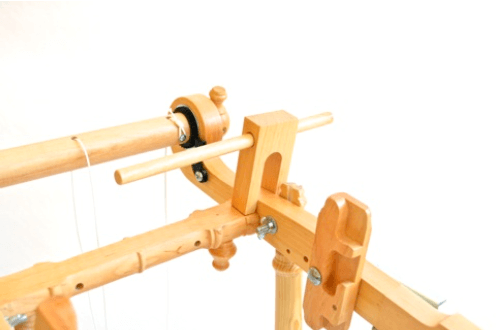
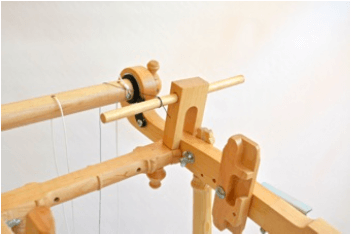
A nice feature to the Kromski Harp Forte is the Warp Helper. Essentially this serves as a very useful 3rd hand. Place the Warp Helper over the side of the loom, behind the heddle. Don’t push it down all the way. It just needs to rest snugly on the side. Slide the Beam Dowel into the hole on the Helper.
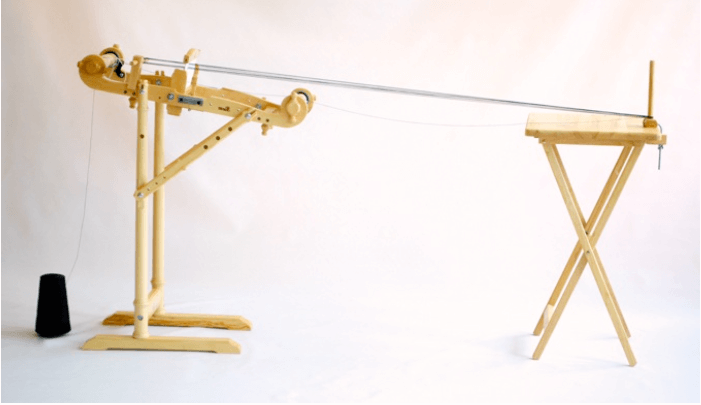
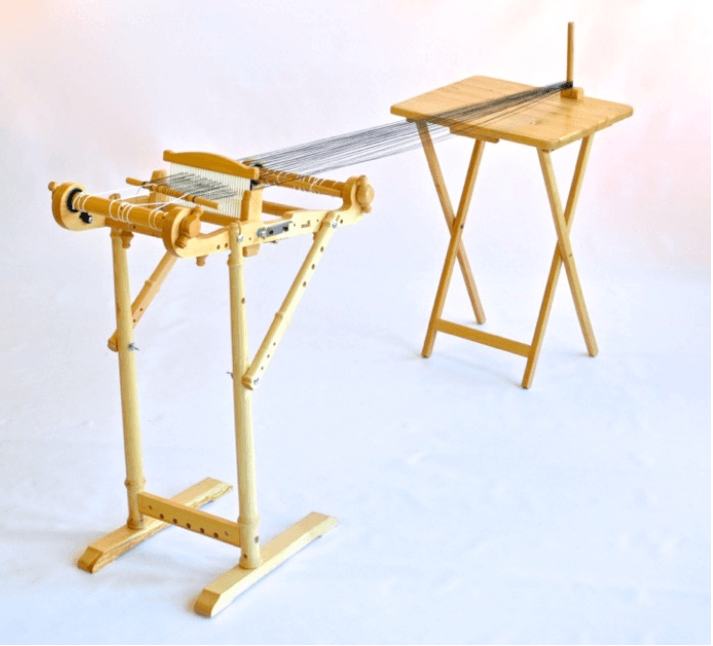
The Harp Forte comes with a built in Warping Board, but for this tutorial, we will be using the included Warping Peg. This method is called “direct warping”.
Clamp the Warping Peg to the opposite side of a sturdy table. The distance between the peg and the dowel beam should be equal to the length of the warp needed for the project. This will need to include approximately 18″ for what is called “loom waste” that will not be used in the actual woven object.
If you do not have a stand, you will need to secure the loom to a table using one of the enclosed clamps. Insert the shorter end into the cross bar and tighten the wooden block under the edge of the table with the wing nut.

Place the warp yarn on the floor behind the loom and tie one end to the dowel using a square knot to secure.
Place the Heddle in the “neutral” (center) position.
Use the Heddle Hook to pull the yarn through the 1st slot in the Heddle, starting from either the left or the right side.
There will be 2 strands running through the slot in one continuous loop. Carry the end of the loop to the warping peg and drop it onto the peg.
Return to the back of the loom and loop the yarn around the dowel. Using the heddle hook, draw it through the next slot and to the warping peg.
Continue in this manner. Place the white dowel strings onto the dowel as you go. This is what attaches the dowel to the loom once the Warp Helper is removed. Work across until there are 2 threads through each slot on the heddle. The number of threads will determine the width of the project. When you have completed the last strand, cut the yarn and tie the end to the dowel.
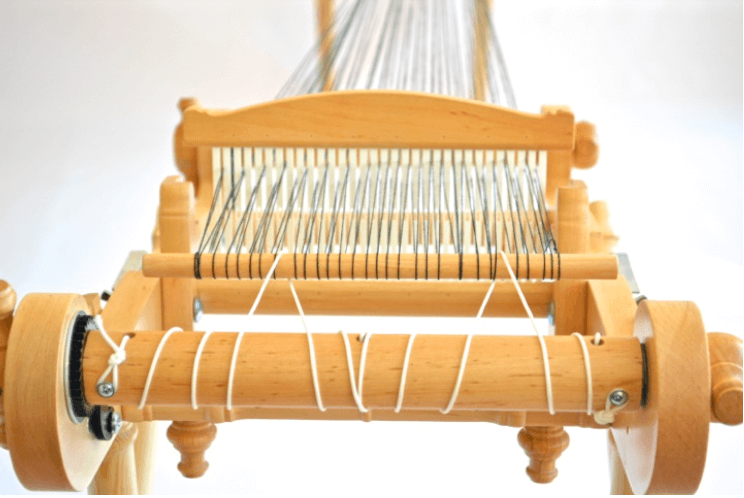
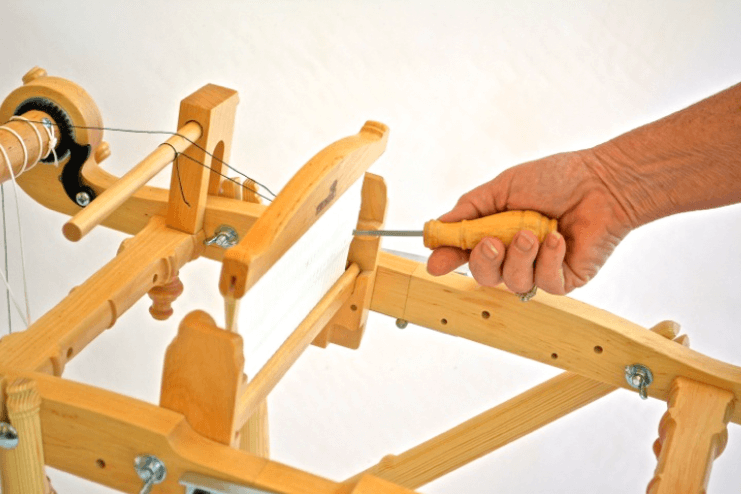
Once all of the warp threads are in place, wind the loom, using the knobs on either side of the back beam, until there is some tension on the warp before removing the dowel from the Warp Helper.
Now it is time to wind all of the warp onto the back beam.
The stand will slide nicely across the floor (you can place a towel under it if you wish). While holding firmly onto the loom (placing your foot on the cross beam on the stand can help) begin winding the warp by rotating the knobs located at the sides of the beam, allowing the loom to slide forward. The stand helps to facilitate this task, but it can still be done if you do not have one. If that is the case for you, it may help to have a second person assisting. Ask them to hold the end of the warp tightly as you wind. The important thing is to get a nice even, snug warp and this is accomplished by putting tension on the yarn as it is wound. It is very important that you do not put too much tension on the beam. Rigid Heddle looms are not designed to be over tensioned. Doing so may cause damage to the beam. Damage caused by over tensioning is not covered under the warranty.
As you turn the knobs, periodically insert an available Warping Stick or heavy paper to keep the surface flat and the tension firm and even.
Continue to wind, adding sticks as you go, until the end of the warp is about 8” to 10” from the heddle.
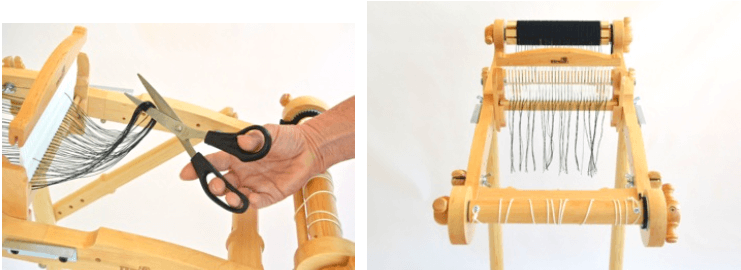
Cut the loops at the end of each set of threads. You are now ready to finish threading the heddle.
Beginning at one end of the heddle, remove one of the 2 threads in the 1st slot and using the heddle hook, draw it through the hole in the heddle next to the same slot.
Continue across the entire heddle.
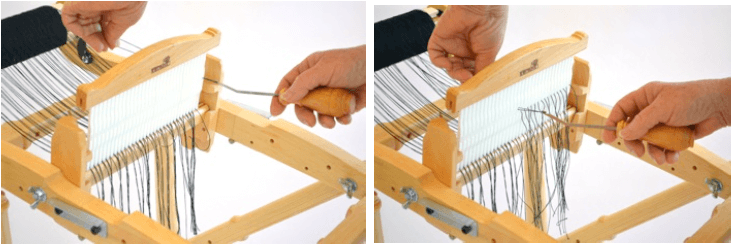
When you have finished, there should be one thread in each slot and one thread in each hole.
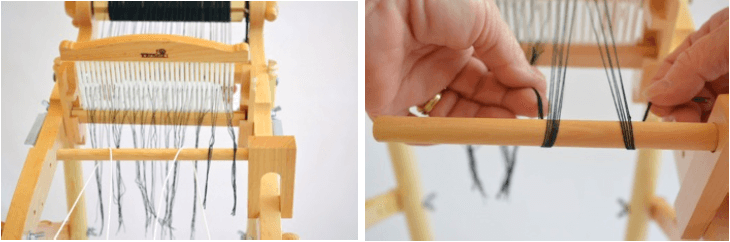
Use the Warp Helper again to assist you in tying the warp onto the front beam dowel. Slide the dowel string onto the dowel.
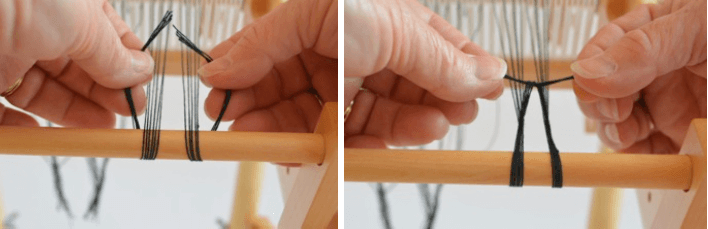
Pick up two small sections of the warp and bring them across the top of the Warp Helper.
Bring them under the dowel to the top, forming what looks like a “W”.
Tie it in a single knot. Next, pick up two sections from the opposite end and repeat the process. Continue to work back and forth, working around the dowel strings as you come to them, until all of the warp strings are tied onto the beam dowel.
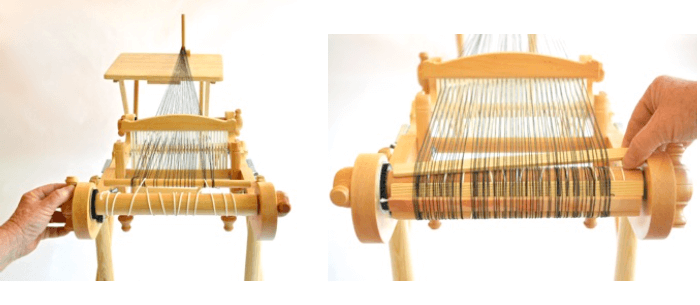
Remove the Warp Helper. Carefully wind the warp forward until it is near the front beam and check to be sure it is even (parallel) with the back beam. Make an adjustment if necessary.
Using the palm of your hand, gently tap the top of the warp between the heddle and the dowel. Test to see that the tension is even. If not, snug up the knots until you no longer feel any soft areas. This may take several passes until it is correct. Once you have a nice even tension, finish the knots into tight square knots to secure.
You are now ready to weave!
Continued in Part 2 of this pattern/tutorial: Weaving Your 1st Scarf!
Here is a pdf version of this tutorial: How to Warp the Harp Forte