March Mug Rug
This month we celebrate St. Patricks Day. Our Mug Rug is designed to (loosely) represent a field of green with scattered coins from the Leprechaun’s Pot of Gold!

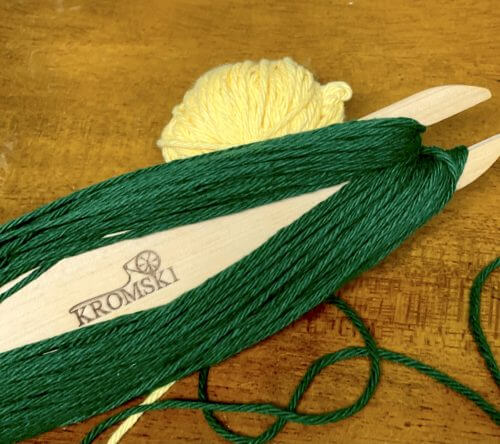
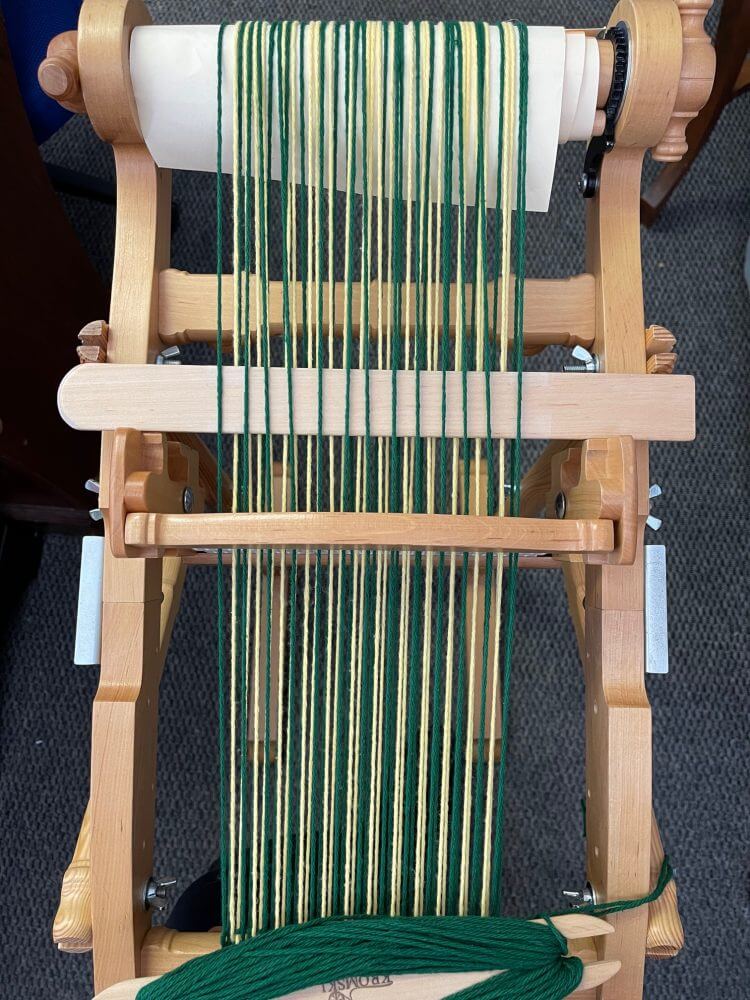
For this project, you’ll be working with two yarn colors. One shade will dominate the design, while the other will serve as the supporting background. I selected green as the primary “field” color and yellow to represent the “gold coins” behind it.
A single ball of worsted-weight cotton is plenty for the main shade, and roughly 50 yards of the secondary color is sufficient to create four mug rugs.
This mug Rug was woven on the Harp Forte. To see all of our looms and accessories click here.
You will need your pick up stick for this pattern.
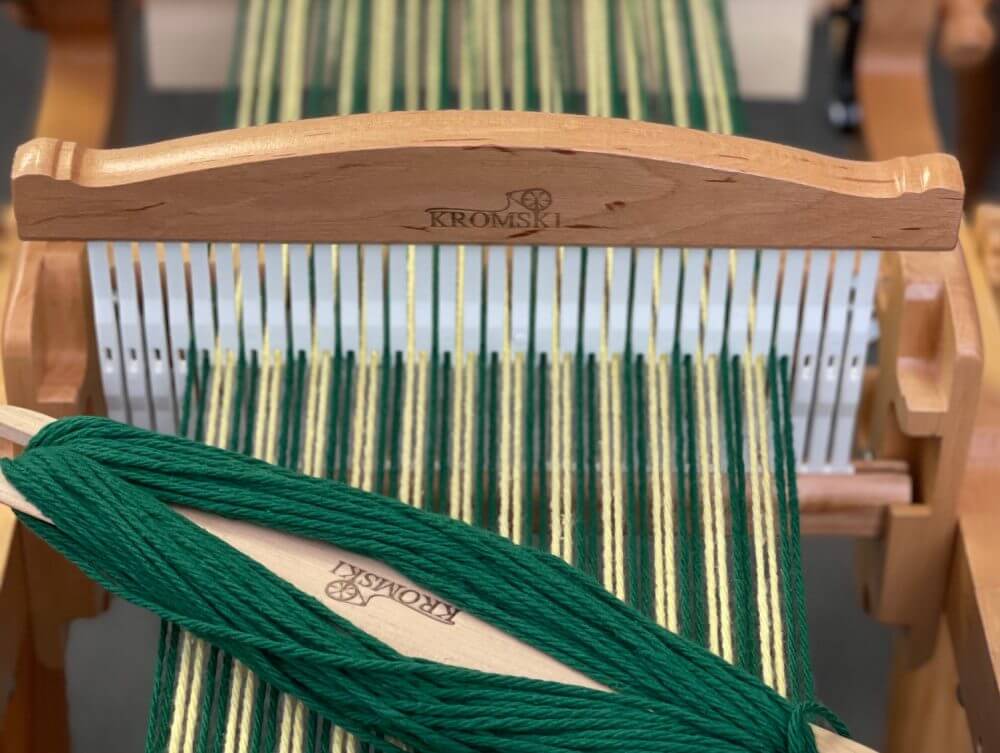
Set up your loom with a warp length of 1.5 yards.
Begin by warping 2 green ends (one loop using the direct-warp method).
Then add 2 yellow ends (again, one loop of direct warp).
Continue alternating these pairs 24 more times until you reach a total of 50 warp ends.
Note: In Step #2 of the weaving draft, you’ll be working over 3 strands at the left edge of the fabric. If that extra thickness seems like it might bother you, you can add one additional green warp end on the far left. This will bring your total to 51 ends.

When you reach Step #2, instead of passing over the edge thread, you’ll need to pass under the extra strand you added (just as you did on the right side in Step #1). This adjustment helps the weft settle more completely along the edge. Be aware, though, that this will create a slightly wider green stripe on the left side compared to the right.
After wet finishing (washing) the piece, I personally didn’t find the difference distracting—the photo makes it look more pronounced than it actually is—so I chose not to include the additional warp end. To my eye, the thicker stripe would have stood out even more.
Wind the warp onto the back beam and thread the heddle so that each green end occupies one slot and one hole, followed by the yellow in the same slot-and-hole sequence all the way across.
Tie onto the front beam and weave an inch or so with some waste yarn.
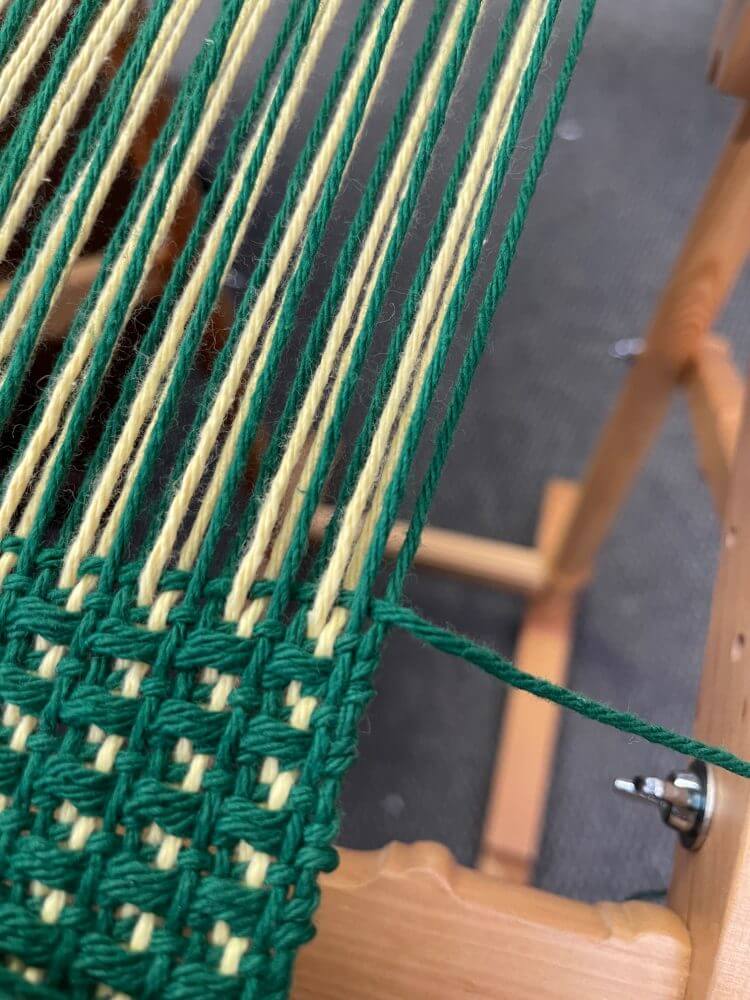
Load your shuttle with only the green yarn.
Start by working four passes of plain weave, finishing with the shuttle resting on the right side of the loom.
Remember to leave a tail long enough for your hem stitching.
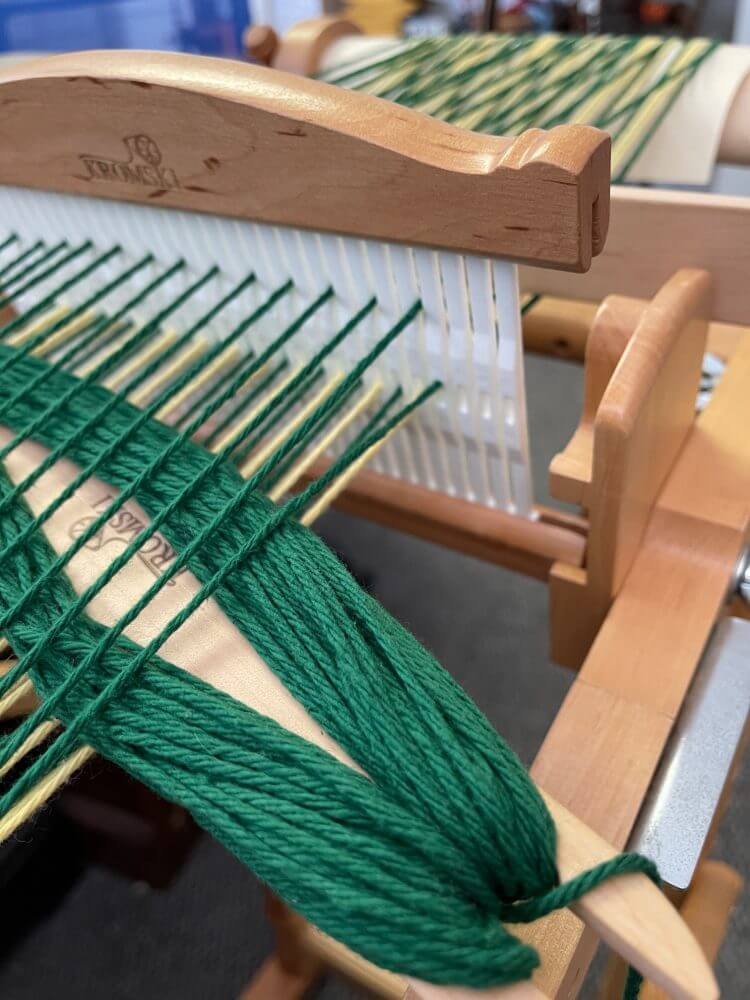
The following pass will make use of the pick-up stick.
Insert it as follows:
Place the heddle in the down position.
From the back of the heddle, lift every other slot thread onto the pick-up stick. Sometimes sliding a sheet of paper into the shed behind the heddle makes the threads easier to see.
For this design, you’ll be lifting only the green threads from the upper layer.
When you’re done, you should have 13 green warp ends resting on top of the pick-up stick.
The order of weaving will follow this pattern (with the weft beginning on the right side):
1.) Set the heddle to Neutral, and place the pick-up stick upright and shifted forward.
Before sending the shuttle through the shed, guide it under the final warp thread so it gets properly caught.
2.) Keep the heddle in Neutral and the pick-up stick in the forward, upright position.
This time, lead the shuttle over the first warp thread to secure it before passing it through the shed.
(If you added the extra warp end, you’ll go under instead.)
3.) Move the heddle to the Up position, and slide the pick-up stick back toward the rear beam.
4.) Lower the heddle to the Down position, again keeping the pick-up stick pushed back against the rear beam.


Work through steps 1–4 fifteen full repeats.
After completing those cycles, run through steps 3 and 4 one additional time to finish off the sequence.
Trim the weft, making sure to leave a generous tail for your hem stitching, and then follow the same procedure for each of the remaining Mug Rugs.

Bonus! These Mug Rugs are reversible!
For video assistance please visit https://youtu.be/kqbL9AStMvQ
To download a PDF of this pattern go Kromski Fun on Face Book or click here
To see all of or Mug Rugs and get the patterns go to http://kromskina.com/mug-rug-weave-along/
Thanks for watching.