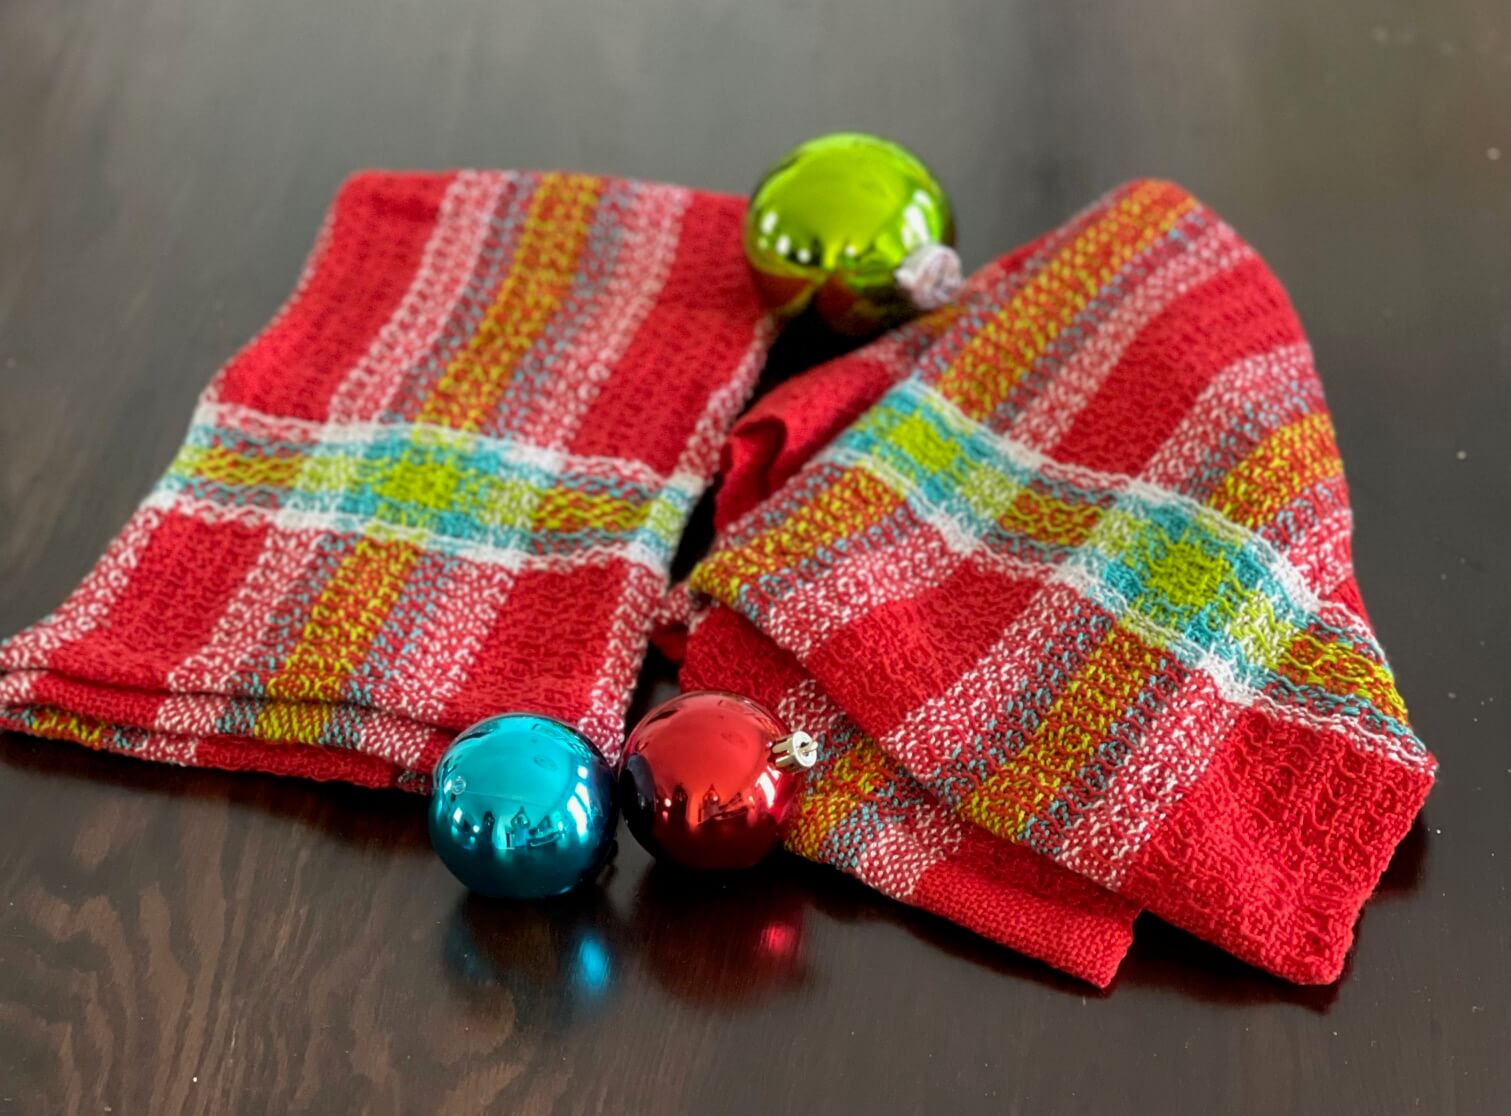
Kromski Holiday Towels
These exquisite kitchen cloths will impart a festive ambiance to any cooking area, regardless of whether it is your own or that of the fortunate individual receiving a well-considered, hand-crafted Christmas or Holiday present.
The textile design is a variation of the waffle weave and necessitates the use of a single pick-up stick. It is marginally distinct from certain waffle weave schematics you may have encountered, as it has been adapted for the rigid heddle loom. Should this sound intricate, please do not be concerned; it is, in fact, quite straightforward, and I have incorporated numerous photographs to assist you throughout the process.
Final Dimensions: 2821”×19″ The pattern yields a pair of two towels.
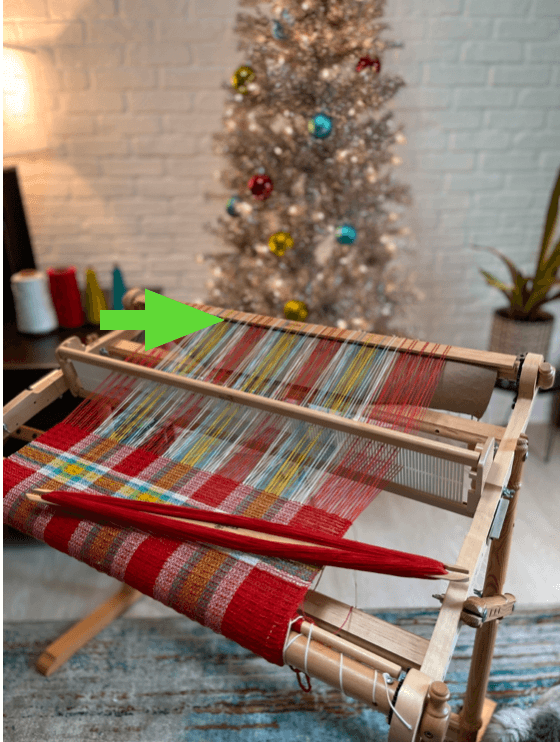
These towels were created on a Kromski 32” Harp Forte rigid heddle loom. They would also fit the 24” model, but if you are in the market for a new loom, reflect upon the added flexibility provided by the extra width of the 32”. This pattern could also result in a charming baby blanket.
You will require a 10-dent heddle, one pick-up stick, and two stick shuttles. Additional shuttles will be advantageous,but not essential (I will provide you with a helpful suggestion regarding this later).
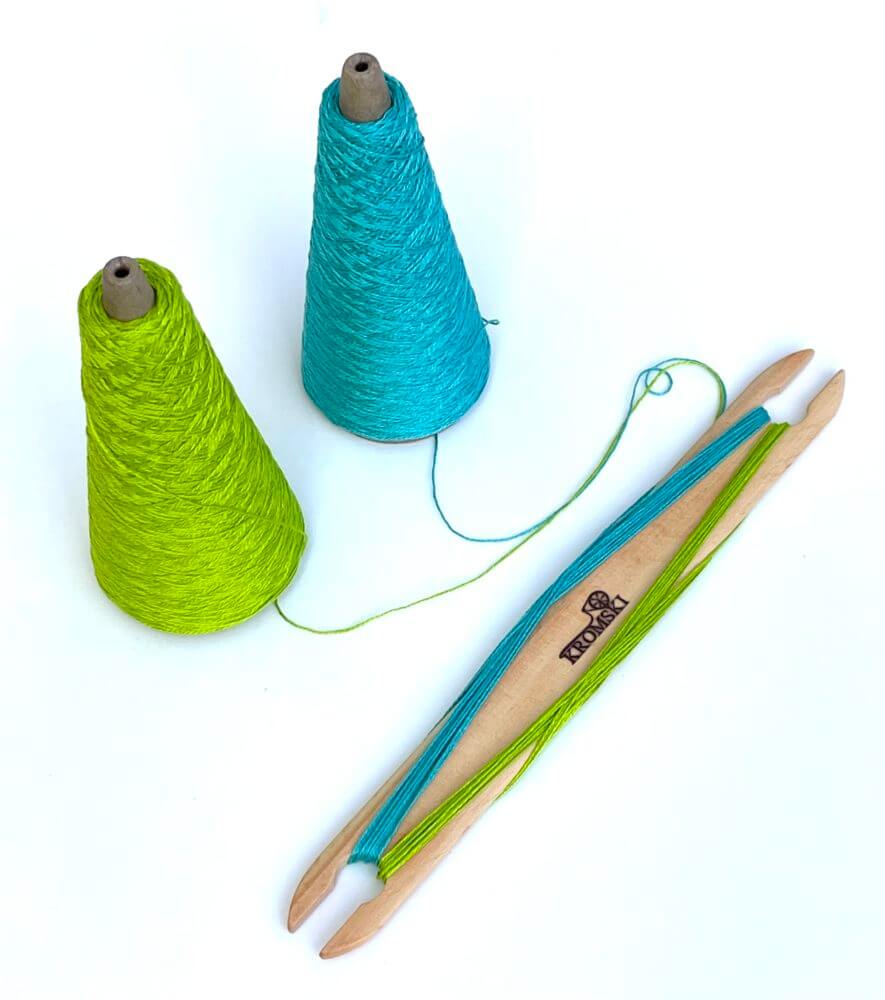
Also essential: 5/2 cotton weaving yarn. I have utilized mercerized cotton.
Bright Green = 132 yards
Red = 588 yards
White = 327 yards
Turquoise = 198 yards

Prepare the loom with a warp length of 98′′ employing your chosen warping technique. The necessary quantity of ends is provided, along with the number of loops required when utilizing the direct warping method.
- Red – 34 ends (17 loops)
- White – 10 ends (5 loops)
- Turquoise – 6 (3)
- Green – 12 (6)
- Turquoise – 6 (3)
- White – 10 (5)
- Red – 20 (10)
- White – 10 (5)
- Turquoise – 6 (3)
- Green – 6 (3)
This composition will bring you to the midpoint. Reproduce the above sequence in reverse order, starting again with green (for a total green segment of 12 ends) and concluding with red.
Initiate the weaving with a few inches of waste yarn.
If you possess a comparable red yarn that is finer than 5/2, you might consider using that for the hem. Employing a thinner yarn will prevent the hem from appearing excessively dense. If this is not an option, it is perfectly acceptable. I utilized the 5/2 yarn on the samples since I did not have access to anything thinner, and I am satisfied with the finished towel.
Weave 2.5′′ of plain weave for the hem. Finish with the heddle in the Up position.
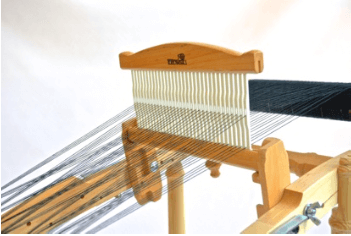
To establish the pick-up stick setting, commence by placing the heddle in the Down position. Using solely the top layer of yarn created by the shed, insert the pick-up stick behind the heddle by passing under the first two threads and over the subsequent two threads. Continue across, going under two, over two. Crucially, remember to engage only the top layer of threads.
Next, if you used a thinner weft for the hem, transition to the main thickness yarn and proceed in pattern with red.
The weaving pattern progression is:
- Down
- Up – pick up forward, flat
- Down
- Up
- Neutral – pick up forward, on edge
- Up
Uncertain about how to handle a pick-up stick? Do not worry—here are those photos I pledged to provide.
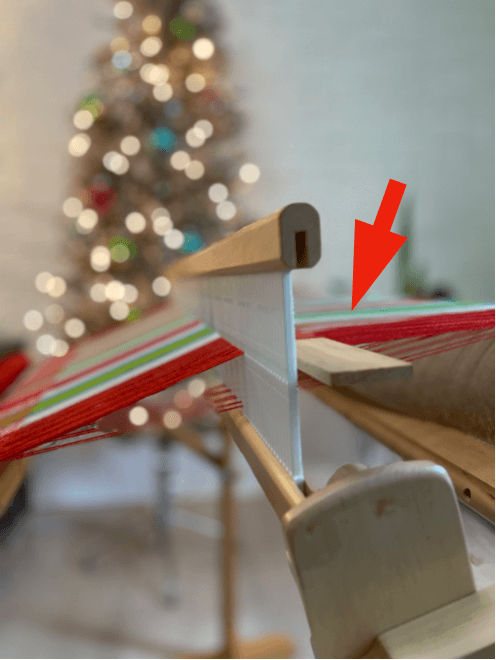
1.) Heddle Down is a position I am confident you are acquainted with, so I will not occupy space with an illustrationof that. Simply ensure that when the pick-up stick is not actively being used, it is pushed back towards the far side of the loom, as depicted here.
2.) Up – advance the pick-up stick, maintain it level. Should you be uncertain of the implication of this, examine the following photographs. This is the identical step displayed from two distinct perspectives.
Position the heddle in the Elevated setting and guide the pick-up stick ahead, keeping it flat (parallel to the floor). Moveit completely forward so that it abuts the rear face of the heddle. Insert the weft strand through the shed.
Next, the heddle will go 3.) Down then 4.) Up as usual, with the pick up stick slid back to the rear section of the loom once more.
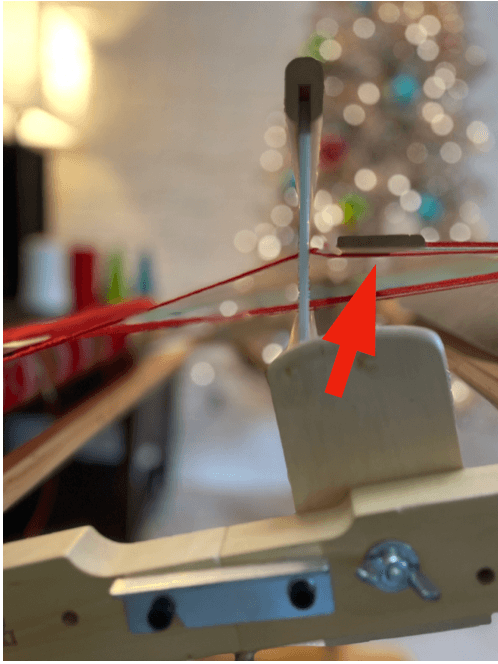
The subsequent step, 5.) requires the heddle to be placed in Neutral – advance the pick up stick, set it on edge. Observein the first photograph that the pick up stick rests against the heddle block, and in the second, it is fully forward and against the back of the heddle. Either position is correct – whichever feels more suitable for you.
The final photo demonstrates just how significantly this will alter the number of threads positioned above the shuttle. This is what yields our pattern design.
On the next traverse (pass), 6.) the heddle will be Up (with the pick up stick pushed back). On this particular pass, it is essential to loop the weft around the final warp thread at the end. If this is omitted, your outer edges will not be uniform. This happens because the pick up stick prevents the last thread in the shed from opening at the edge, so we must manually close the gap that is created.
*If you commence the sequence from the left side, the terminal thread will need to be elevated on the 5th step, when the heddle is in Neutral and the pick up stick is forward and on edge.
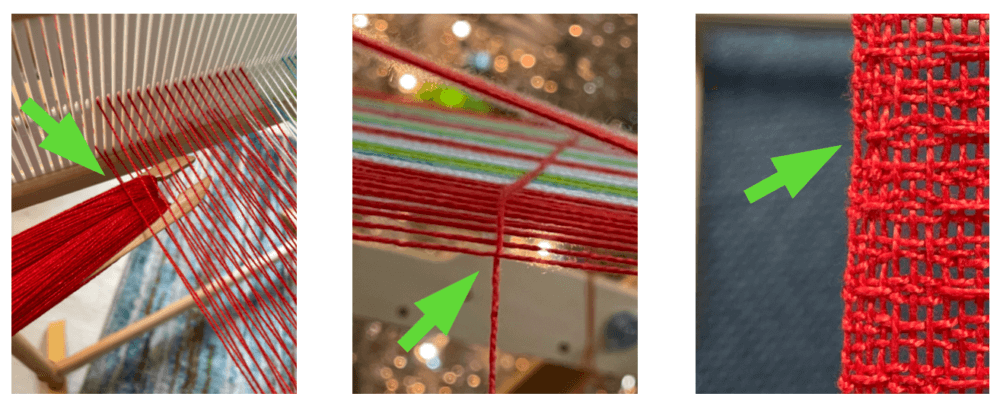
Observe in the final image that a space exists at the edge. This is precisely what will occur if the end thread is not secured (wrapped).
Interlace 10 repetitions of the pattern (steps 1–6) using the red yarn.
Prepare your shuttles with minor quantities of the remaining shades. If you lack sufficient shuttles, you can wind two colors onto a single shuttle and simply deploy them one successively.
Sever the red yarn and change over to the white yarn for one complete pattern set (steps 1–6).
Transition to turquoise for a further set.
Interlace steps 1–6 twice using the green yarn.
Replicate the sequence with turquoise, and again with white, for one instance each.
Subsequently, weave the main section of the towel with red for 18′′. A simple method to monitor the length is with a piece of scrap yarn and a straight pin. Cut approximately 24′′ of scrap yarn. Select a material that will not stretch. Tie a knot about an inch or so from one end. Measure 18′′ from that knot and secure another knot. Utilize the straight pin like a fastener to keep it in place so that the knot aligns with the beginning of the red section. Continue weaving until you have reached the second knot.

Now you will replicate the white, turquoise, and green bands in the identical manner as you did prior to the 18′′section of red.
Following the stripes, interlace a further 10 pattern cycles of red and complete the piece with 2.5′′ of plain weave for the hem. If you employed a finer thread for the hem, ensure you do so once more.
Execute two passes (picks) of plain weave with scrap yarn to distinguish your towels.
Reproduce the above sequence for the second towel.
After the final hem, weave a short segment (a couple of inches) in scrap material (or a small amount of extra red). Remove the project from the loom and secure knots in the warp to prevent it from disintegrating. Alternatively, sew multiple rows of zigzag stitch over the scrap yarn.

Launder the towels (do not separate them yet) in the washing machine utilizing hot water and tumble dry on a high setting.
It assists in managing creases if you include an additional towel in the dryer.
Conclude by either hand or machine sewing the hems.
You may have been concerned that your waffle pattern did not manifest sufficiently while you were interlacing.
Do not be troubled; the wet finishing (cleansing and drying) will create a significant improvement in the final result. The cotton will contract substantially during the wash, and the towels will become fully voluminous and achieve a wonderfully soft and highly absorbent texture. The pattern will emerge prominently, and you will possess a set of lovely Christmas towels to value for years ahead.

If you would like a pdf of this pattern click .