Macrame is making a comeback. It’s a fun and versatile craft that involves a series of knots organized to create plant hangers, key chains, hammocks and more. The most commonly used material is cotton rope.
But that’s not what we will be using!
In this post we will be making a Macrame Wall Hanging with hand spun Polish Merino Wool.
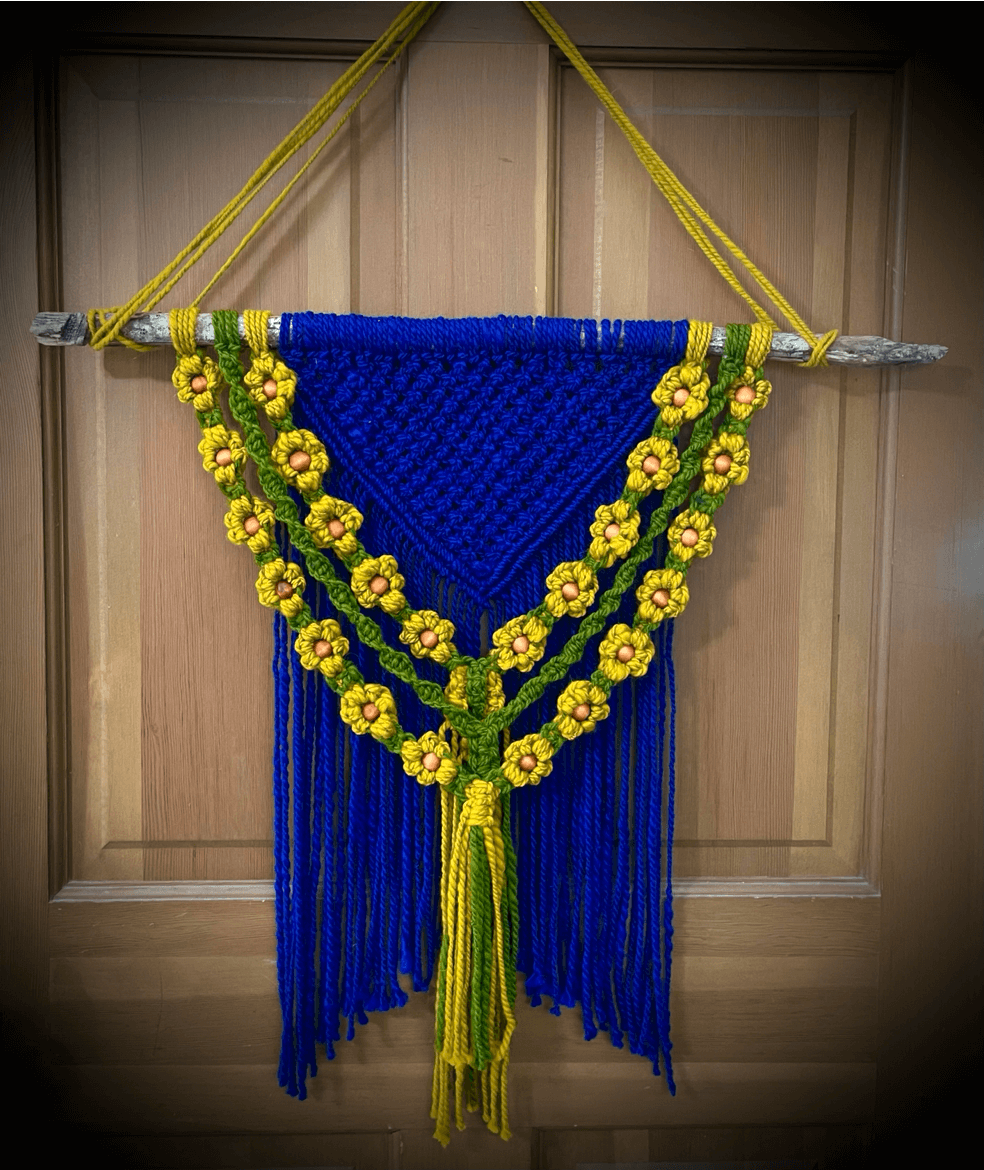
Our design today is intended to represent the Ukrainian Sunflowers against a clear blue sky.
Our hope for peace.
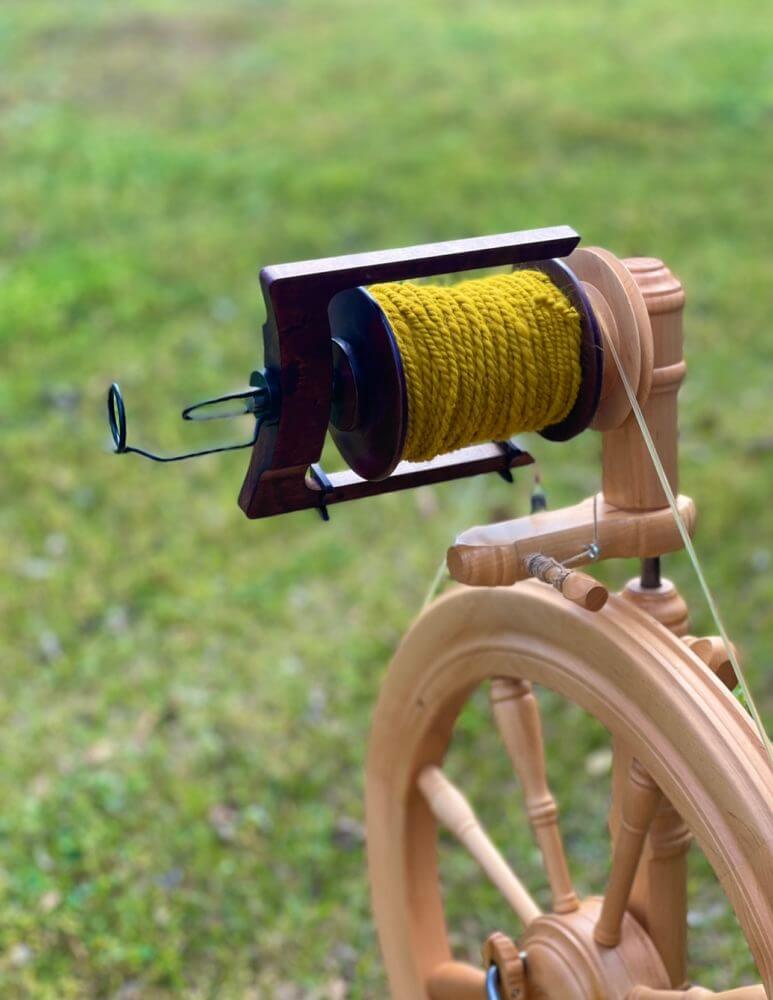
The yarn was spun on a Kromski Sonata equipped with a Magnetic Flyer Head and Jumbo Flyer Set.
Most spinners strive to spin thin, delicate singles to use in either knitting, crochet or weaving. For use in Macrame, the yarn needs to be bulky weight and perhaps more importantly, tightly spun.
The goal is not to make a nice fluffy, soft and lofty yarn. The goal is to make yarn that looks and acts more like rope, yet still has plenty of flexibility.
To help accomplish this, the drive band is placed on the smaller whorl, thereby adding more twist to the singles and the finished ply.
This can be tricky for those of us who have spent years developing our skill at making fingering and lace weight yarn. Bear in mind that an acceptable yarn does not need perfection.
Once the yarn is off the wheel, I recommend wet finishing under tension. A full spray bottle hung on the bottom of the skien is ideal. Normally, this is not how I would finish my yarn, but as stated above, we are looking for a sturdy and tight yarn with low loft. The weight will prevent the yarn from fulling and becoming too lofty for knot tying.
For this wall hanging you will need approximately the following yardage. ** Note that the actual yardage will vary depending on the thickness of the yarn and the tightness of your knots. I strongly recommend that you spin extra yardage and cut your lengths generously. These measurements worked for our example, but you may tie tighter and your yarn will most certainly be different due to the nature of hand spinning.**
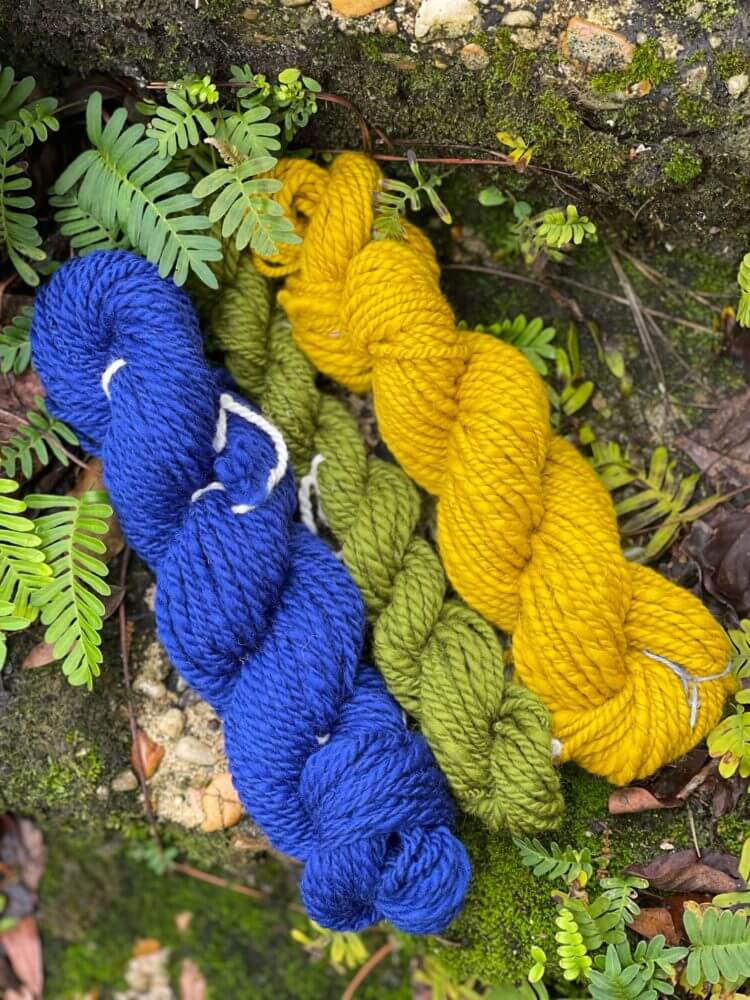
Blue: 64 yards. (Polish Merino #24 Sapphire)
Yellow: 42 yards. (Polish Merino #3 Gold)
Green: 44 yards. (Polish Merino #32 Lime)
Also needed:
24 large hole wooden beads, approx. 15mm diameter (you may need a few more or less depending on the yarn size).
Wooden dowel or stick approximately 24 Inches long.
You will need to find an appropriate work station. The easiest way to work on macramé is to allow it to hang as you work.
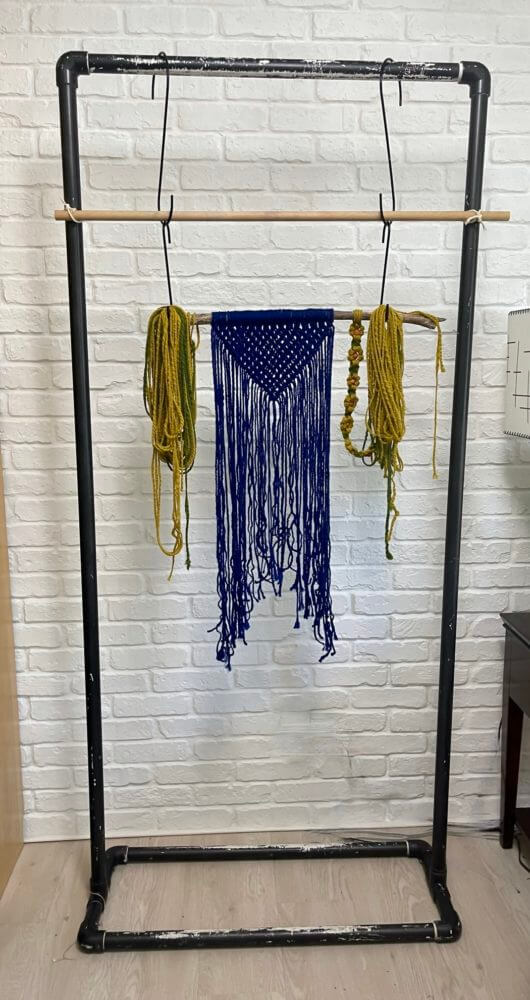
A portable coat rack is a perfect choice for a macrame station. They are fairly inexpensive and easily found.
A home made PVC rack (such as the one here) also works very well and it’s very cost effective.
If you don’t have access to something like this, there are still many ways to hang your project. Try an over the door rack or a rod between a door jam. It’s not recommended that it be hung on a wall, you would need to be very careful as you work on the knots so that it did not pull off the hook.
Begin by cutting the blue yarn into 2 yard lengths. You will need 32 pieces to make this hanging. If you want the blue section to be longer, shorter or wider simply adjust the number and length of the pieces.
Make 32 Larks Head Knots in the center of the stick. This will give you 64 strands to work with.
If you are familiar with macrame, you can move ahead to the next section.
If not, here is a simple explanation of the Larks Head Knot.
Fold each 2 yard length of yarn in half.

- Bring the fold over the top of the stick.
- Continue down until you can see the loop below the stick.
- Pull the loose ends of the yarn through the loop and pull snug.
The blue section is composed of a series of Square Knots using 4 strands at a time. See below for a numbered diagram of the steps.
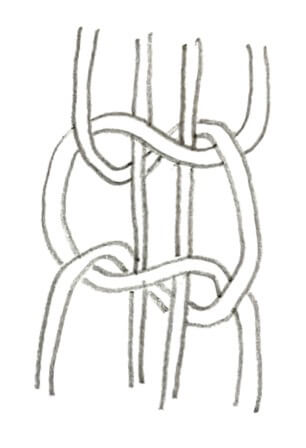
For the first half of the knot:
Bring rope #4 across in front of ropes 1, 2 and 3.
Next bring #1 in front of #4.
Then Take #1 behind 2 and 3. Bring it out and over 4 through the hole formed between 3 and 4.
Push the knot upwards as you snug it up (not too tightly).
For the second half of the knot:
Bring rope #1 across in front of 2, 3 and 4.
Next bring #4 in front of #1.
Then Take #4 behind 2 and 3. Bring it out and over 1 through the hole formed between 1and 2.
Push the knot upwards as you snug it up.

Once you have completed the entire row, move over so that you hold groups of four yarn strands that consist of two from each knot group.
Leave strand 1 and 2 on the left and gather 3 and 4 from the first knot and 1 and 2 from the second knot.
Repeat the Square Knot. Then use 3 and 4 from the second knot and 1 and 2 from the next.
Continue in this way across the row.
At the end there will be two strands (3 and 4) left hanging.
Follow this pattern until all the knots have been used and the design forms a triangle.

To give the triangle a nice finished look, we will next use a Double Half Hitch knot.
Pick up the outer most yarn from either side. Hold it across the front of the triangle so that it follows the downward angle. We will call this the ‘inside yarn’. It will remain constant as the center with the other yarns wrap around it as follows.
- Pick up the strand next to the inside yarn. Bring that yarn over the inside yarn and back through the hole created between them. Keep hold of the inside yarn and pull the other upwards so that the knot snugs up against the triangle.
- Keeping the inside strait, continue with the same length of yarn to make the second part of the knot. Bring that one behind the inside yarn, around and back to the front, pulling it through the hole that was created. Again pull upwards to snug up the knot.
- Pick up the next yarn at the top of the triangle and repeat.
This is also shown in the photos further down in this post.
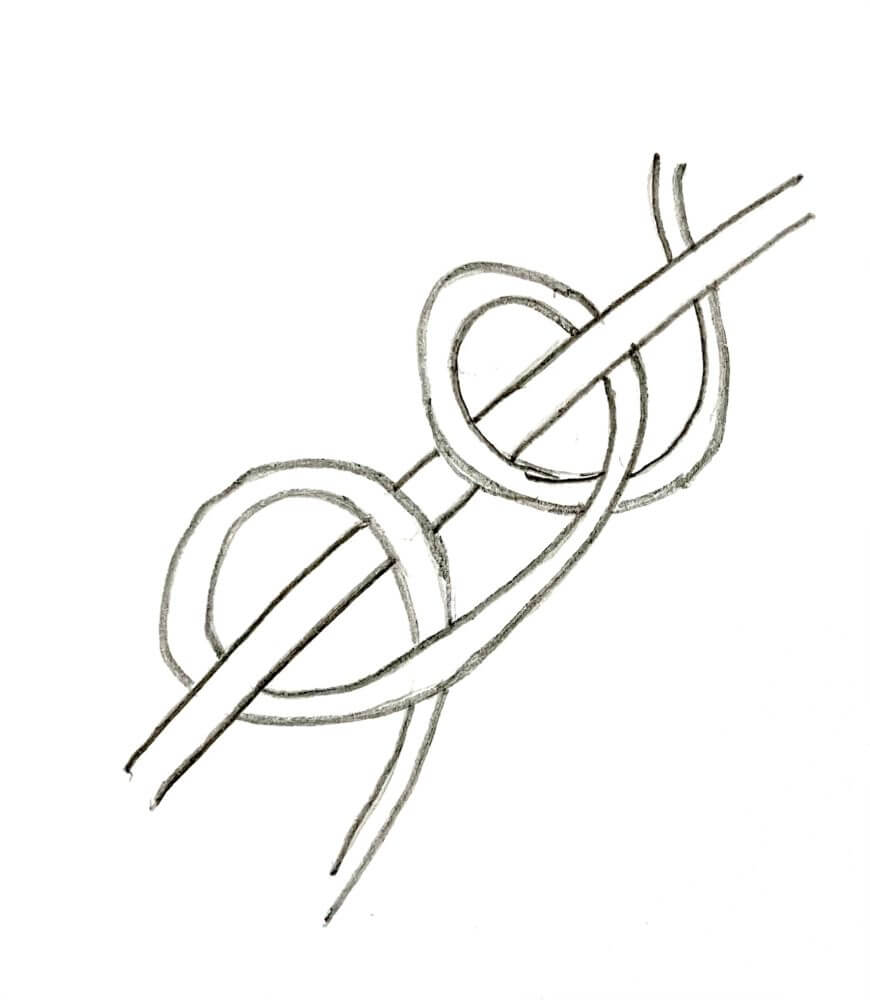
Continue until the center is reached. Do the same thing on the other side. To make a clean point, repeat the knot one more time using the main yarn from the other side as the knotting yarn.
Next we will make a knot called the Daisy Knot. We have used it here to represent our sunflowers. There are several variations using either yarn or beads to make the center. On this project we will use beads to help create our flowers.
The beads used are 15mm, but of course yours may be different depending on your yarn thickness. Our yarn is 6 WPI.
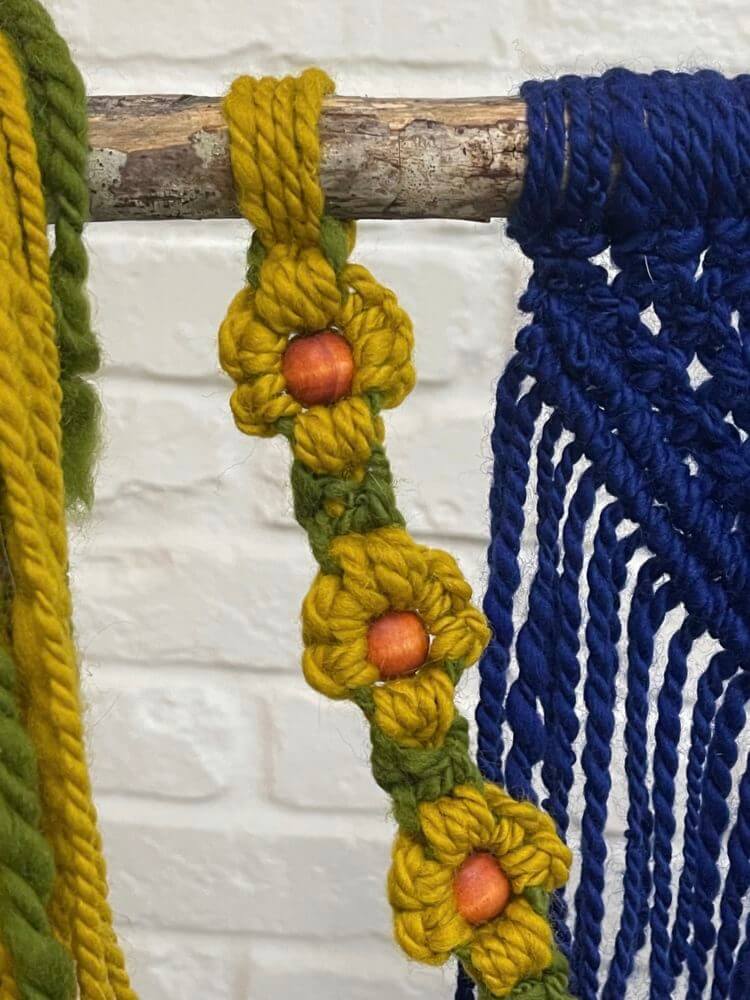
Cut 4 lengths of yellow yarn 4.5 yds long for the 1st set of flowers.
Begin by making 2 yellow Larks head knots on either side of the blue triangle. Before pulling them tight, pull a 4 yard length of green through the gap under the stick. Pull it until it is centered and then snug up the yellow yarn.
1. Make a Square Knot using the green yarn.
2. Next cross both of the green in front of the yellow. Make sure the green makes a hole on either side. Pinch everything together in the center with one hand to keep it in place.
3. Use the other hand to bring 2 yellow strands forward and up so that they go through the hole made by the green.
4. Repeat this on the other side
5. Hold the green yarns to the front and pull to the left and right simultaneously. The yellow should curl around the green and form the 1st 2 petals of our sunflower.
6-7-8. To make the side petals use the outside yellow yarn and make 2 Double Half Hitch knots around the green.
9-10. Repeat this on the other side.
11. Slide the bead onto the 2 center yellow yarns.
12. Repeat steps 2-5
For each sunflower repeat step 1-12 and end with a Square Knot made with green.

Make enough flowers to lay just below the edge of the triangle and stop at the center.
Make a second flower chain on the other side. Our design needed 5 sunflowers on each side.
To connect them together make 4 Square Knots with the green yarn. Separate the yellow yarn into two groups of four. Make 4 Square Knots with each group. Let the green hang behind the yellow. Use the four center yellow strands to make 4 additional Square Knots.
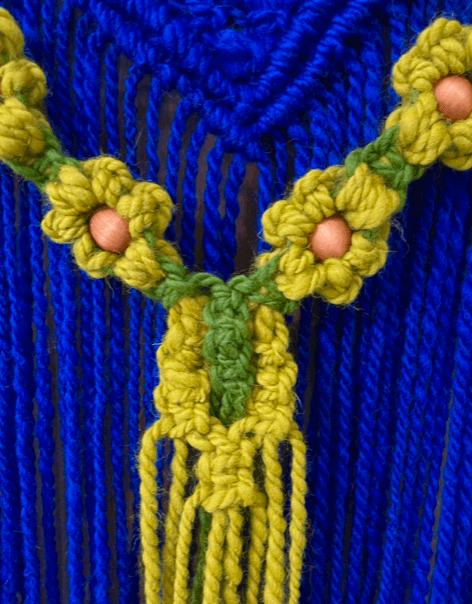
Next we will make some additional “leaves” for the flowers.
Cut four 6 yard lengths of green. Make 2 Larks Head Knots on either side of the flowers.
This spiral effect is made by repeating one step of the Square Knot over and over until the desired length.
It’s important that it lays flat when the 2 sides are joined together. To do this be certain to use step 1 of the Square Knot on one side and step 2 on the other. This will make them twist in opposite directions and the center will lay flat when joined.
This time when you reach the center there will be a total of 8 strands of yarn. Make 4 Square Knots holding two strands together as one while you work the knot.
Cut four 6 yard lengths of yellow and two 6 yard lengths of green. Make another row of Sunflowers that will lay just below the leaves.
To connect this set together use 2 strands from each side and make a Square Knot with the green as the center.
Take the outermost strands and make another Square Knot. This time wrap it around all of the other cords.
Trim the ends for a nice finished appearance.
Hang and enjoy!
Once you learn the basic macrame knots, it’s easy and fun to design your own wall hanging. With all the colors of Kromski Polish Merino there are endless possibilities!
If you make this one or one from your own imagination please share it with us on our Face Book Group – Kromski Fun. We’d love to see it!
*****************************************************************************************************************


