December Mug Rug
December Mug Rug
This month we have doubled our fun with a Double Weave Mug and Cookie Rug!
This pattern requires two 5 dent heddles.
We will be using worsted weight cotton yarn.
If you do not have two 5 dent heddles, but you do have two 8, 10 or 12 dents, it is still possible to make the pattern with some minor adjusting. You must use a yarn thin enough for 3 strands to move freely in a slot. You will also need to adjust the number of color repeats in order to have a mug rug in an appropriate size.
You will need 2 pick up sticks and at least 2 stick shuttles (3 is preferred).
The warp is 1.75 yards long. This is slightly longer than our previous mug rugs because the hem will be done differently.
Don’t have a second heddle yet? No problem. I’ll also show you how to make a similar design using just plain weave.
If you do have 2 heddles (they must be the same size) I encourage you to give this project a try. It may look complicated at first, but once you get going, it’s really not difficult at all. And there are so many ways to use this technique! Take a look at these projects from the Kromski Blog!

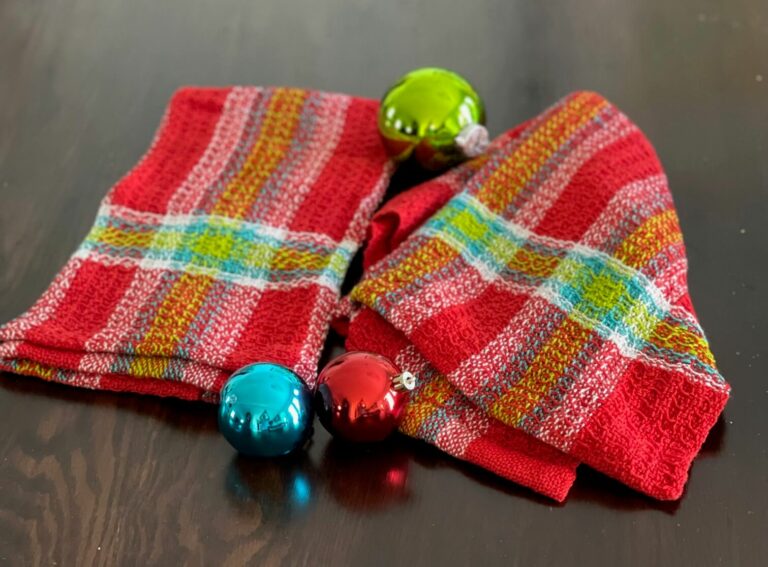
We will be using one ball each of white, red, and green for this Holiday inspired design.
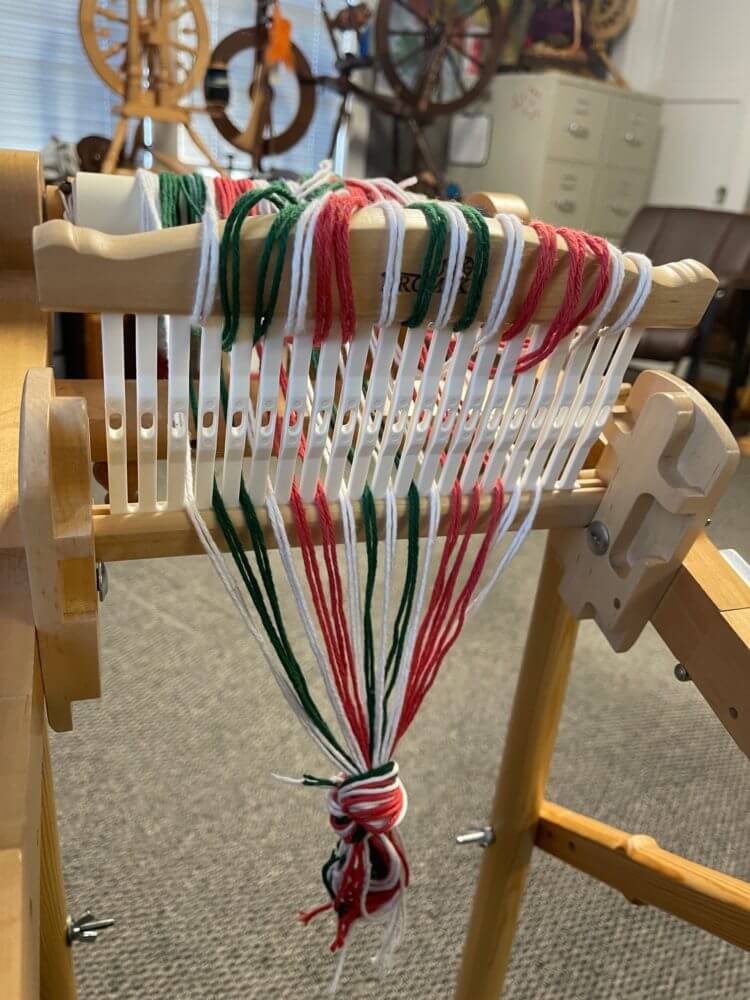
We will initially warp with 4 strands (2 loops) per slot on the heddle.
For example, the pattern begins with 8 white. Warp 4 strands (2 loops) of white in one slot. And 4 in the next slot to fulfill the 8 white strands.
The next color will be 12 red. Warp 4 strands (2 loops) red in each of the next 3 slots.
And so on.
The full color sequence is as follows, beginning on the right.
8 white
12 red
4 white
4 green
4 white
4 green
4 white
8 red
4 white
8 green
4 white
Begin with the rear heddle only on the loom. We will add the front heddle a bit later.
Start the warp in the 2nd slot on the right, warping 2 loops (4 strands) per slot in the rear heddle as instructed above.
You may notice in the photos that my sample was off centered. If this happens to you, don’t worry, it will still work out alright.
Once you have all of the yarn in the rear heddle, wind the warp onto the back beam as you normally would.
Cut the loops and take 2 from each slot and lay them across the top of the heddle to separate them. You should have 2 from each slot above the heddle and 2 still hanging down in the slot. Tie the bottom threads together to prevent them from slipping out or mixing with the others.
For now, we will ignore the bottom group.
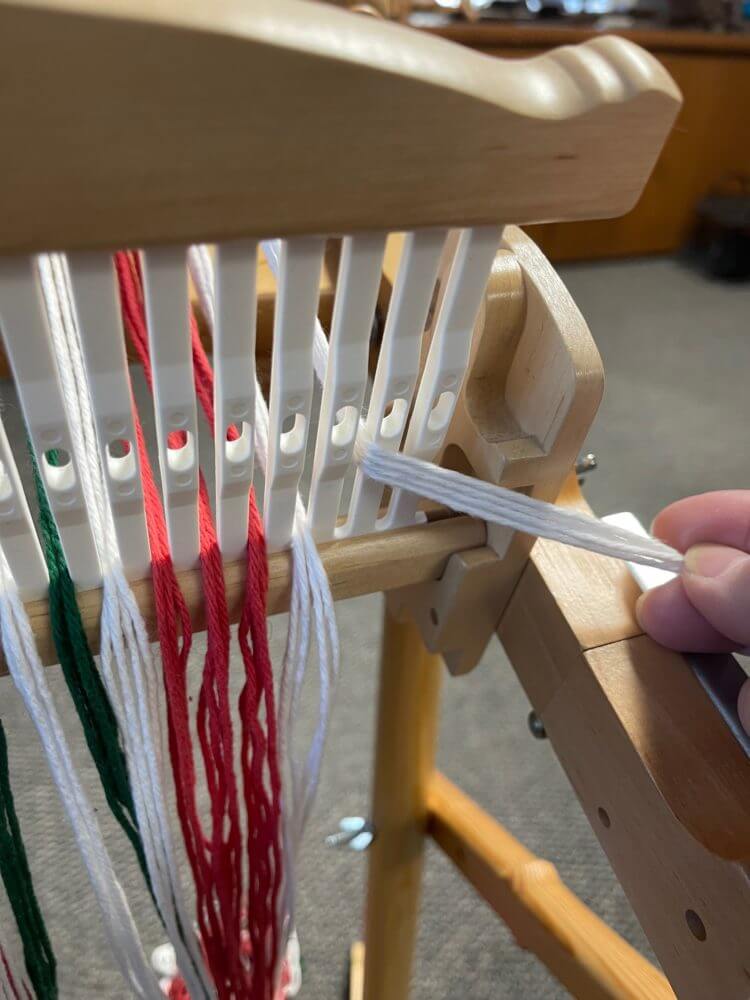
Pick up the top set and thread the heddle in the usual manner (manor). Begin on the right side. Place the first strandinto the hole to the right of the slot, leaving the second in the slot as usual.
Continue across the loom. The top group of threads should be warped just as it would be if the bottom group did not exist.
Next, untie the bottom threads and bring all of the yarn in the slots up and lay them across the heddle together so that they are out of the way, leaving the yarn in the holes hanging below.
You are now ready to add the second heddle.Carefully lay the rear heddle down so that it is resting on the cross brace. This can be done on either the Presto or the Harp Forte as you see here. Doing this will give you easy access to the yarn as we thread the front heddle.
In this step all of the yarn in the holes of the rear heddle will be brought through the slots on the front heddle. Place each strand from the hole in the rear heddle through the slot to the right of the corresponding hole in the front heddle.
Work your way across in this fashion.

Next we will begin to work on the strands that are in the slots of the rear heddle.
Bring one of the strands that is through the slot in the rear heddle through the corresponding slot in the front.
There should now be 2 threads through each slot in the front heddle.
The rear heddle will have 3 in each slot and one in each hole.
There are 2 remaining threads in the rear heddle slots that have not yet been placed through the front heddle. Bring one from each of these through the hole to the right of the corresponding slot on the front heddle.
The remaining thread from the rear heddle will go into the front heddle slot to the left of the hole filled in the previous step. In other words – the corresponding slot.
Now you can put the rear heddle back up into position and check that everything looks correct.
On the rear heddle there should be 3 strands each slot and one in the hole, beginning with a slot from the left and ending with one in the hole on the right.
The front heddle should have one strand in the slot on the left. After that there should be one in each hole and 3 in each slot, ending with 2 in the last slot from the right.
If the setup is satisfactory, secure the warp onto the rod and prepare shuttles. You must load all three colors.
As with all projects, we will begin with a plain weave header out of scrap yarn. To get a plain weave with double heddles, treat them as one. Lift both and push both to switch sheds.
Before pick up sticks, weave a few inches of plain weave.

Before we begin the double weave, we first need to insert our pick-up sticks.
Place both heddles in the down position and slide the first pick-up stick into the shed.
Starting with the first thread on the right, use the second pick-up stick to lift every other thread from the top of the first pick-up stick.
Tilt the second pick-up stick on its edge and slide it up against the heddle.
Remove the first pick-up stick and place it behind the rear heddle in the shed created by the stick in front.
Remove the front pick-up stick.
To secure the second pick-up stick in place, put both heddles in the up position. Slide the rear pick-up stick forward (keeping it flat). This will create a shed below it. Place the second pick-up stick in this shed.
Here is a photo from our blog post showing the same double-weave technique used to make a Baby Blanket on a 24” Harp Forte.

Now that the hard part is finished, we can begin weaving!
You will be creating two separate layers of fabric that stay connected along the left side, forming a natural fold. This is shown in the illustration on the right, where the black lines represent the fabric on the loom and the arrows show the paths for steps 1 through 4.
Once the weaving is removed from the loom, you simply unfold the fabric to reveal a piece twice the width of what you wove. The possibilities are endless!
The pick-up sticks will be labeled “A” and “B”.
Stick A is the upper stick, and stick B is the lower one.
An easy way to remember this: A = ABOVE, B = BELOW.
H1 refers to the front heddle and H2 to the rear heddle.
The weaving process is a four-step repeat. The sequence is as follows:
B – Both heddles in neutral. Bring pick up B forward and tilt it on its side against the rear heddle. Pass the shuttle along the shed on the bottom layer from right to left.
H2 Up – Both pick ups are resting at the back of the loom. Lift the rear heddle into the Up position. The shuttle goes to the right through the top layer of fabric.
A – Both heddles in neutral. Bring pick up A forward and tilted on edge. The shuttle makes another pass on the top layer.
H1 Down – Both Pick ups are resting at the back of the loom. Place the front heddle in the down position and weave the second pass of the bottom layer.

Note that each full sequence completes 2 rows of weft.
So when the pattern calls (for example) for 6 rows of red, you will complete the sequence a total of 3 times to accomplish this.
The weft color sequence matches that of the warp. The numbers are halved because we are only working with 1/2 the warp per layer. You will begin with 4 white and continue down the list (ending with 2 white). Then you will work your way back up the sequence until you get to the top (start this set with the 2 white again and work up).
4 white
6 red
2 white
2 green
2 white
2 green
2 white
4 red
2 white
4 green
2 white
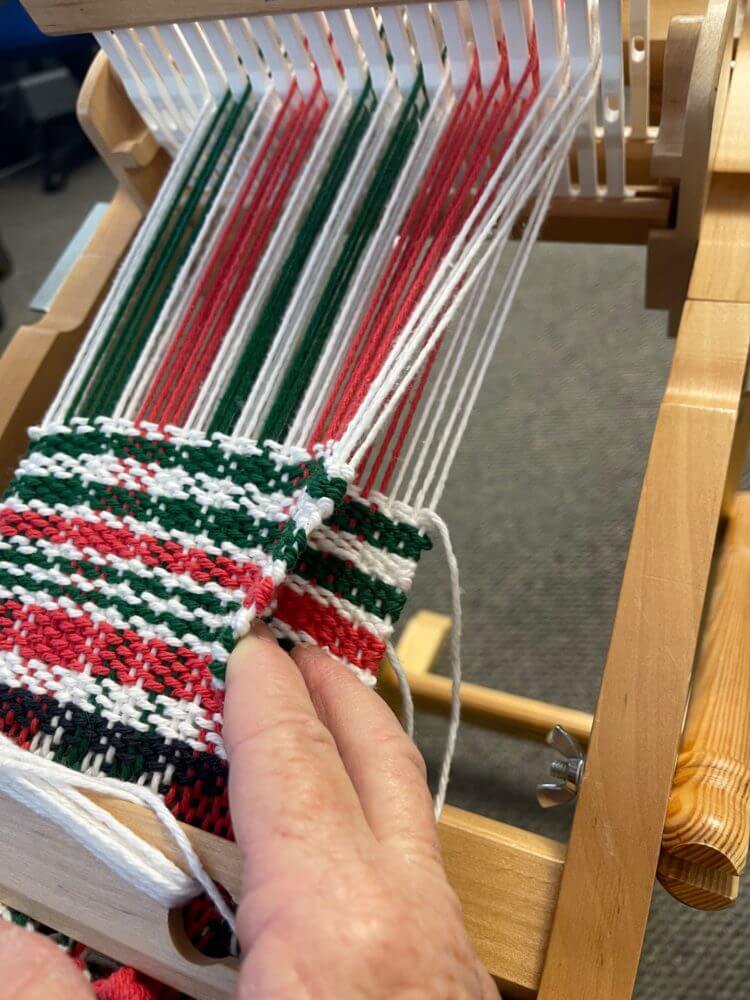
Pay careful attention to the left edge. Make certain that the weft is not snug around the last thread, but rather has enough looseness to reach the thread on the far right.
The photo below shows the CORRECT way to do this.

The second photo shows the INCORRECT way.

This will allow the fabric to lay flat and not bunch up in the center when unfolded.
Check the work periodically as you weave to be certain a thread was not mistakenly woven into the wrong layer.
It is very difficult to sew a hemmed edge on folded fabric, so for this mug rug we’ll use an alternative finishing technique: a simple overhand knot that lies neatly on the finished piece.
Because this method requires extra thread for tying, we will use 2½” paper dividers between each mug rug. As you advance the warp, you may notice the edges don’t line up—this is completely normal and does not indicate uneven weaving.
Normally mug rugs are wet finished while still connected, then cut apart. But since these will not be hemmed individually on the loom, we must secure the ends before washing.
After weaving the final mug rug, add two extra paper dividers.
While the weaving is still on the loom, begin cutting between the paper dividers—only about one third of the width at a time.
Peel back the top layer as you go so that the layers do not get tied together by accident.
Tie two warp strands together with an overhand knot, and as you tighten it, push the knot toward the weaving so it sits snugly against the weft. Tie knots for both layers before cutting further.
Continue working your way across until all threads are tied securely.
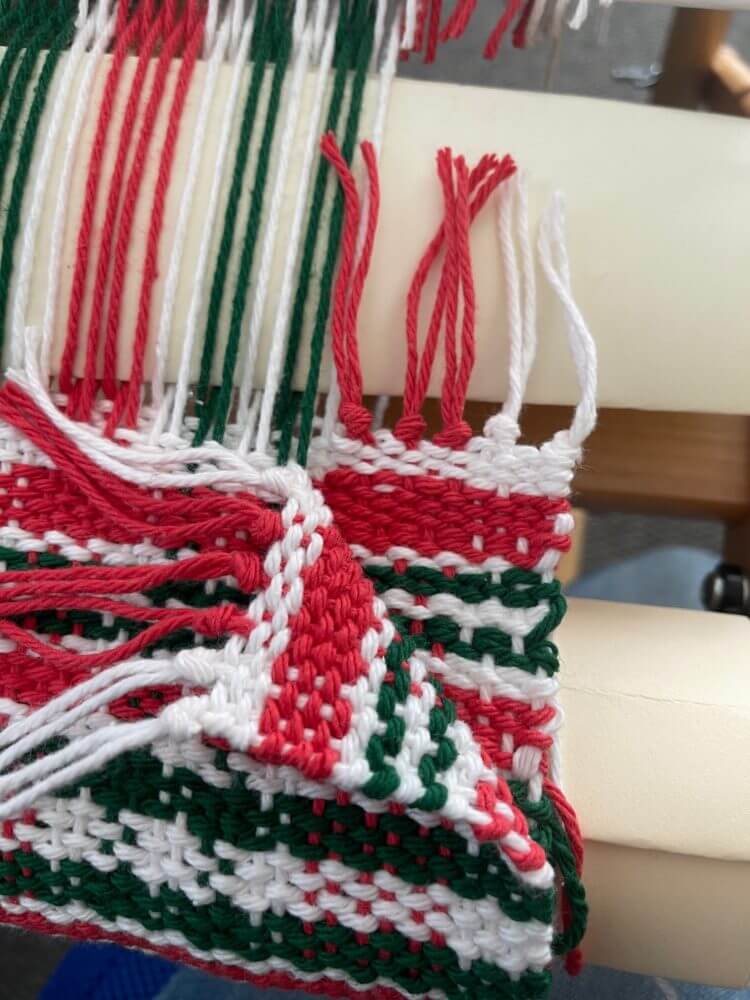
Carefully remove the weaving from the loom, keeping the paper dividers in place. Lay it out on a table and repeat the process until all of the ends on all of the mug rugs are secured.
Now it is safe to wash and dry them without the fear that they will fall apart. However, you must first take the time to weave in any ends that may have been missed during the color changes. You may want to trim the length of the ring. This can be done before or after wet finishing.
****************************************************************************************************
If you don’t have two heddles of the same size but still want to create something similar, you can use the plan below.
Warp your loom using an 8-dent heddle and worsted-weight cotton yarn.
The warp should be 2.5 yards long.
The sequence provided will serve for both the warp and the weft.
Just as in the double-heddle version, begin with 4 white threads, then follow the sequence downward until you reach 2 white. After that, work your way back up the sequence, starting again with 2 white and continuing to the top.
For weaving, use plain weave, repeating the entire sequence twice to create a mug rug that’s longer than usual—perfect for a cup and a few cookies.
4 white
6 red
2 white
2 green
2 white
2 green
2 white
4 red
2 white
4 green
2 white