Card Weaving with Plain Weave
Card (or Tablet) Weaving dates as far back as the 8th Century BC. There are many examples from throughout history, usually in the form of bands and belts.
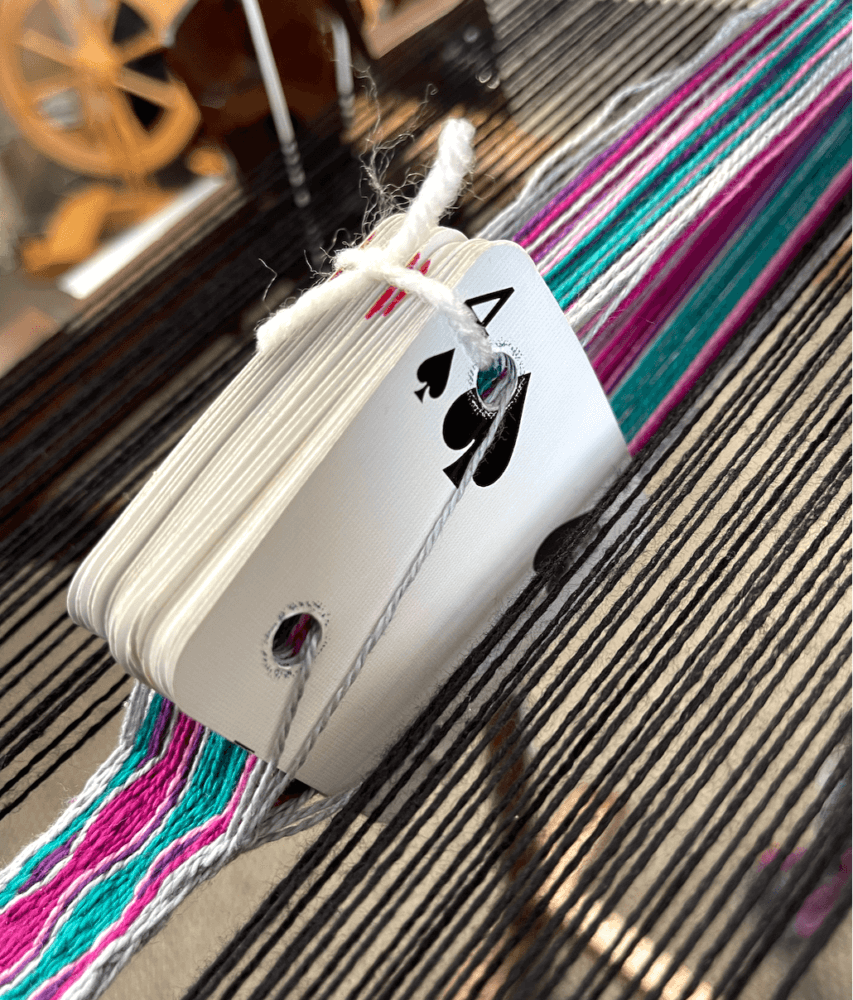
The technique hasn’t changed much over the years. Simple cards made from wood or bone were, and still are, commonly used. In more recent times, many weavers have opted for lighter, more readily available cards made from light cardboard or, as I’ve used here, playing cards. These cards have holes through which the threads pass. As the cards are rotated, the shed opens. The number of holes, the placement of thread colors, and the direction of rotation all contribute to the final woven pattern.
For this project I wanted to try something different. I wanted to see if I could weave a band in the center of a plain woven fabric using my Kromski Harp Forte.
And guess what ? I can!
I chose a simple pattern for my band so I could focus on the experiment. If you’re familiar with card or tablet weaving, you’ll understand what I mean by a 4-forward, 4-back pattern. It doesn’t build up twist, but given the way I’ve set up the loom, that wouldn’t have been an issue anyway.
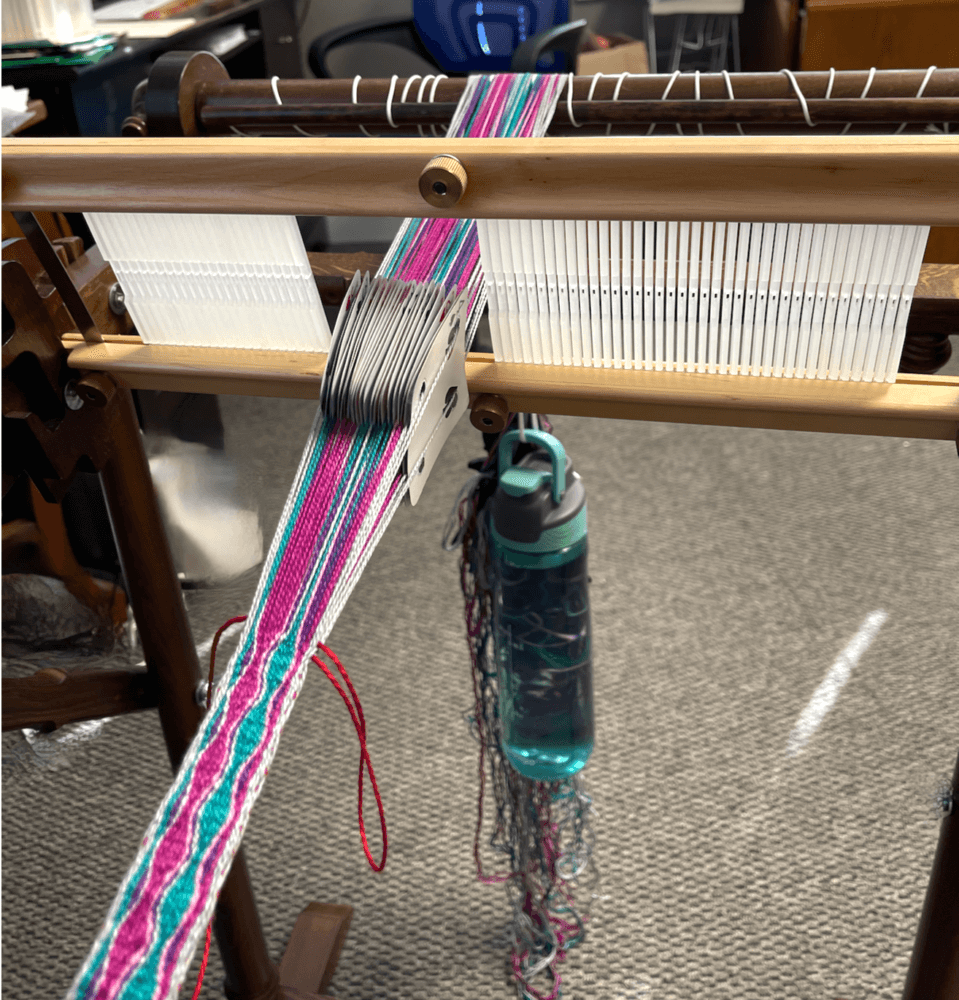
For this project I used a 16″ Harp Forte with a Walnut finish. I also needed a Weavers Choice Heddle which I set up using only the 12 dent pieces, plus and additional 20 from a Set of Extra Dents. This gave me a total of 60 pieces. I placed 40 on the right side of the heddle, left a gap of a about 4″, and then set the other 20 dents on the left.
I warped my cards according to the pattern by tying the ends to the front dowel, threading the yarn through the correct hole in each card, and then through the gap off the back of the loom. I tied each group of cards together and kept the completed cards on a stitch holder as I worked.
Once all the cards were on, I let them hang off the back of the loom and used a water bottle as a weight. Do not attach the card threads to the plain weave warp, as card weaving has significantly more take-up. This is important to keep in mind when planning your project—make sure to allow extra length for your card warp. I doubled mine, which also gave me some extra to test the pattern first..
I wanted to make sure I was happy with the band pattern, so I wove several inches and adjusted the gap in the heddles to match the width of the band. To do this, I slightly loosened the bolts on the heddle, made the adjustment, and then retightened them for weaving. *Note: I should have pushed the cards through the gap before narrowing it; instead, I had to squeeze them through..
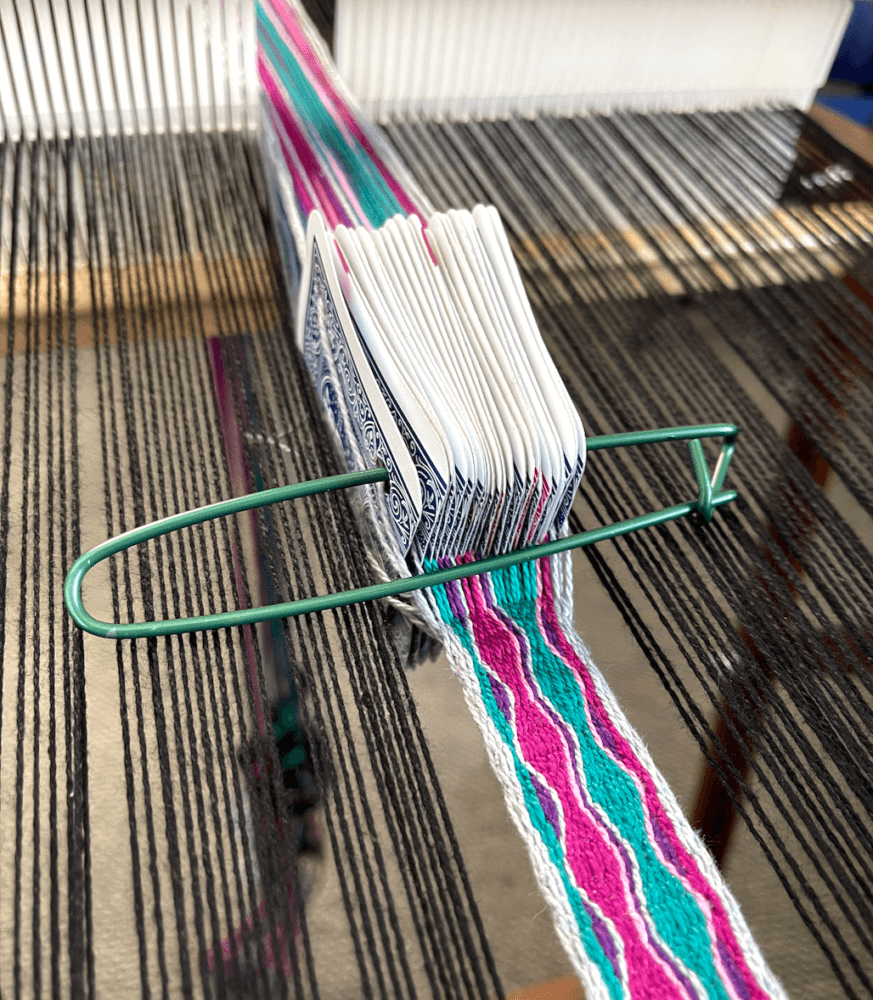
Once I was satisfied with the band pattern, I warped the plain weave section around the band as if it weren’t there.
Make certain that the cards are locked in place with a stitch holder or a bit of yarn tied around them as you attach the warp. Otherwise you run the risk of them moving out of sequence.
Then began the fun part! I experimented a bit with weaving the warp on either side of the band, but that idea didn’t end up in use, so I won’t include it here.
In order to really see the process of the weave, I suggest that you watch the video. It may make things clearer than what I can describe in words.
In case you prefer written instructions, I’ll explain as best as I can.
Before you can begin to weave, you must 1st push the cards through the gap so that they rest behind the heddle. Wind your shuttle, on one side only, with a weft that matches the plain warp.
Rotate your cards according to the pattern and separate the threads to create a clean shed. Raise the heddle to the up position while keeping the upper shed of the band in hand. Pass the shuttle through, but do not bring the heddle forward. Instead, use the edge of the stick shuttle to press the yarn into place.
Rotate your cards and separate the yarn again to open the shed. Place the heddle in the down position while holding the lower part of the band shed. Pass the shuttle through and press the yarn into place. Give a gentle tug on the previous weft thread to remove any excess, then press the shuttle against the weft once more.
Rotate your cards, place the heddle in the up position and follow the same steps as you pass the shuttle again. Give a small tug on the weft yarn.
Continue to work these 2 steps. Giving a tug on the previous weft after each pass. When I began my project I did not give this extra tug and before long my band became wider that it should have been. Drawing out the excess yarn solved this issue.
As the weaving progressed, I had some issues with my tension because the band is much thicker than the plain weave. I solved this by using additional warp sticks or paper on either side of the band as I advanced it onto the front beam.
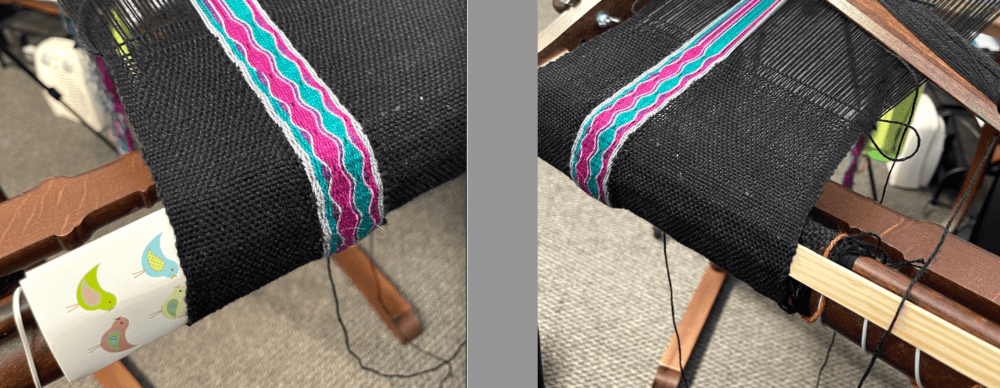
I wove the remainder of my short warp and removed it from the loom. I did a light wet finishing on it by simply soaking it for a few minutes and then laying it flat to dry.
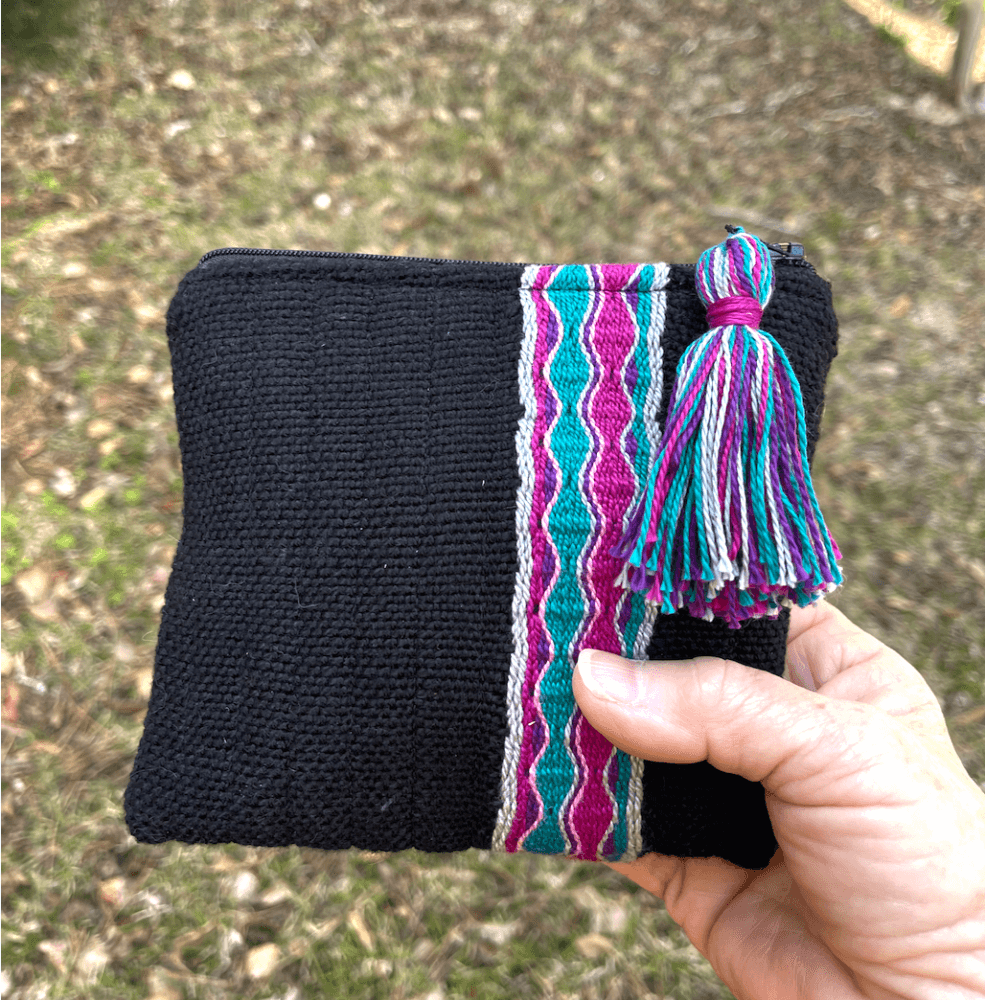
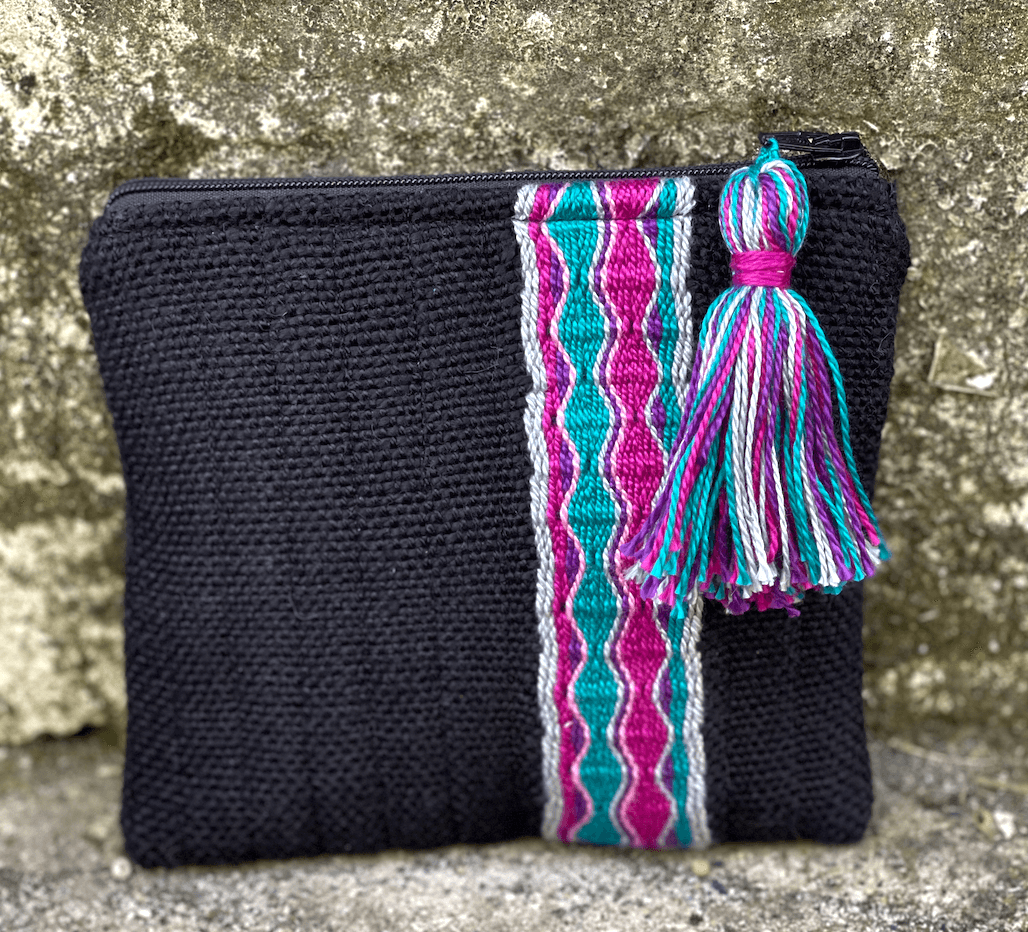
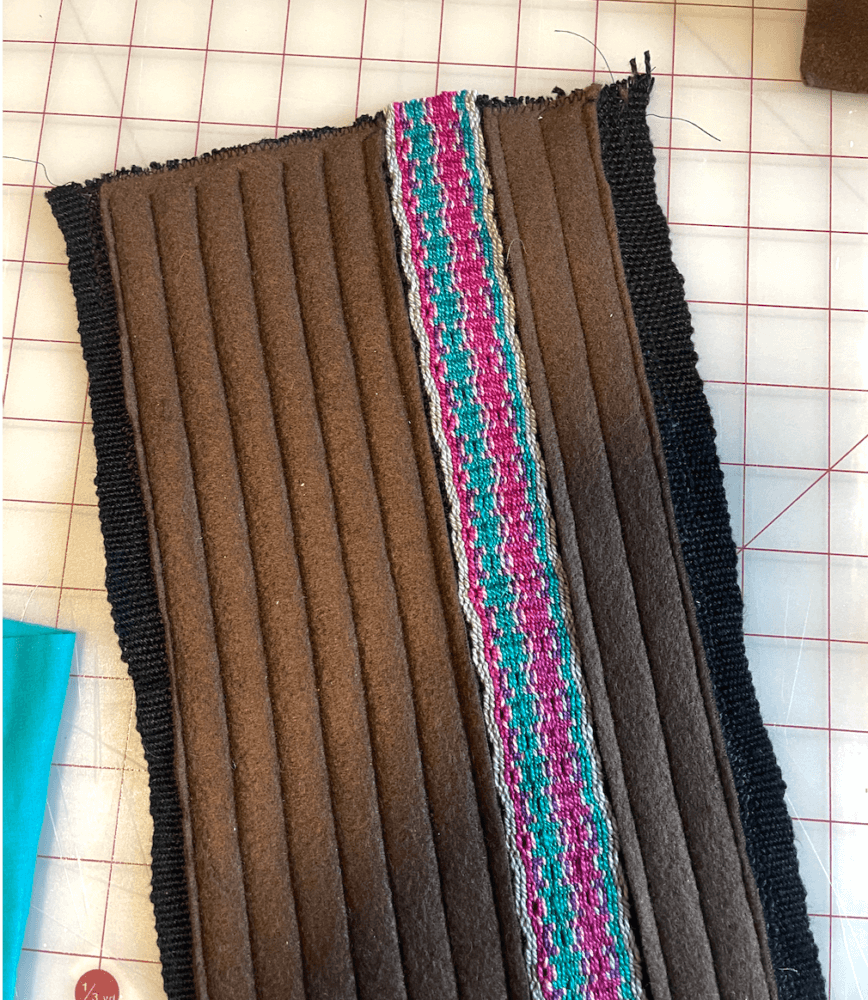
My plan was to make a small zippered bag. As mentioned the band is somewhat thicker than the rest of the weave. This made the overall fabric feel unbalanced. To solve this, I stitched some fleece fabric to the back on either side of the band much as you would do when quilting. It worked perfectly.
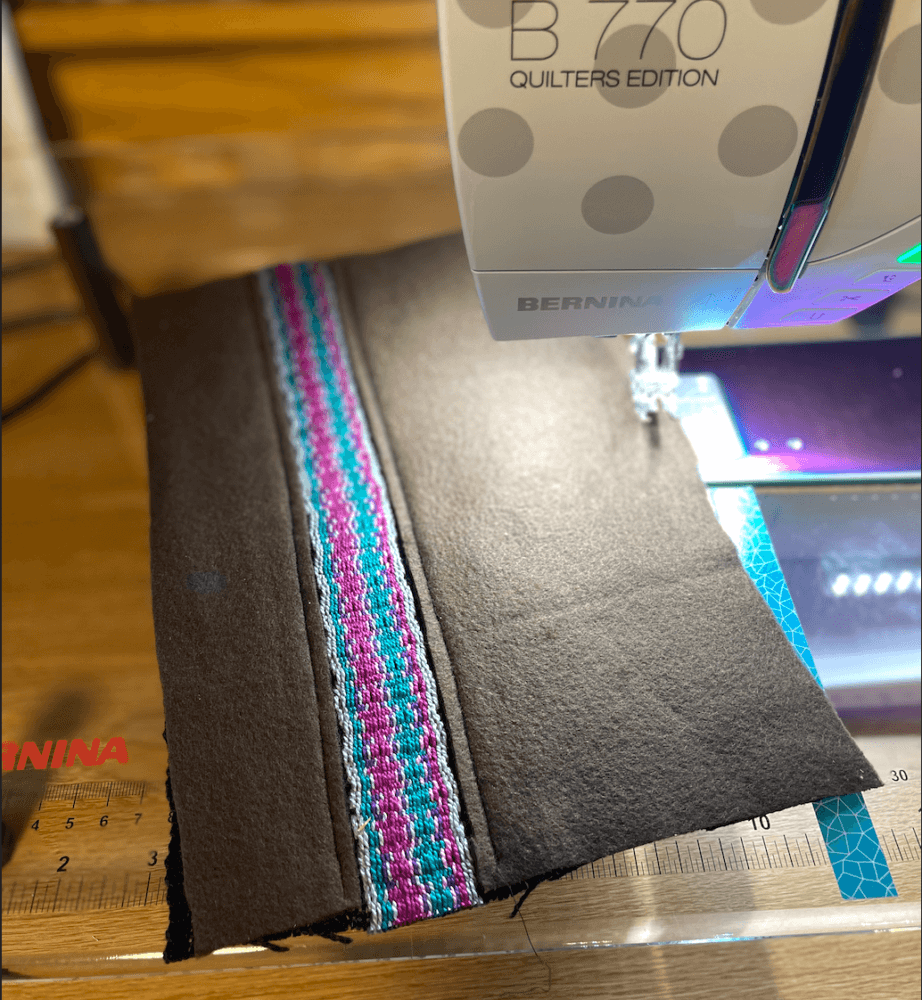
Once my fabric was ready, I added a zipper and lining to turn it into a bag. There are plenty of tutorials available for making a small zippered bag, so I won’t include that here. If you find the band too thick for your sewing machine, I recommend slowing down or even hand-cranking the machine through the thicker sections.
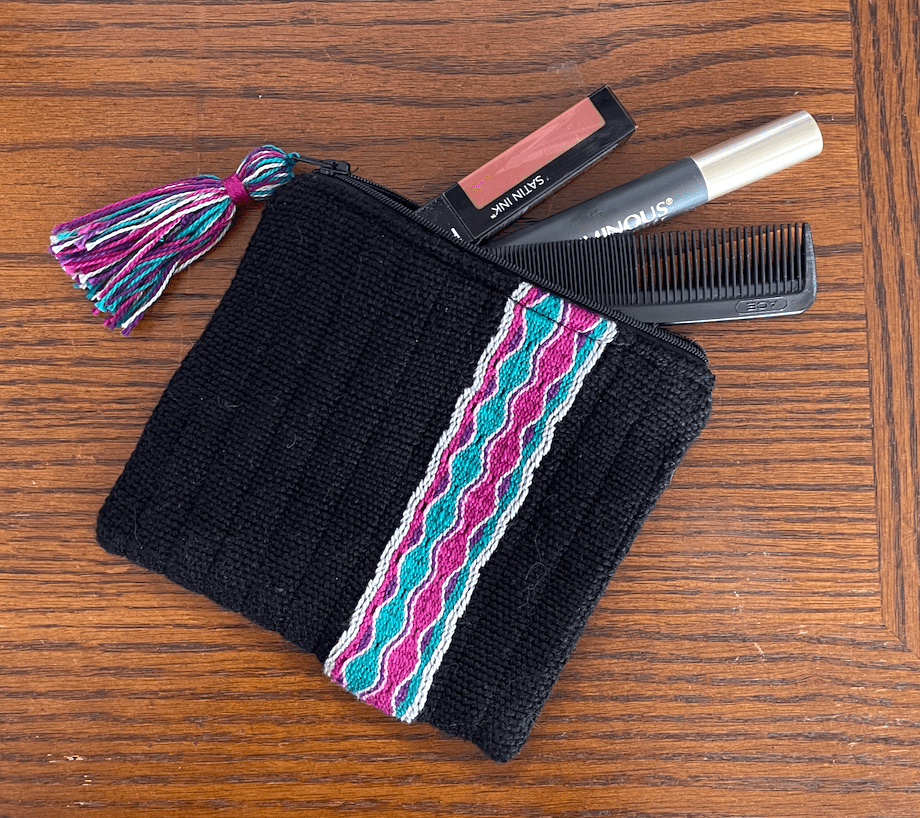
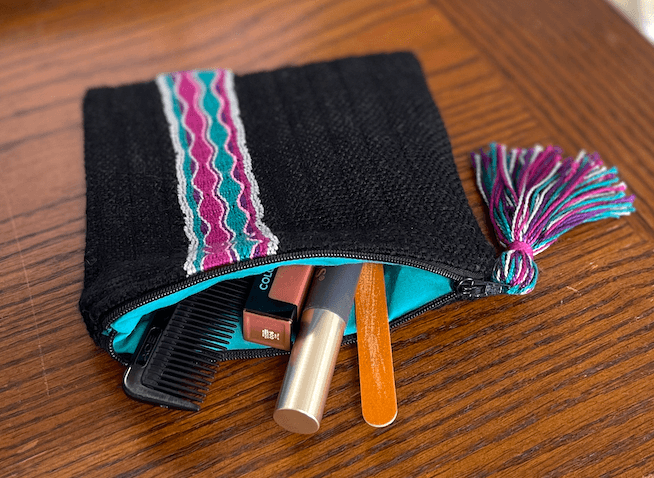
I added a tassel to complete my project.
I hope you will give this a try! I can think of many fun uses for this type of fabric. A jacket would look amazing don’t you think?
Tried it? Let us know on Facebook Kromski Fun!