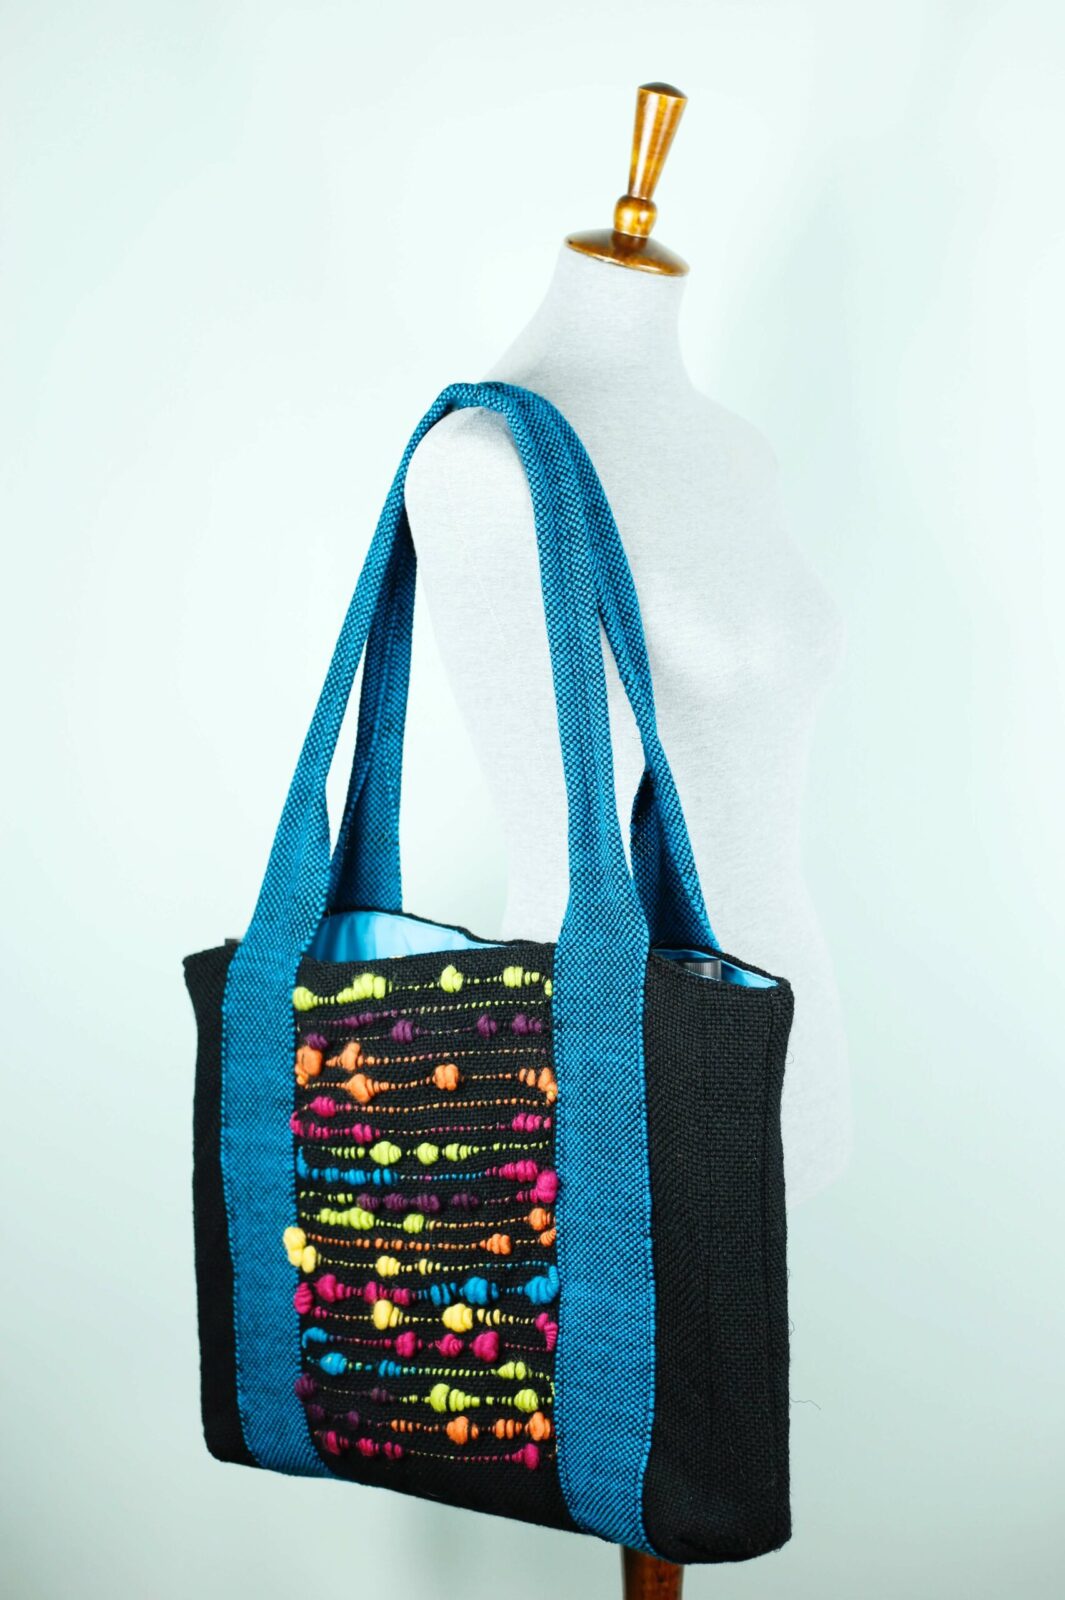
Beehive Tote Bag
Sew this fun and versatile bag with fabric made on the spinning wheel and a rigid heddle loom!
This post will show you how to create a bag just like (or similar to) the bag we have here.
You will need:
A rigid heddle loom with a weaving width of at least 10”, we’ve used the Presto for this project.
8 dent heddle.
A sewing machine.
1 yard lining fabric.
Worsted weight wool yarn for the sides, handles and the beehive weave background.
Approx. 800 yards of black
Approx. 120 yards of blue
Approx. 20 yards of Beehive yarn
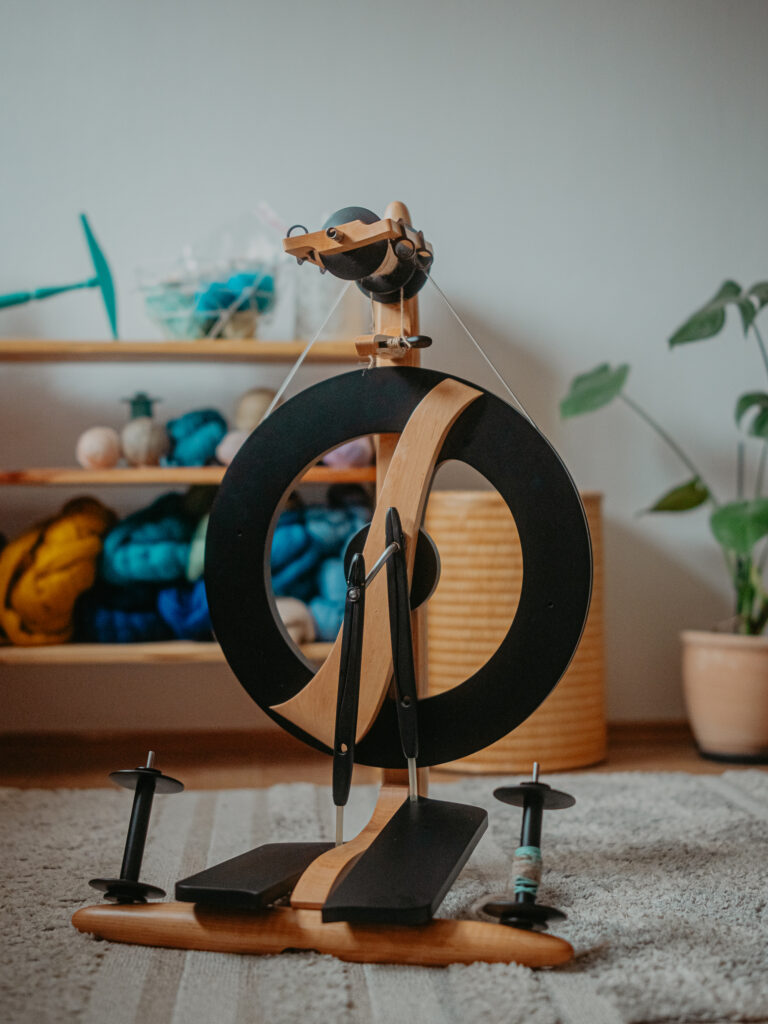
Our brightly colored “Beehive” yarn was spun on a Kromski Fantasia spinning wheel equipped with a Jumbo Flyer Set.
Don’t have a Fantasia? This can also be done on the Kromski Sonata with the addition of the the Magnetic Flyer Head Set and a Jumbo Flyer !

However, the best option would be the Kromski Minstrel wheel and the Great Flyer. The Great Flyer was designed to create art yarn. The extra large bobbin and orifice would hold this yarn with ease. Just look at the difference in size!


If you’ve never made this type of yarn before, don’t worry, with a bit of practice it’s actually much easier than you might think. And after all, it’s Art Yarn – it’s all beautiful!
For our yarn we used Polish Merino roving. It’s a nice sturdy yarn(without being scratchy or hard on the hands) and it comes in a multitude of colors.
Start by spinning a “thick and thin” single. This means filling a bobbin with roving and spinning it so that some sections are thick while others are thin. Each variation should be roughly 4–6 inches long. In our example, we changed colors frequently to add interest.
Next, prepare a fresh bobbin and spin some thin yarn. We used the same roving, changing colors periodically here as well.
Now it’s time to create your beehives!
These are formed during plying. Begin by holding the yarns together in the usual way and ply just enough to get started. When you reach a thick section from the first bobbin, allow it to wrap around the thin yarn from the second bobbin. As soon as the thick section is wrapped, use the hand holding that strand to pinch the base of the thick spot. While keeping the thin yarn steady, push the beehive toward the wheel. Immediately after, bring the thin yarn up at an angle toward the wheel—a kind of hiccup motion—to lock the beehive in place.
Continue plying normally through the thin section that follows, and repeat this motion with each subsequent thick spot. This technique is briefly demonstrated at the start of the video.. https://www.youtube.com/watch?v=WuWK6B8y-nI&t=13s. The following are screen shots from the video.


Once you have the yarn complete, wet finish it with a gentle soak and allow it to hang to dry. This will assure that everything stays in place as we continue.
Once the yarn is dry, it’s time to start weaving. Let’s make the center panel first.
Warp the loom, equipped with an 8 dent heddle, with 78 ends of the black yarn to a length of 1.5 Yards. If you’re weaving on a 10″ Presto Loom as we are here, this will be the entire width of the heddle. Using black as the weft, weave 4” to start. It will be easier to handle the fabric later if you do a hem stitch at the start and finish of all weaving.
Place the beehive yarn into the next shed, adjusting the warp as needed so it sits neatly in the grooves of the hives. Don’t worry about securing the ends just yet—they will be anchored when the bag is sewn.
Weave one pass of black in the next shed. When bringing the heddle forward, tilt it slightly so the black yarn passes under the beehive. This helps prevent gaps and keeps the fabric tightly woven. Continue with three more passes of black. There’s no need to wrap the colored yarn with the black as you weave; sewing later will secure it.
Repeat this sequence—beehive followed by four passes of black—until you’ve completed 18 colored rows. Cut the beehive yarn, leaving a tail 2–3 inches long. At this stage, the woven piece should measure roughly 13 inches.
On the same warp, weave 8 inches of black to form the bottom of the bag.
Next, continue the sequence of beehive plus four passes of black 18 times along the remaining warp. Finish with approximately 4 inches of black and complete a hem stitch to stabilize the edges before sewing. Carefully remove the piece from the loom.

Warp 40 ends in black, each 1.5 yards long.
Weave this section entirely in black—these will form the side panels of the bag.
Next, it’s time to weave the straps. The warp is again black, 4 yards long and 28 ends wide. For our bag, we used blue for the weft, but choose a color that complements the other yarns in your project.
And that’s it for the weaving!
It’s recommended to wet-finish the fabric pieces just like the yarn. If you didn’t do the hem stitch, secure the raw edges first to prevent unraveling. Place a piece of dissolvable stabilizer (or, if needed, paper) under the ends, and another on top, creating a “sandwich” with the raw edge in the middle. Sew several rows of zigzag stitches along the edges. Remove the paper if used, then proceed with wet finishing as usual.
Once everything is dry, you can begin assembling the bag.
Attach the side panels to the center panel by placing each side panel on top, overlapping slightly (not right sides together as usual). Try to catch only the edge of the center panel, keeping the beehives pushed aside while sewing.
Fold the strap in half and sew the ends together to form a single large loop.
Position the strap along one side of the center panel and stitch it in place, moving any nearby hives out of the way as needed. Stop sewing about one inch from the top.
Center the strap and attach the other side in the same way.

Measure the body of the bag and cut the lining fabric to this measurement.
Fold the bag in half, right sides together and sew up the side seams.
For added stability, open the side seams and stitch them down at the edges. Be sure you don’t sew through both sides of the bag.
The seams will show on the outside of the bag, so be as straight as possible.

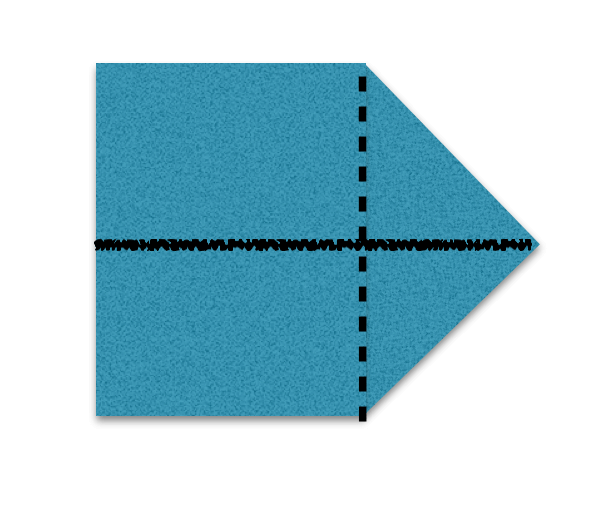
Next, you’ll need to box the corners. With the bag inside out, fold the bag so that the side seam is lined up with the center of the bag bottom. Sew across the bag where the dotted line is on the diagram.
Repeat this on the other side.
Assemble the lining by sewing the side seams first, then box the corners in the same way as the bag body. Turn the bag right side out, but leave the lining inside out. Slide the bag into the lining, tucking the handles down between the lining and the bag body.
Sew along the top edge of the bag, leaving a 6-inch opening for turning.
Pull the bag through the opening and arrange the lining neatly inside.
Fold down the raw edge of the opening and topstitch around the entire top to finish the bag.
I chose to sew the handles closed lengthwise—it isn’t necessary, but it makes the bag fit my shoulder more comfortably..


Thanks for watching.