


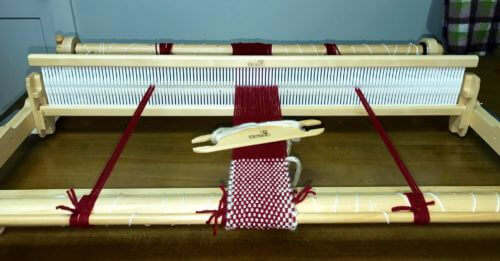
So you have purchased the Rigid Heddle Loom of your choice (a Kromski Harp Forte I hope!) and you have a nice tight tension on the warp. Thanks to the magnetic ratchet and pawl that comes standard on the Harp Forte, it is possible to get a very tight warp. Now you are happily weaving away when all of a sudden – crack – the beam breaks! This is unfortunately an all too common mistake among new rigid heddle weavers. Rigid Heddle looms were never made to take high tension, the beams are simply not heavy enough to withstand it without failing. When weaving on a Rigid Heddle loom, probably the single biggest misconception is that people think that a warp needs to be TIGHT to weave. This is not the case. Warping with just enough tension for error-free, easy weaving is the best practice.
Another key thing to think about is the length of the beam. It stands to reason that a wider loom, a 24″ or 32″ for instance, would suffer more from tension applied to the center of the beam. I would not recommend placing a 4″ warp on a 32″ loom and then severely over tightening the tension. This will surely cause problems. This does not mean that you cannot weave a narrow cloth on a wide loom. Remember, we are talking about tension here. Keep your tension snug, not tight and you will be fine. As an added precaution, many weavers choose to place a few additional warp threads on either side of a narrow project, midway from the weaving edge and the ends of the beam. These warp threads do not get woven so it is not necessary to draw any of them through the holes on the heddle. They serve to balance the tension by dispersing the pressure applied to the beam.
This concept of over tensioning is true for most floor looms too. Too often people try to weave a rug on a smaller floor loom. It cannot be done without damaging the beam. Rugs require a great deal of beating on a highly tensioned warp. The beams on an average floor loom are just not thick enough. For that particular project, an appropriate Rug Loom is the only fail safe way to go.
Likewise, in theory, a Rigid Heddle Loom beam is not strong enough to create a Tapestry Weaving… or is it?

True Tapestry needs a VERY tight warp, and therefore a particular loom in order to do it right. But that doesn’t mean we can’t play at it and make some “tapestry like” weaving projects!
Ready to give it a try?
Warp up your loom using a cotton, or similar yarn. It is important that a non stretchy yarn be used. Weave a bit of waste yarn as you would on any project.
The weft yarns can be anything that strikes your fancy. Be creative and let the weaving take it’s own path!
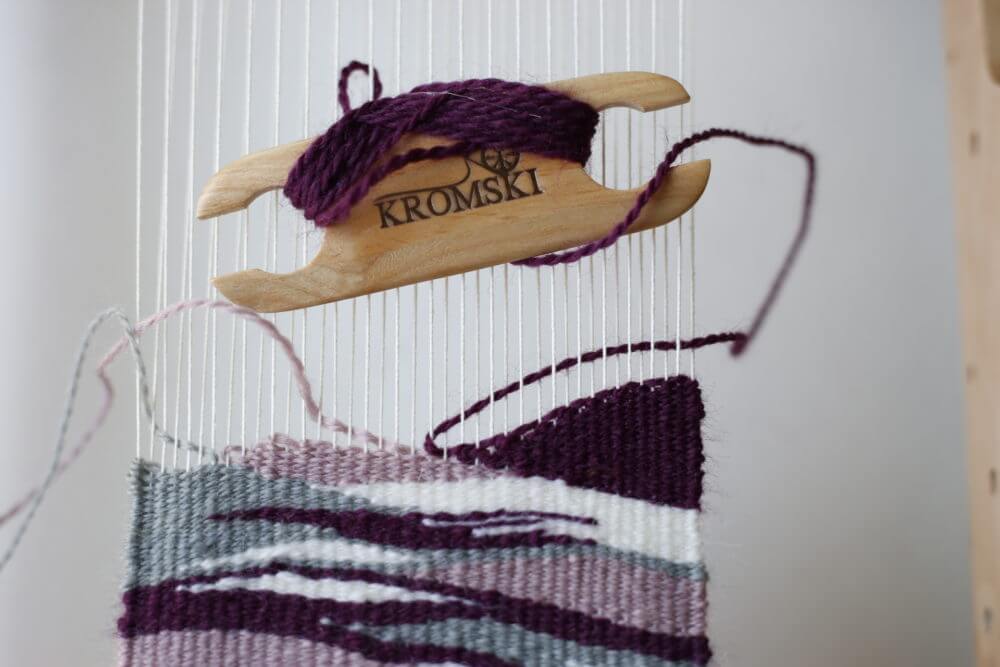
There are a few basic techniques that I want to go over that will help you achieve that cool tapestry appearance. Begin with a bit of regular plain weave, about 4 passes with the shuttle. One of the aspects of tapestry that is most evident is the weft faced fabric. This means that the warp threads are hidden from view by the weft. Traditionally the warp would be strongly beaten on a very tight warp. However, we’ve just stated that the rigid heddle cannot withstand this. Therefore, we will push the weft towards the front beam. A plastic hair comb works well for this. The comb will not fit into some areas, so a fork may be used instead. You may also want to use just your fingers to maneuver the weft threads down.
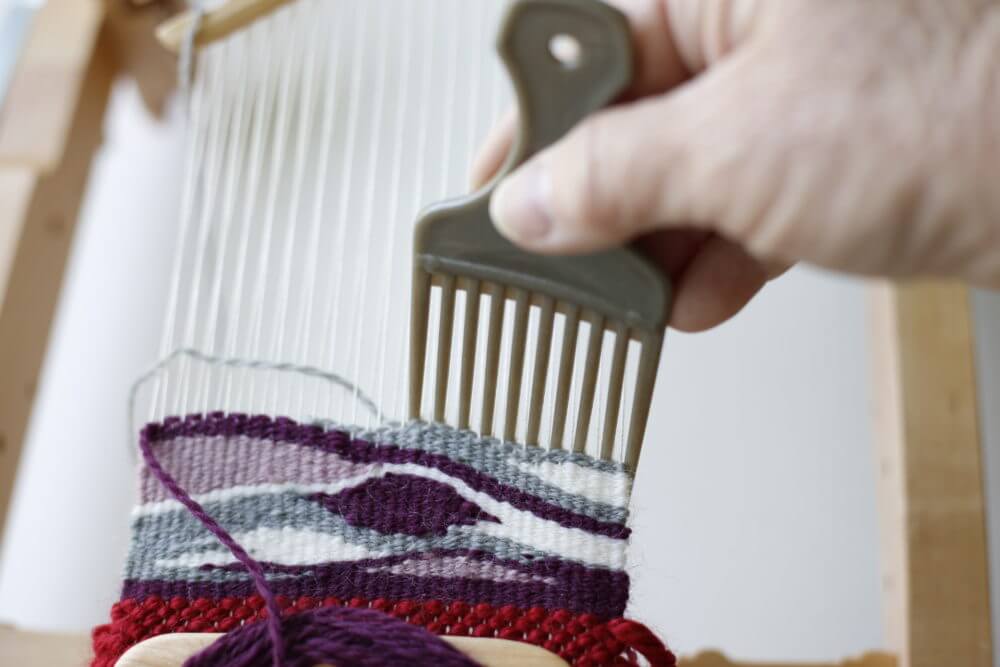
Be aware that the warp may still show some, depending on the yarn chosen. This is after all – Mock Tapestry!
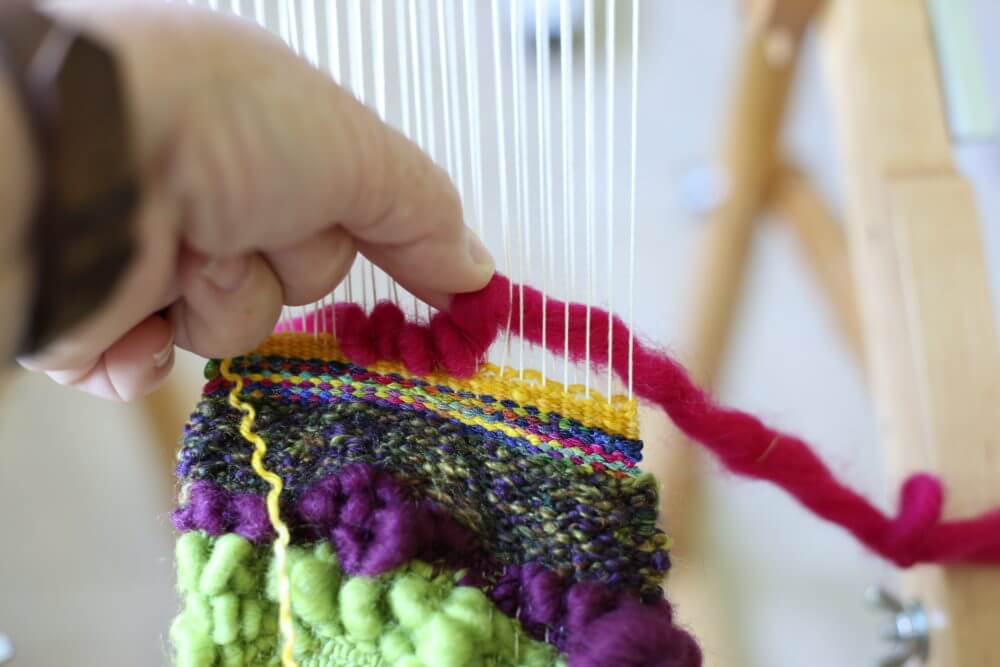
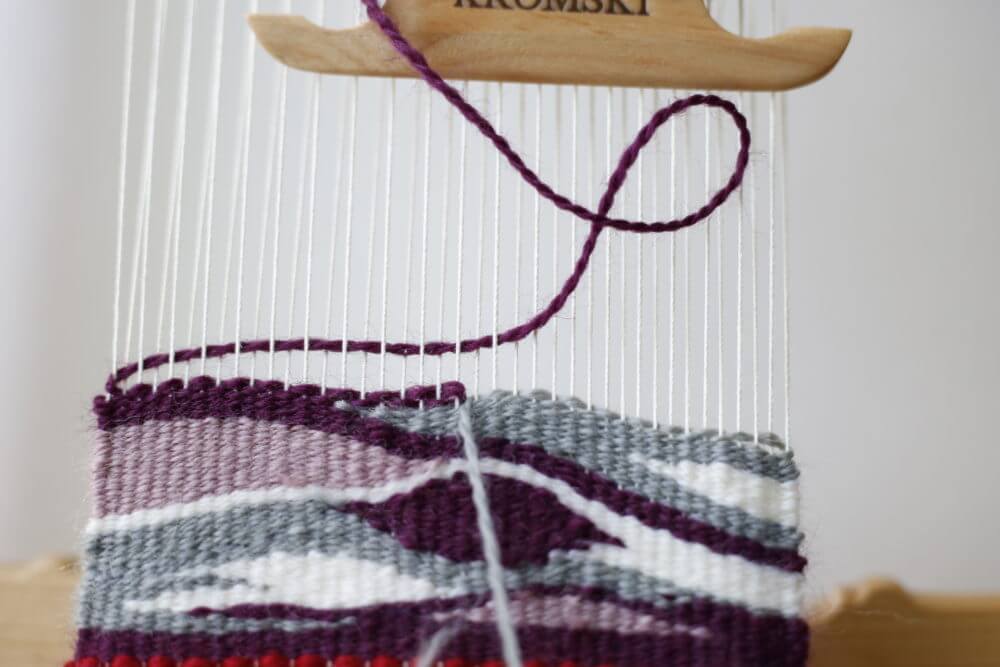 To create the hills and waves so often seen in this type of weaving, carry the yarn to a point part way across the project as shown above.
Then, change the heddle position and return, being sure to catch the adjacent warp thread.
 On the next pass, carry the yarn to the following thread for an even curve. Go around the adjacent thread on the return as before.
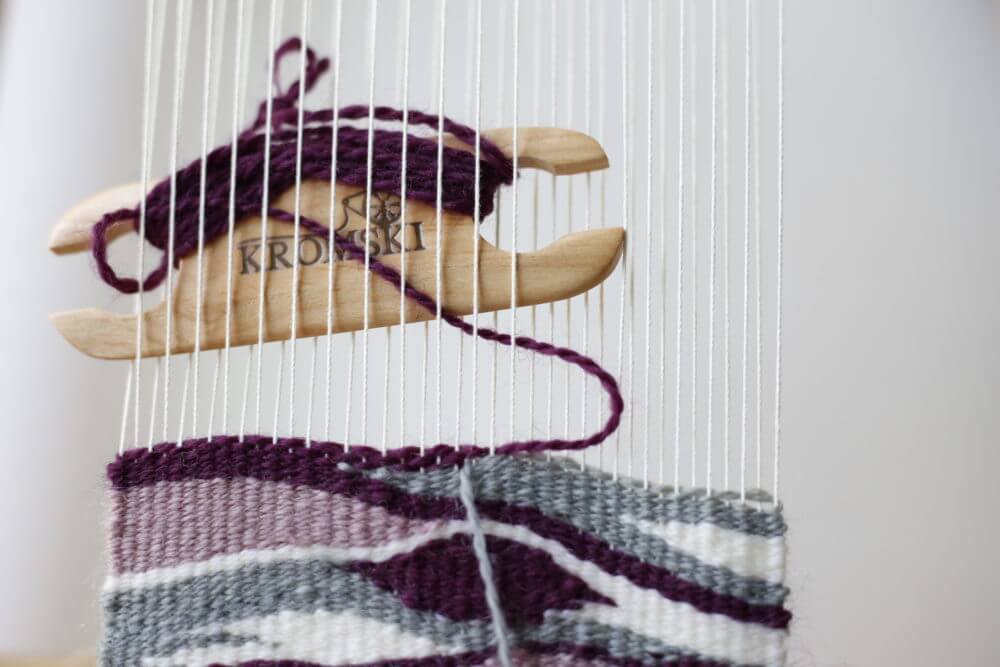
To build a “hill”, begin with the width wanted for the base and work in the same manor, stopping one thread short on each following pass. Once the hill is complete, return down the length of the section. This will give the appearance of a smooth edge.

I like to make one more pass, but that’s up to the weaver.
Continue to meander through the Tapestry, adding hills, valleys and waves. As you can see above, often times there will be several colors used at once.
In tapestry the treads are not wrapped around each other when changing color as we did in the Clasped Weaving project. For this reason, vertical lines will actually leave a gap in the fabric. This gap can be avoided by catching an adjacent thread on occasion.
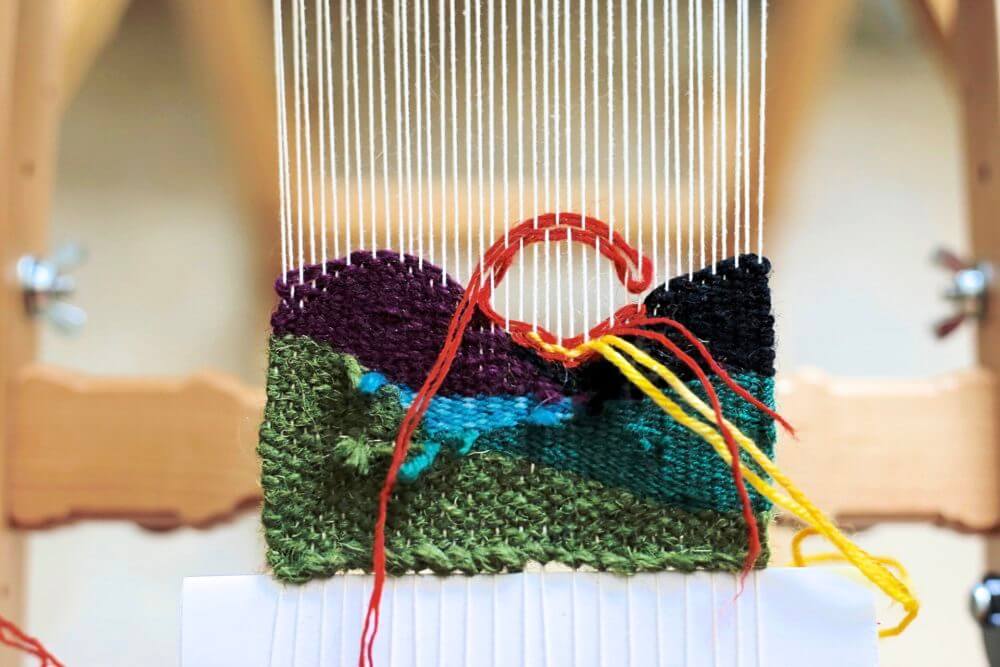
Want to add a sun? Here’s how I did it. I formed the basic shape and then used a tapestry needle to fill it in.
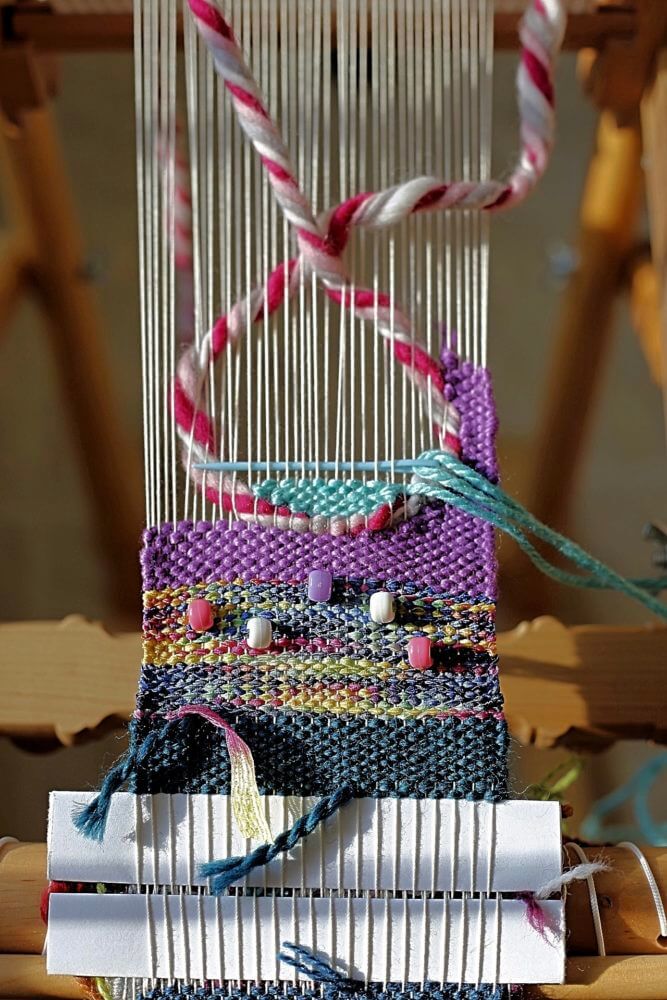
I used the same technique in this funky wall hanging.
Don’t be afraid to use a wide variety of weft yarn! I used some ribbon yarn, wool, cotton blends and even some roving. As you can see, using super bulky yarn right along side a fingering weight, leads to some fun textures. You may even want to add some beads, shells or other oddities to your project.
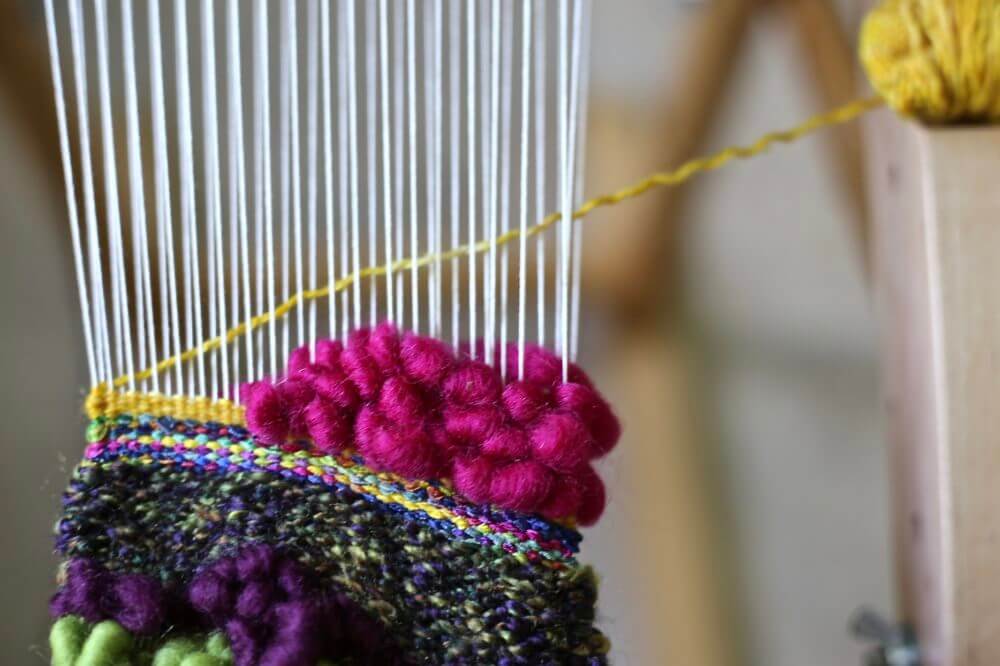
When adding roving, pull up a loop between each warp thread to give it a nice bumpy look.
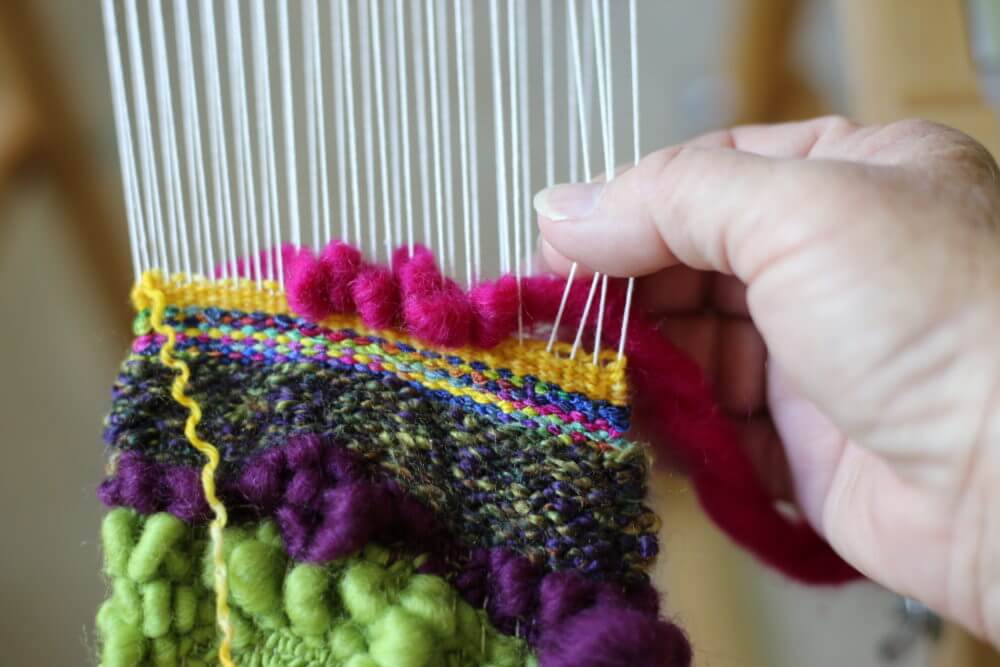
If you finger twist the roving just a bit it will help hold it together. Pull the warp threads apart to give it more space to fit through.
When adding roving, pull up a loop between each warp thread to give it a nice bumpy look.
Once the hill is high enough suit you, lock it into place with another type of yarn.
Let your imagination run wild! Just remember – keep the tension firm but do not OVER tension and your Kromski Harp Forte loom will give you years of creative service!
