


When the hot summer months roll around my thoughts turn to weaving projects other than scarves and shawls.
It’s nice to give the house a fresh look for the summer months too.
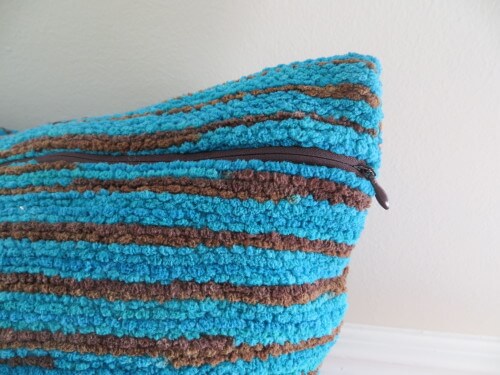
Cool blue was my inspiration for this project. But of course with so many colors to choose from, you can customize this pillow to suit your home!
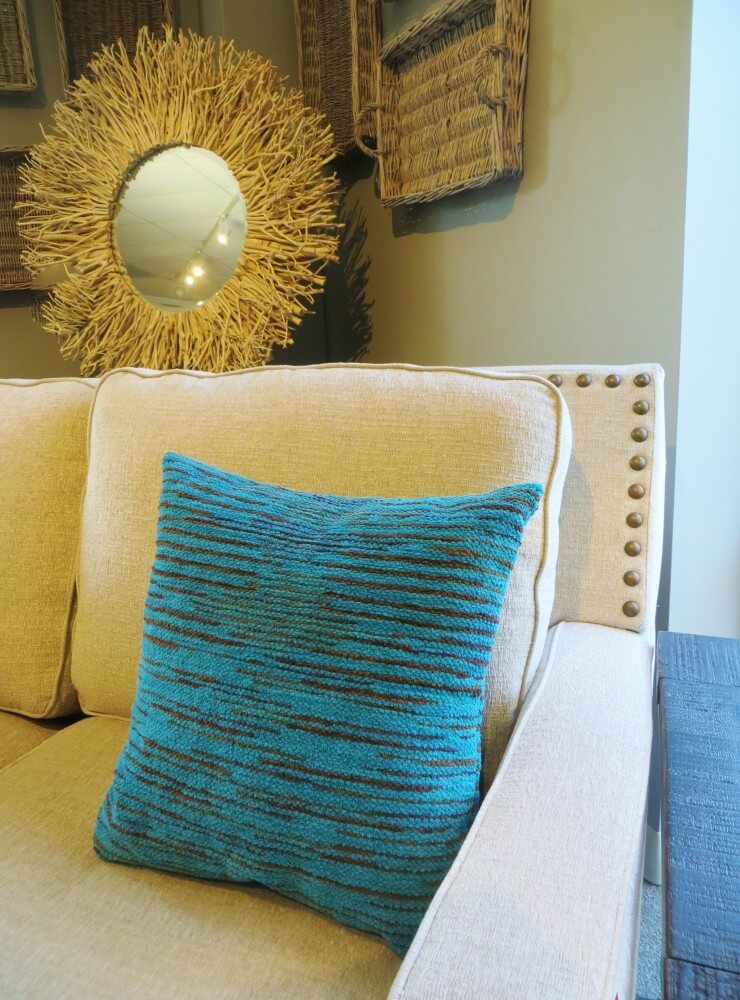
Make this velvety soft Pillow on a Kromski Harp Forte Rigid Heddle Loom.
You will need:
24″ or 32″ Harp Forte Loom
8 Dent Heddle
10/2 or 8/2 Linen warp yarn.
Approximately 440 yards Polyester Chenille Yarn.
1 Invisible Zipper
Sewing Machine with zipper foot and walking foot attachments.
18″ Pillow Form.
Begin by warping your loom to a width of 20″ (164 ends), using the Linen Yarn. Linen is a good choice for this project because of it’s durability, however, a sturdy cotton may be substituted if so desired. Warp a length of 1.75 yards. This is 18″ for the pillow times 2 sides, plus 3 inches on either side, plus 20″ waste.
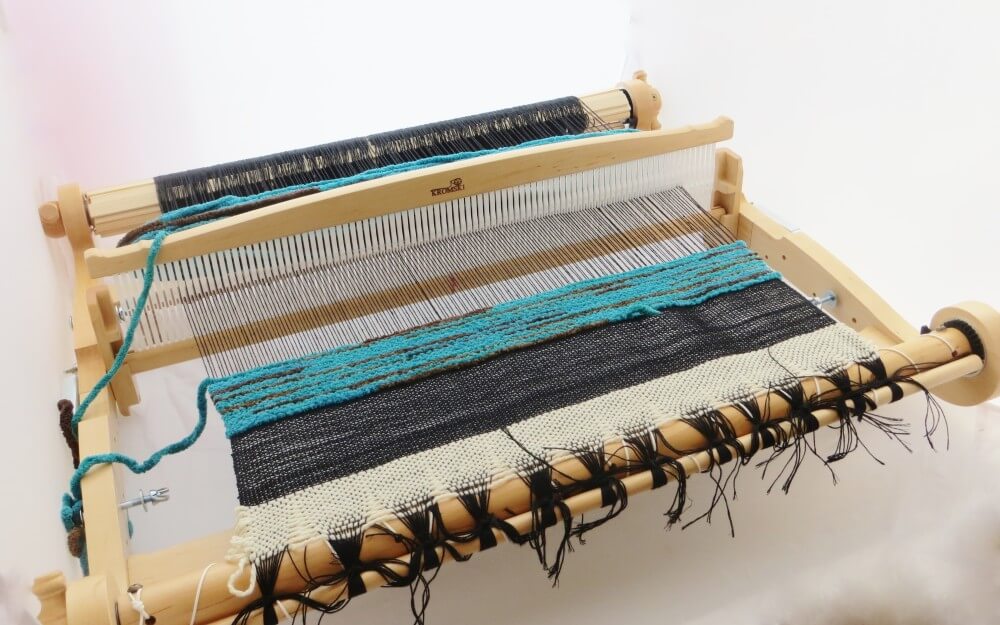
After weaving the set up header section on scrap yarn, weave a 3″ length with the linen. It is not necessary to do any kind of hemstitching, as it will be machine stitched at a later time.
Using the Chenille Yarn, weave for 38″ . As you weave, be sure to pack the weft tightly. To do this, press the Heddle forward firmly, with each pass of the weft. The intent is to prevent the warp from showing, and to ensure a tight weave that will last through many years of use.
Follow the Chenille with another 3″ section of the Linen. Once that is done, finish up with about 2″ of waste yarn. This will help keep the Linen in place until it is sewn.
Cut the project from the loom and carefully transfer over to your sewing machine. If you feel confident, you can skip this next step and go directly to hemming the fabric.
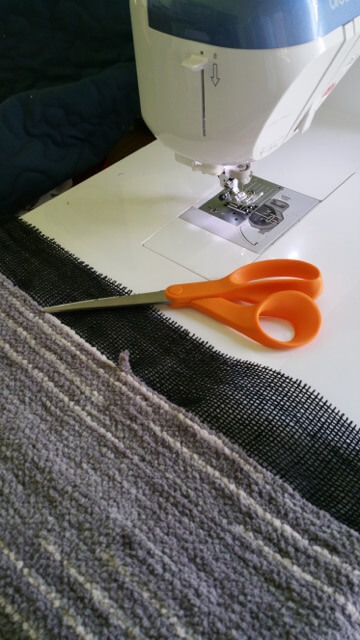
Otherwise, begin by sewing 2 rows of zig-zag along the outside edge of the Linen sections, followed by a strait stitch directly over the zig-zag. The idea here is to secure the fabric and prevent unraveling. Trim off the waste yarn.
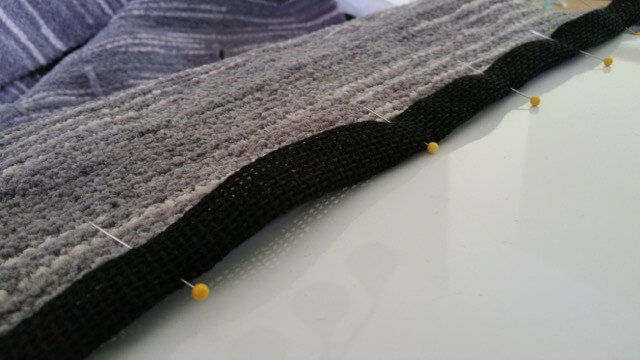
Decide which side of your fabric is the right side and which side is the wrong side, by locating the loose ends created by adding new yarn to the shuttle stick. Fold the Linen into a hem and stitch in place. Be sure to fold towards the wrong side.
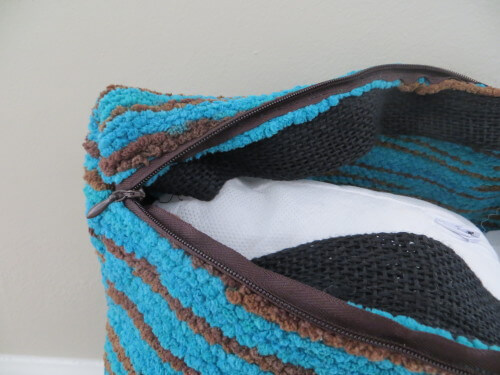
Install the Zipper, following the manufactures directions. The Zipper should be attached to the Chenille, not the Linen. Remove any excess zipper from either end.
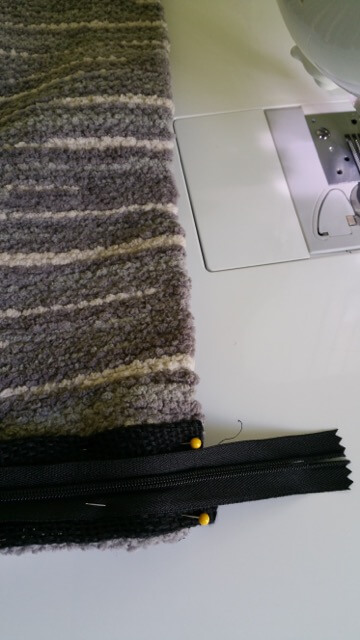
Fold the pillow in half, right sides together, with zipper most of the way closed. Be sure to leave the zipper unzipped enough so that you can unzip it to turn the pillow right side out once finished. With right sides together, offset the zipper by about 1″ from the top of the pillow. This will prevent the corner from being too bulky once sewn. Pin in place and sew along each side, using the walking foot attachment and a 1/2″ seam allowance. If you do not have a walking foot, you will have a difficult time feeding the thick fabric through the machine evenly.
That’s it! Turn the pillow right side out, insert the Pillow Form and you’re done!
To wash the pillow, remove the pillow form and wash using the gentle/handwash cycle on your washing machine. Air dry cool.