


Looking for your next weaving project?
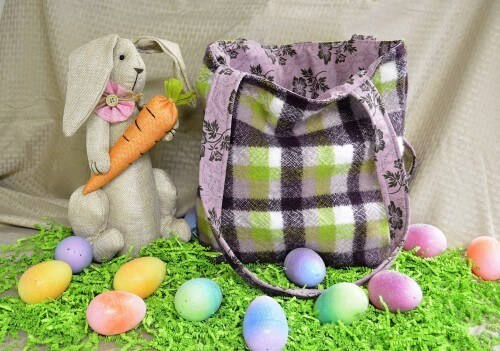
This Tote Bag will allow you to explore weaving a four color plaid. Once it is off the loom, it will be felted before the tote pieces are cut and sewn together using a sewing machine.
Let’s begin by gathering the supplies needed:
4 skeins of feltable, fingering weight wool yarn. Choose colors that have some contrast, yet will look nice when blended.
Kromski Harp Forte at least 24″ in width
10 Dent Heddle
3/4 yard complimentary fabric to be used as a lining
Scissors or rotary cutter (prefered)
Washing Machine
Sewing Machine
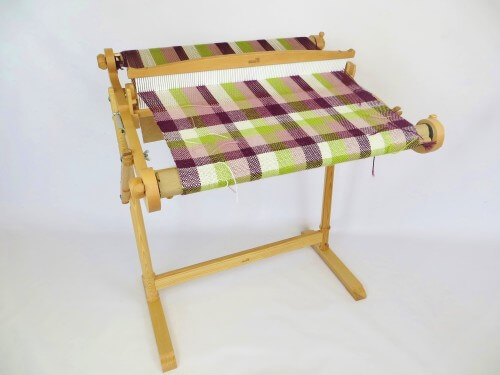
Begin by warping the loom using the following thread count, 90″ long.
For this example the colors are represented as:
A = Heather
B = Pink
C = Bright Green
D = White
The warping draft is written showing the thread color, followed by the number of threads.
If you prefer to count the loop created when using the direct warping method, simply half the number.
A 18, B 16, C 10, D 16, A 12, B 14, C 16, D 10, A 16, B 12, C 14, D 16, A 10, B 16, C 12, D 14, A 20
If you need help warping your loom, please refer to our tutorial How to Warp the Kromski Harp Forte.
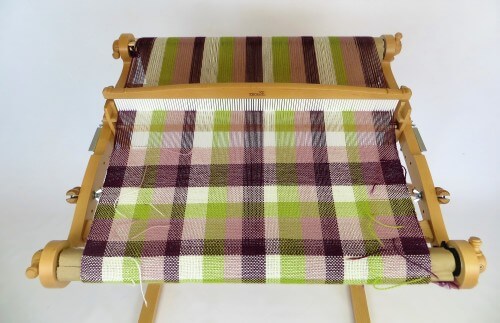
The weaving is done by following the actual thread count in what is call “tromp as writ”. This means that you will weave the same number of weft passes as were used in the warping process, in the same sequence.
Weave the full length of the warp, repeating the color segments as necessary. With the exception of the last section of color A. Leave off the 1st section of A so that it is not repeated twice in a row.
When your weaving is finished, remove the fabric from the Harp Forte and tie the fringe ends together in groups of 4. This will prevent it from unraveling. The knots will be cut off prior to sewing. Our sample measured 62″ x 22″, pre-felting.
Felt it in a washing machine using hot water and laundry soap. Dry in a hot dryer. Now take a look at the felted piece. It should measure approximately 16″ x 46″. It may be necessary to repeat the wash and dry process to achieve the desired size.
The 1st thing you’ll want to do is trim off the end knots and the tails from the color changes.
Cut the fabric into one 33.5″ x 16″ piece (the body of the bag) and 4 strips, 1.5″ x 16″ to be sewn together for the handles. Note that you will have a bit left over. There was 6.5″ left over on our sample. That will be saved for another project, or you may wish to add a pocket to your bag. The extra fabric was included to insure that you will have enough after the felting process.
Next, cut 2 strips from the lining measuring 3″ x 32″. These will be for the handles.
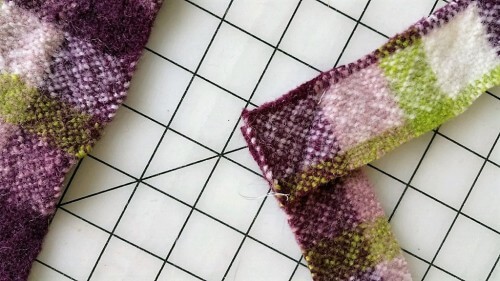
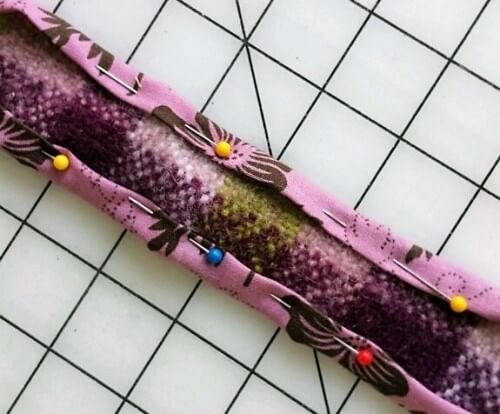
Sew two of the felted strips together by placing the ends together at a 90 degree angle and sew from corner to corner of the overlap so that it becomes one continuous length. Trim the excess by the seam.
Place them on the lining strips, wrong sides together. Wrap the lining fabric around the felted piece, fold the edges under, and sew in place. Repeat for the other handle.
Now place one handle on top of the felted body section and pin it in place so that the ends face away from the center of the fabric. They should be about 3.5″ from each edge with the felted side down. Cut two 16.5″ x 16″ pieces from the lining material. Lay one of the lining pieces on top of the handle and the felted piece. Re-pin all 3 layers together (the handle is sandwiched between the bag and the lining). Sew and repeat on the opposite side.
Next fold the whole thing in half, squaring up the seams and sew along each side. Be careful not to catch handles in the seam. Sew along the lining end 3″ in from each side, leaving a hole for turning.
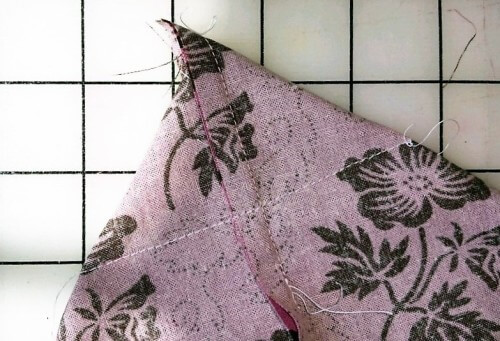
To give the bag a nice base, the corners need to be shaped. This next part is a little tricky if you’ve never made a bag before. I’ll do my best to explain it clearly. Fold the bag so that the center front and back are now the folded edges. The corner will form a point. Sew across this point, and trim off the excess. Repeat this on all 4 corners.
Push the lining inside the bag and sew the hole closed.
Stitch around the top edge of the bag. Work slowly, the material is quite thick at the handles and you don’t want to break a needle!
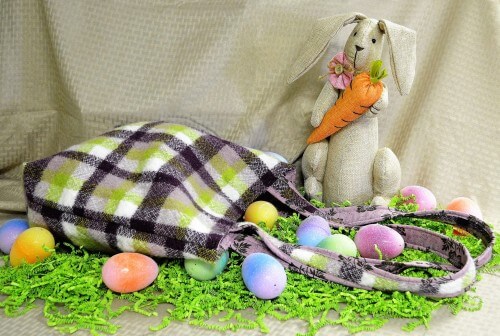
That’s it! trim off any loose threads and enjoy your new Tote Bag.