


In our last project post we used a 24″ Harp Forte to weave a blanket that was 45″ before washing. This process is called Double Weave and as the name suggests, we can weave double the width of the loom. However, that’s not the only way to utilize the double weave threading.
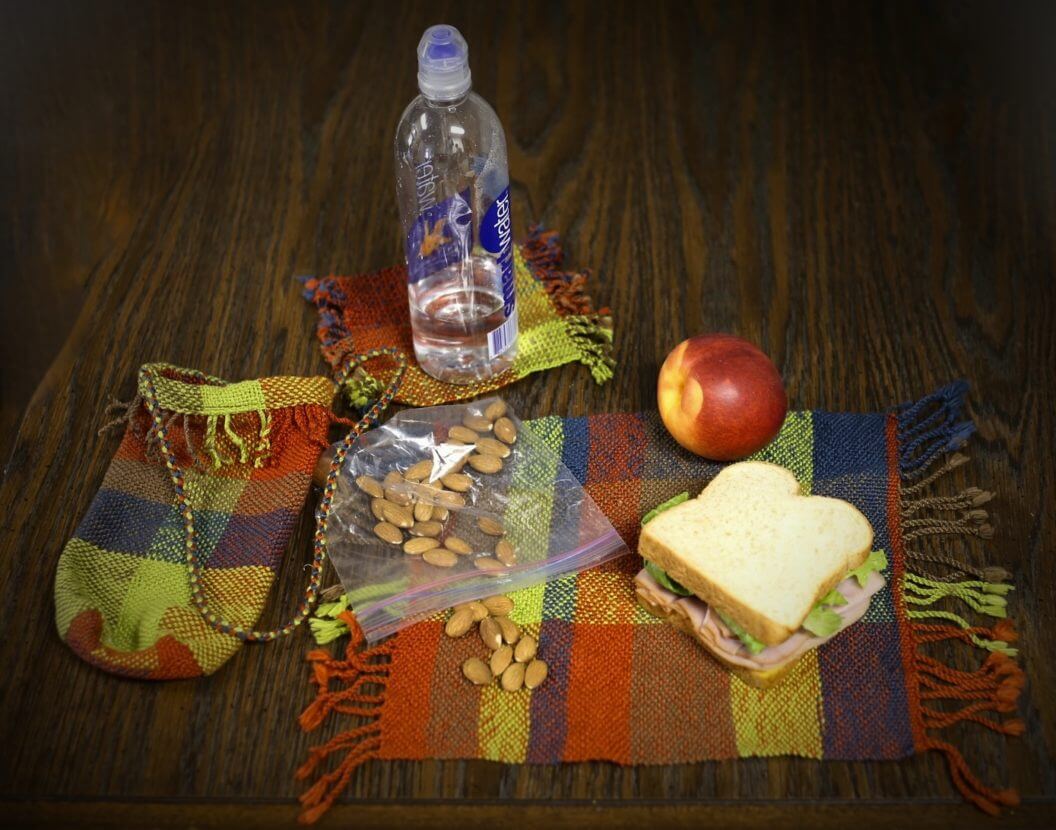
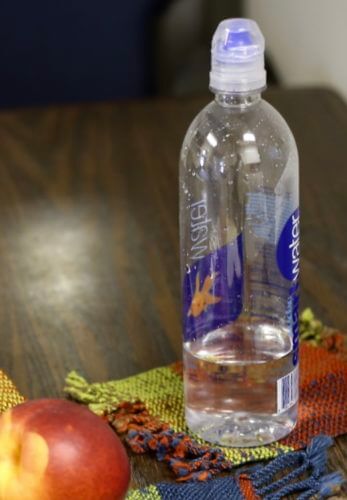
In this project, one warp will allow us to make this cute little lunch pack set. We will use the same double width method to make a small placemat. The Water Bottle Holder will introduce a new technique to create a tube! Thats right – no seams, just a simple stitch along the bottom and the top to finish.
Follow the instructions given in the Double Weave Part 1 to warp the loom.
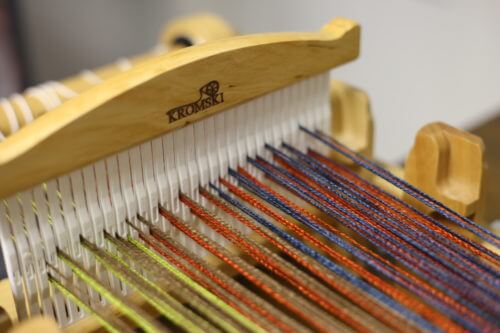
For this set we will use an 8″ Harp Forte, equipped with two 8 dent heddles and some 3/2 mercerized cotton yarn. We have used 4 contrasting colors. Although this could be made in a single color, it is much easier to see the layers when contrasting colors are used.
Warp to a length of 6′. You will again begin with the bottom layer as shown in Double Weave Part 1.
To make a set like the one here, warp 20 slots in red, followed by 8 slots of green. This gives you a total of 56 ends on the bottom layer.
Warp the top layer as if the bottom was not there by reaching around the threads on the apron rod. Warp 13 blue slots and 15 brown slots directly above the bottom layer threads. Continue threading as per instructions in the Double Weave part I post.

We must first weave several inches of plain weave (both heddles up, then both heddles down). This will spread the warp and give us a foundation to build on, just as in any weaving project.
It is important that we begin by weaving the placemat. This will be woven in the same fashion as the blanket, using the weaving sequence: B, H2 Up, A, H1 Down. Follow the instructions on Part 2 for more information.

Because I have chosen to use fringe to finish off my mat, it is woven to a length of 12″. If you decide to make a folded and sewn hem, then you will need to allow another 3 inches of weaving to make the same size mat.
If you need to stop at any point and walk away from the loom, here’s a tip to keep the pick up sticks from sliding out if they are accidentally bumped. Just snap a couple binder clips on the ends. Now you can move the loom without fear of loosing the threading!

Before moving on to the Water Bottle Holder, place something in the warp to divide the 2 projects and allow for the fringe. I find a couple pieces of paper work well for this.
In order to weave a cloth that is twice the width of the loom, we wove the bottom from right to left. Then we wove the top, left to right. Then back to the left on the top layer, finishing the sequence by weaving left to right on the bottom. This gave us a folded fabric by connecting the top left edge to the bottom left edge. To weave a tube, we must weave in a circular path. Starting from the bottom right, travel left, then left to right on the top just as before. However, now we need to go back to the bottom right to left, and then again to the top, left to right. This will connect the fabric on both edges, thus creating a tubular weave.
The heddle sequence is as follows:
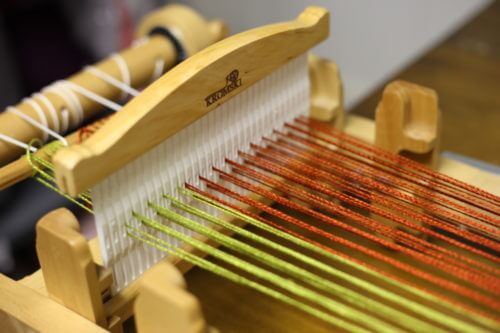
- B – Both heddles in neutral. Bring ‘B’ forward and upright against the rear heddle. The shed can be improved by sliding ‘B’ over and into the heddle block against the heddle. Lift slightly on the front heddle, or set it on the edge of the block, to achieve a nice deep shed. Move shuttle right to left. This weaves the bottom layer.
- H2 Up – Lift the rear heddle to the up position. Front heddle in neutral. Both sticks pushed to the back in their neutral position. Shuttle moves back to the right. This weaves the top layer.
- H1 Down – Put the front heddle in the lower position. All else in neutral. Shuttle moves back to the right. This weaves the bottom layer.
- A – Bring ‘A’ forward and tilt on edge. Both heddles in neutral. Shuttle moves to the left. This weaves the top layer.
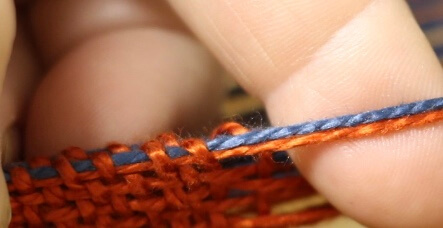
Repeat this sequence for a few inches. Now take a close look at the right edge of the fabric. Notice how there are 2 strands running together through the last warp on the right side? This is particular to double weave tubes. It is for this reason that it was necessary to begin with the mat.

Carefully cut the top tread, in this case the blue one.
Gently pull the thread from the bottom to remove it from the area already woven. Pull the extra thread to the back and out of the way before continuing to weave. You may even want to trim it off at the back of the loom so it is not dangling.
Weave 15″ for the bag. I changed the weft color in a random pattern as I saw fit.

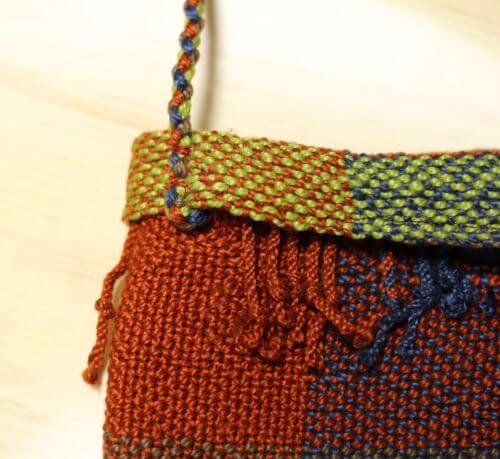
It’s difficult to see, but if you look closely you will see that we have 2 layers of fabric attached on either edge.
Weave several additional inches of waste in a contrasting yarn or again add some paper to allow for fringe.
I had a bit of extra warp so I made a mug rug to go along with my Lunch Pack. I placed the rear heddle in neutral, and used the front heddle only to weave both layers together.
Follow with several inches of plain weave, like we did at the start. This will secure the fabric and help prevent unraveling.
If you are using fringe, this should be done before wet finishing. If you are not familiar with making fringe, it is easy to do by carefully pulling 4 strands from the waste yarn at a time and twisting them together in the following manor. Grasp 2 strands and finger twist them to the right until they begin to kink up on themselves. Keep these pinched in one hand and twist the next 2 in the same manor. Next pinch all 4 together and twist them to the left. Tie a knot in the end to finish.
Before the wet finish process, secure any ends of the fabric that are not fringed to prevent unraveling – I like to use the zig-zag stitch on my sewing machine – and then throw the entire project into the washing machine followed by the dry cycle. This will tighten up the weave and soften the fabric considerably.
Cut the excess fabric away and sew the base of the tube on a sewing machine, 1st to close and then across the ends to create a flat bottom.
 Our bag has a Kumihimo strap, but of course a flat strap could be woven on the Harp Forte as well.
Fold the top down and hand stitch the strap in place before machine sewing the fold to finish. I have folded mine twice like a plain hem in order to give it more substance at the top, and then stitched it in place.


Perfect for a workday lunch!