


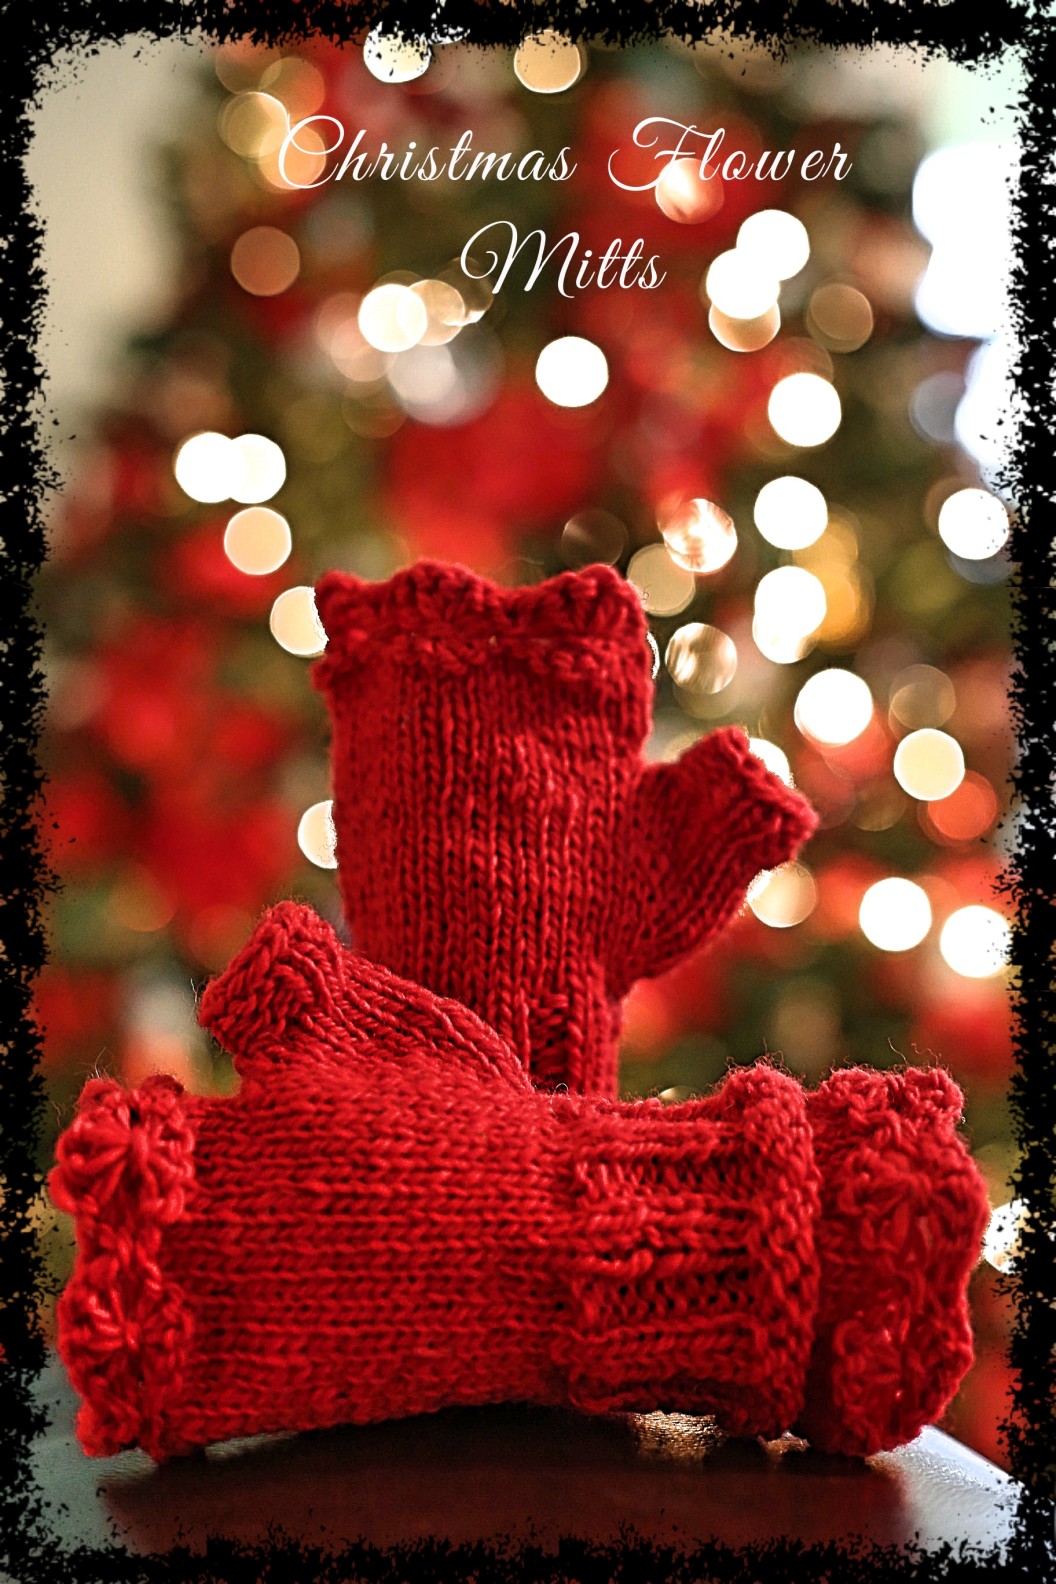
Kromski’s Christmas Gift to you!
A free pattern for you to knit up for yourself or as a last minute gift for a friend.
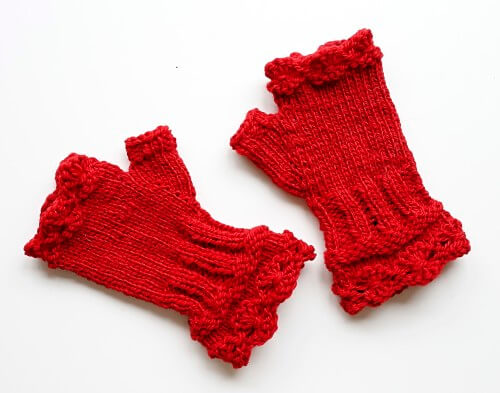
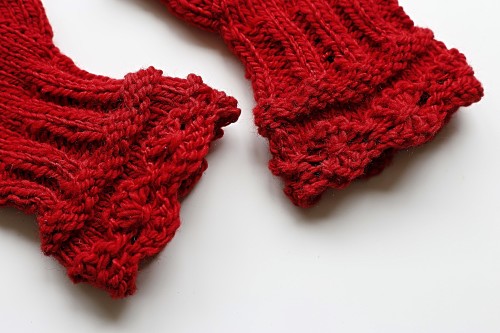
I’ve named them Christmas Flower Mitts because the cuff edges remind me of Christmas Poinsettias!
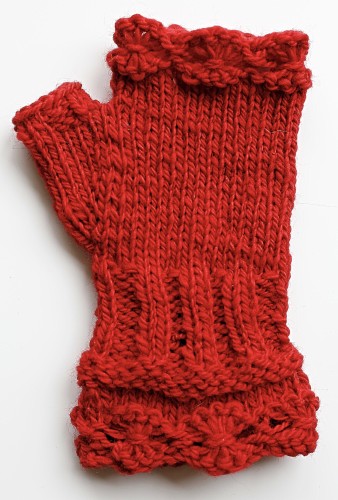
These cute fingerless mitts will knit up quickly. The flower stitch that adorns the top and bottom edges adds an elegant touch. It looks much harder to knit than it is!
Sizes for a teen/small adult or large adult hand. Larger size will be shown in parenthesis. They measure 7″ (7.75″) circumference at top of mitt.
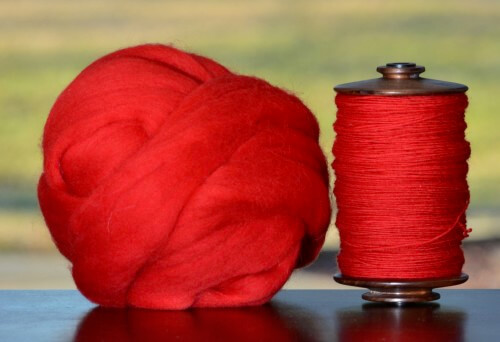
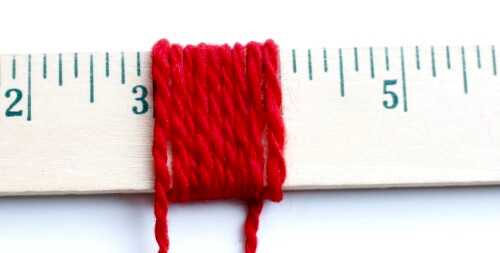
Yarn: Worsted Weight Wool. The sample was knit in Handspun Kromski Polish Merino. 9 WPI.
Needles: US #6/4mm double points
Gauge: 22 sts/30 rows over 4″
CO 36 (42)
Join in the round and work rows 1 – 4 of Flower Stitch
Knit 4 rounds.
Next round: *k2tog, k7* repeat around for small size (32 sts). Large size *k2tog, k5* around (36 sts).
Purl 3 rounds.
Work k2, p2 rib for 10 rounds.
Knit 4 (6) rounds in stockinet.
Begin the thumb gusset: k1,m1R, k1, m1L, k1, pm, knit to end of round.
Knit one round.
Thumb gusset:
- k1, m1R, knit to one st before marker, m1L, k1, slip marker, knit to end of round
- knit
Repeat the last 2 rows until there are 13 (15) sts between start of round and marker.
Knit 4 (6) rounds before placing the thumb gusset sts on waste yarn.
Next: kfb of the 1st st, then knit 5 (7) rounds in stockinette.
Work rows 1 – 4 of Flower Stitch
Bind off loosely.
Thumb: Pick up the 13 (15) sts from waste yarn. Slip the last st to the 1st needle. K2tog, then knit the remainder of the row.
Work k2, p2 rib for 3 (4) rounds.
Bind off loosely.
Sew in ends. Use the ends near the base of the thumb to close off any holes that may have been formed at the join.
The second mitt is knit in the exact same way.
Enjoy!
Stitch Glossary:
- k = knit
- p = purl
- m1R = make one right: Pick up the bar between the last stitch you knit and the one you’re about to knit, bringing the needle from the back to the front. Then knit into the front of this stitch.
- m1L = make one left: Pick up the bar between the stitch you knit and the one you’re about to knit, bringing the needle from front to back. Then knit into the back of this st.
kdb = knit into the front and back of same stitch
Flower Stitch: Note that when working this stitch, the loops are loose. Be carful not to drop any!
- knit
- *P1, Purl the next stitch, wrapping the yarn 3 times around the needle before pulling all 3 loops through to complete the stitch (5x)* repeat around. [6 stitches worked in each repeat].
- *P1, (yarn in back, slip the next 5 sts (loops)onto the right needle, bring yarn in front, slip the 5 loops to the left needle, bring yarn to the back, return sts to the right needle, bring yarn to front, slip the 5 sts to the left, yarn in back, return sts to the right). The 5 loops are now wrapped twice with the yarn.* repeat around
- purl
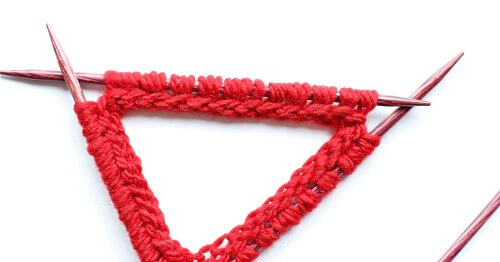
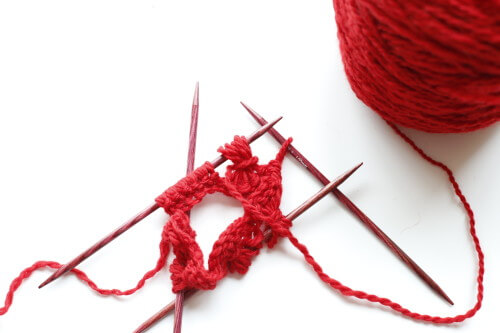
This is how the needle should look after step 2 of the Flower Stitch. The top needle shows 5 groups of 3 stitches, followed by a single purl stitch and another 5 groups of 3 stitches and another purl stitch.
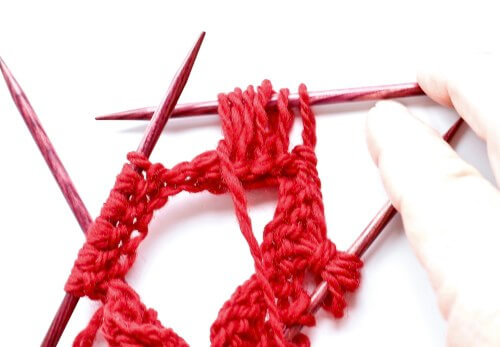
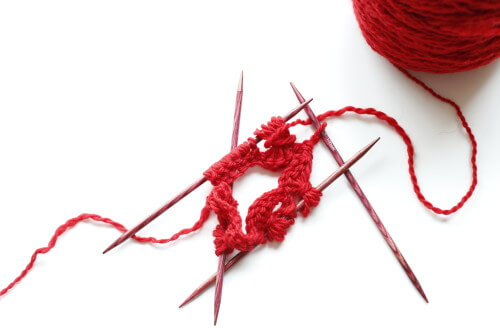
The 5 loops are slipped onto the right needle.
Now, with the yarn in front, they are slipped to the left needle.

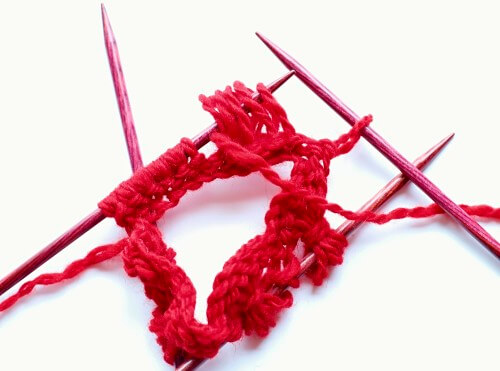
With yarn in back, return stitches to the right needle.
Bring yarn to the front and slip back to the left.
Yarn to the back.
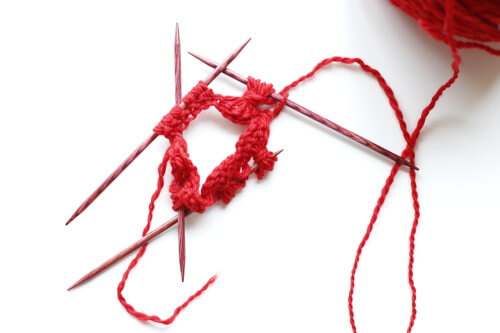
Slip back to the right and the stitch is complete. Purl the next stitch in the normal fashion. That’s it! Your flower is complete.
Please post your finished Christmas Flower Mitts to Ravelry. We’d love to see them!
Pattern design by Dona-C